写于2021年5月17日
这篇文章讲什么?
如何用 AWS Codebuild 构件出 Docker 镜像。然后把镜像推到 ECR。
本文章对谁有用?
打算部署到 AWS ECS 的程序员。
备注
以下全部是在 AWS 中国区(北京)(cn-north-1) 完成的
问题:根本目的是什么?
最终目的是把一个 Ruby on Rails 应用部署到 AWS。并且有自定义域名可访问。
本篇文章还没有达到这个目的,只是完成了一部分(Codebuild+ECR)
这俩组件的意义:
- Codebuild:构建(build)镜像 (就是普通的 Docker 镜像)
- ECR:存储镜像
这俩弄成功之后,后续可以用 ECS 运行镜像。
问题:用不用 CloudFormation?
不用,这一次我们全手动在网页里新建。
第一个原因:Codebuild 和 ECR 这种东西建了一次之后,几乎万年不变。
第二个原因: 我 CloudFormation 不是特别熟悉
第一步:首先你应该有个 Dockerfile(根目录下)
以下是我们的 Dockerfile,仅供参考,我们这个是 Ruby on Rails 应用,你的可能是 PHP/Java 等。
FROM ruby:2.7.1-alpine3.12
用中国区的 Alpine 镜像
COPY repositories /etc/apk/repositories
ARG APP_ENV
RUN apk update && apk add bash
RUN apk add –no-cache –update linux-headers

build-base

git

python3

# python3 is for alpine3.12
python3-dev

# python3-dev is for alpine3.12
postgresql-dev

sqlite-dev

less

nodejs

nodejs-npm

ttf-ubuntu-font-family

tzdata

ffmpeg
RUN mkdir -p /app
RUN mkdir -p /usr/local/nvm
WORKDIR /app
RUN node -v
RUN npm -v
Copy the Gemfile as well as the Gemfile.lock and install
the RubyGems. This is a separate step so the dependencies
will be cached unless changes to one of those two files
are made.
COPY Gemfile Gemfile.lock package.json yarn.lock ./
RUN gem sources –add https://gems.ruby-china.com/ –remove https://rubygems.org/
RUN gem sources -l
RUN gem install bundler -v 2.2.15
RUN gem install foreman -v 0.87.2
Install gems from the RubyGems Chinese mirror
RUN bundle config mirror.https://rubygems.org https://gems.ruby-china.com
RUN bundle install –verbose –jobs 20 –retry 5
RUN npm install -g yarn –registry=https://registry.npm.taobao.org
RUN yarn config set registry https://registry.npm.taobao.org
RUN yarn config set sass-binary-site https://npm.taobao.org/mirrors/node-sass
RUN yarn install –registry https://registry.npm.taobao.org/ –check-files –verbose
Copy the main application.
COPY . ./
If this is a production image, precompile the assets
RUN if [ "$APP_ENV" = "production" ] ; then RAILS_ENV=production SECRET_KEY_BASE=bin/rake secret bundle exec rake assets:precompile ; fi
Expose port 80 to the Docker host, so we can access it
from the outside.
EXPOSE 80
The main command to run when the container starts. Also
tell the Rails dev server to bind to all interfaces by
default.
CMD ["bundle", "exec", "rails", "server", "-b", "0.0.0.0", "-p", "80"]
Dockerfile 里第二步 repositories 文件内容(同一个层级,根目录下)
# China region mirror server for Alpine
https://mirrors.nju.edu.cn/alpine/v3.12/main
https://mirrors.nju.edu.cn/alpine/v3.12/community
第二步:你应该有个 buildspec.yml 文件(根目录下)
这个文件指名了 Codebuild 应该怎么做。
version: 0.2
官方教程文档
https://docs.aws.amazon.com/codebuild/latest/userguide/sample-docker.html
需要配置4个 Codebuild 环境变量
$AWS_DEFAULT_REGION
$AWS_ACCOUNT_ID
$IMAGE_REPO_NAME
$IMAGE_TAG
Docker caching:
https://github.com/aws/aws-codebuild-docker-images/issues/26#issuecomment-370177343
phases:
install:
runtime-versions:
docker: 18
pre_build:
commands:
- docker version
# https://github.com/aws/aws-cli/issues/4962#issuecomment-592064025
- echo 登录 Amazon ECR…
- aws ecr –region $AWS_DEFAULT_REGION get-login-password | docker login –username AWS –password-stdin $AWS_ACCOUNT_ID.dkr.ecr.$AWS_DEFAULT_REGION.amazonaws.com.cn
# 如果 ecr 登录这一步如果失败,可能是 role 没有权限
# An error occurred (AccessDeniedException) when calling the GetAuthorizationToken operation: User: arn:aws-cn:sts::832343096630:assumed-role/codebuild-hackernews-codebuild-staging-service-role/AWSCodeBuild-a7c26677-1ec3-4497-90e1-c94bc4abd414 is not authorized to perform: ecr:GetAuthorizationToken on resource: *
# 给 Role 加一个 AmazonEC2ContainerRegistryFullAccess 就行了
build:
commands:
- echo Build started on date
- echo Building the Docker image…
# 我们这里让 Docker 使用阿里云的镜像服务
# 开发者需要开通阿里开发者帐户,再使用阿里的加速服务
# 登录后阿里开发者帐户后,在 https://cr.console.aliyun.com/undefined/instances/mirrors 查看您的专属加速器地址
- mkdir -p /etc/docker
- |
tee /etc/docker/daemon.json <<-‘EOF’
{
"registry-mirrors": ["https://(隐去).mirror.aliyuncs.com"]
}
EOF
- docker build –cache-from $AWS_ACCOUNT_ID.dkr.ecr.$AWS_DEFAULT_REGION.amazonaws.com.cn/$IMAGE_REPO_NAME:$IMAGE_TAG -t $IMAGE_REPO_NAME:$IMAGE_TAG –build-arg APP_ENV=production .
- docker tag $IMAGE_REPO_NAME:$IMAGE_TAG $AWS_ACCOUNT_ID.dkr.ecr.$AWS_DEFAULT_REGION.amazonaws.com.cn/$IMAGE_REPO_NAME:$IMAGE_TAG
post_build:
commands:
- echo Build completed on date
- echo Pushing the Docker image…
- docker push $AWS_ACCOUNT_ID.dkr.ecr.$AWS_DEFAULT_REGION.amazonaws.com.cn/$IMAGE_REPO_NAME:$IMAGE_TAG
第三步:创建 ECR 存储库
先做这一步是因为这一步太简单了。
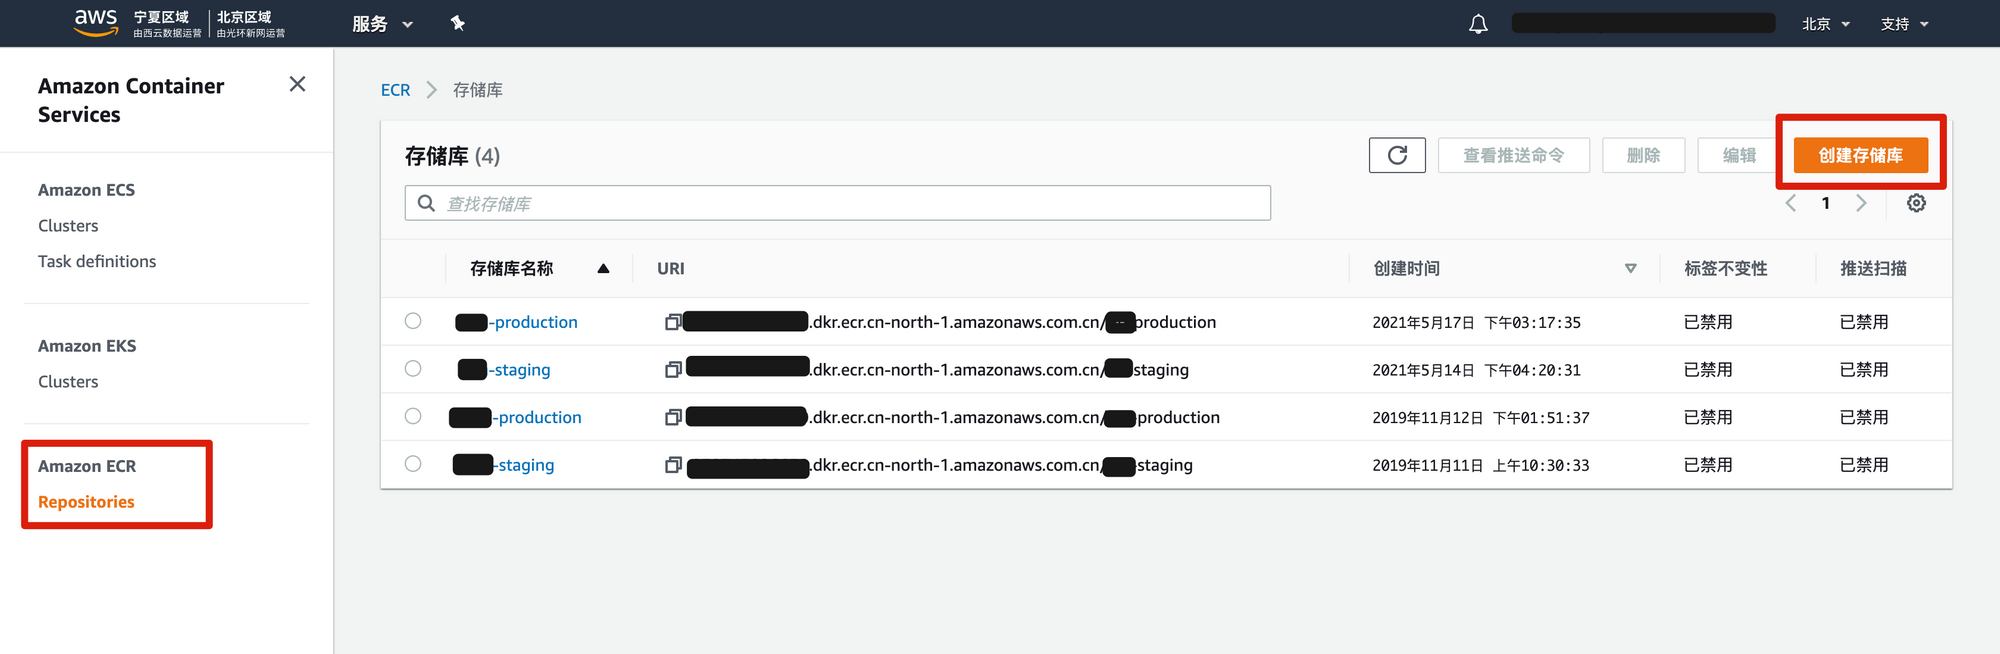
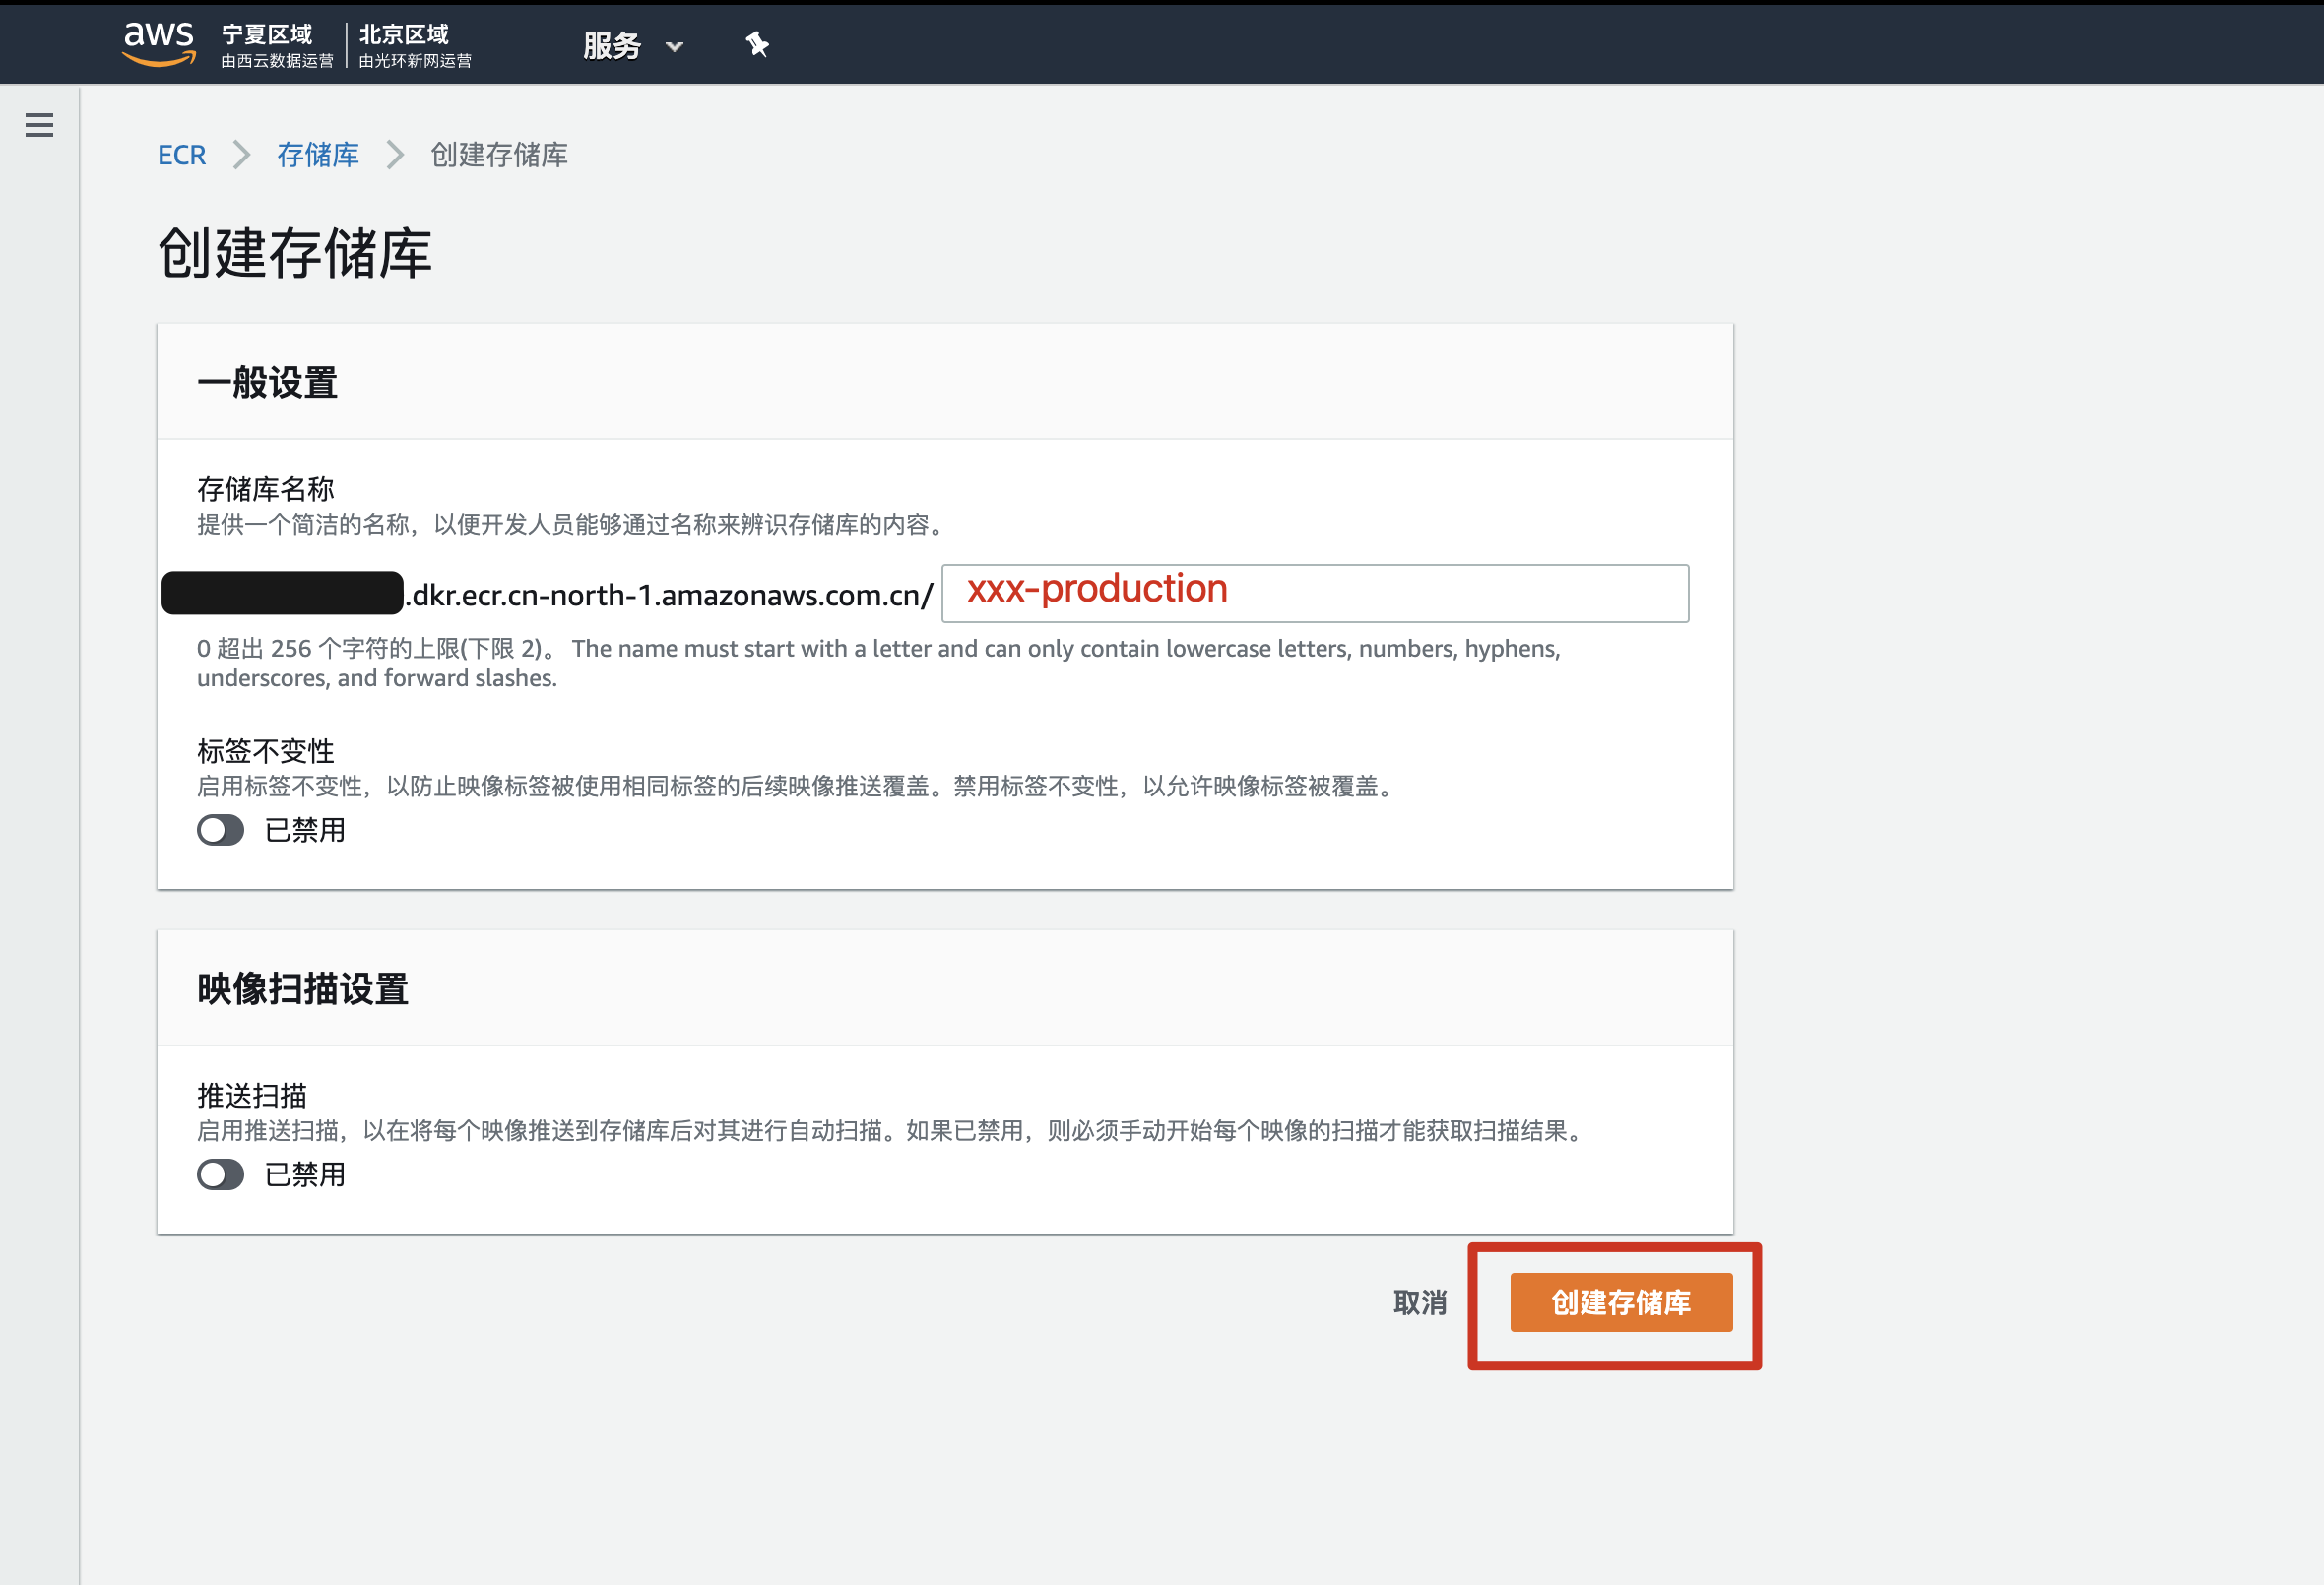
名字没什么特别要求。
我们这里用 xxx-production 以及 xxx-staging 对应2个环境下的镜像。
如果你照着做,这里先新建一个就行,反正是学习目的嘛,学会了再删掉就行。
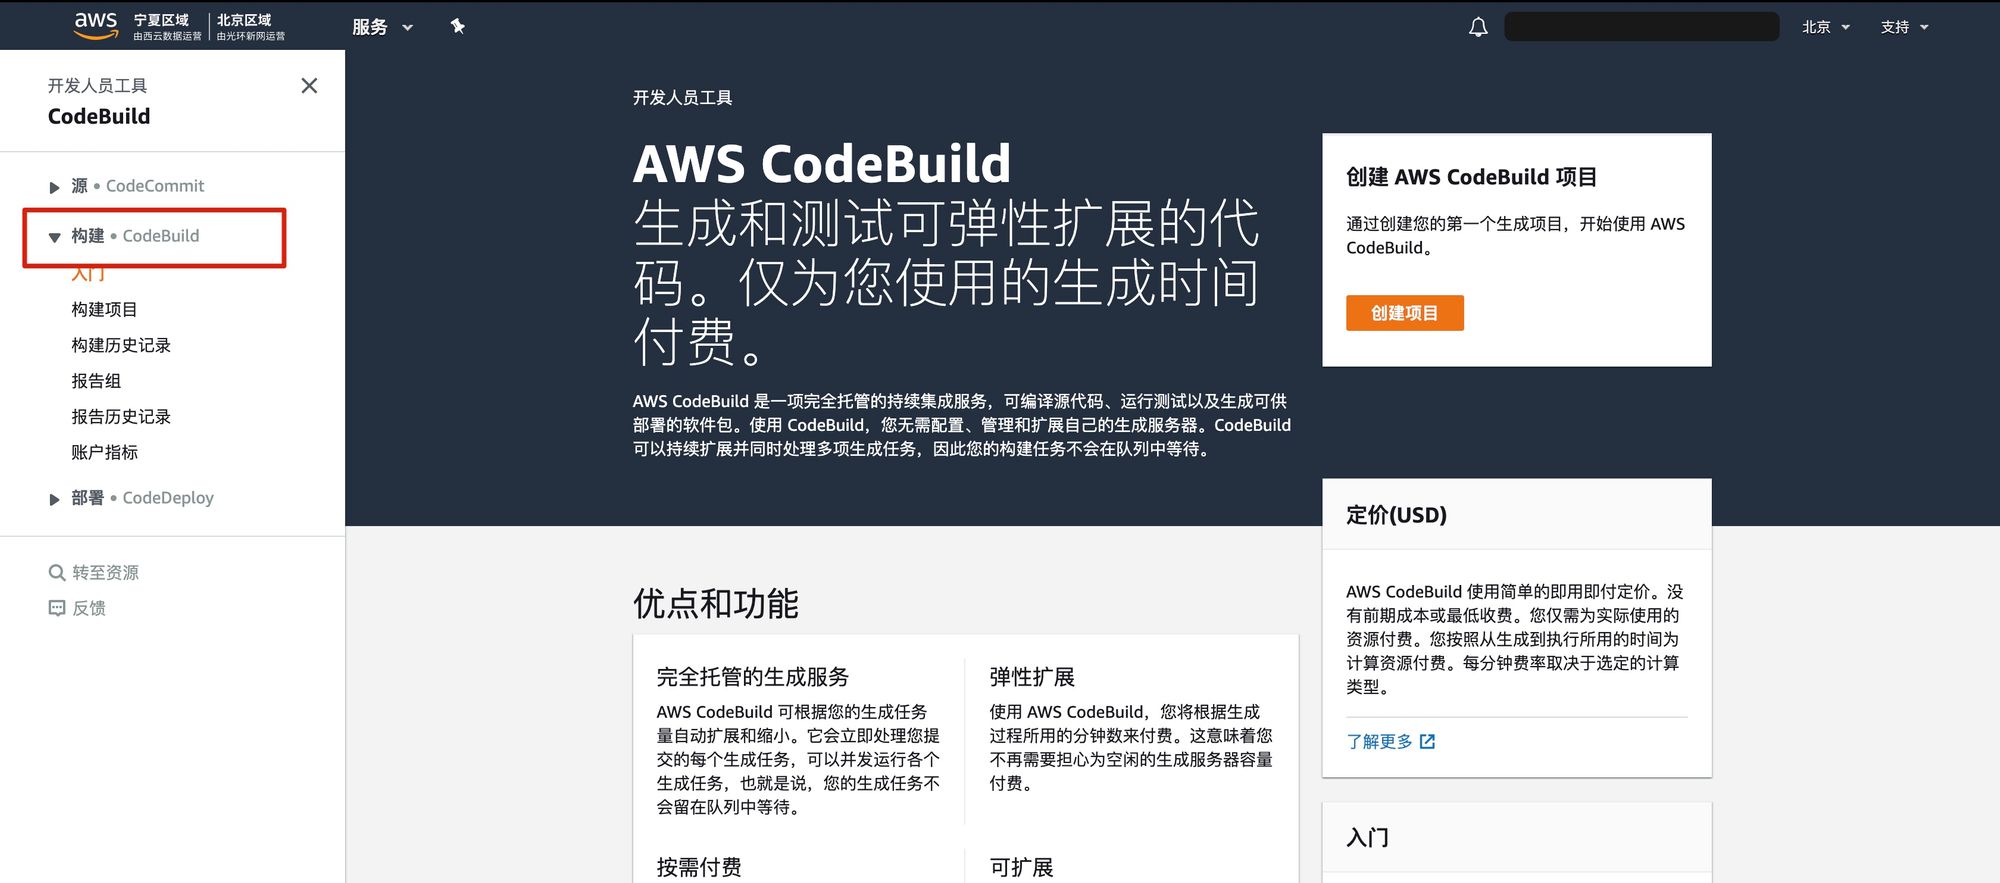
第四步:弄 Codebuild
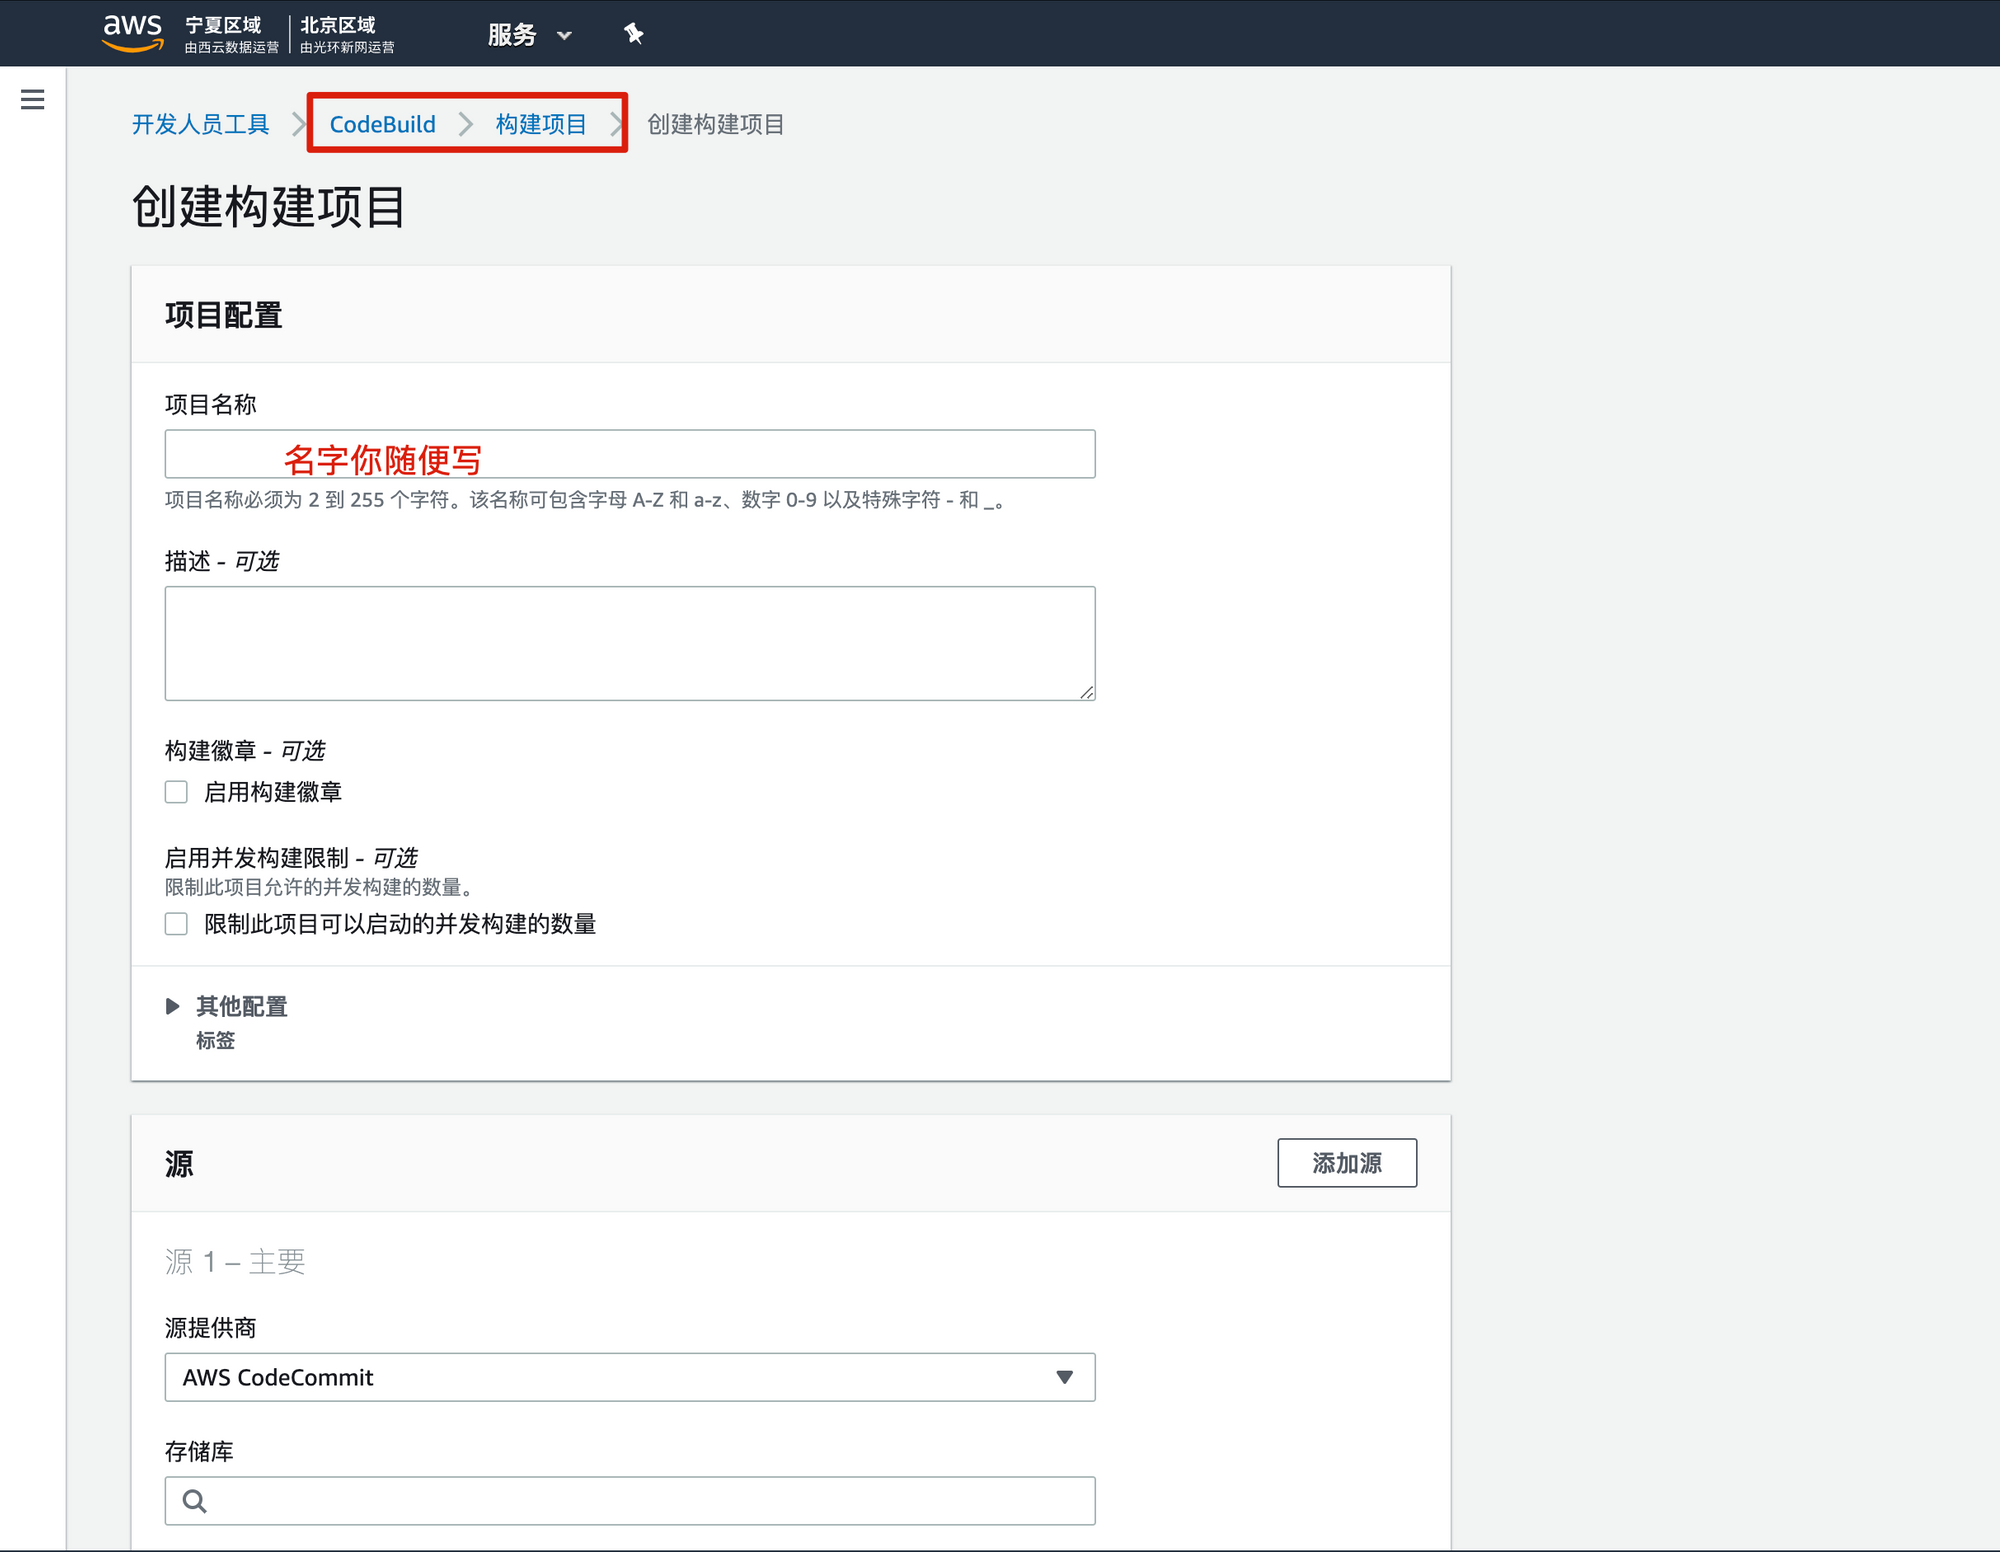
名字你随便写,我们这里是 xxx-codebuild-staging。
代表 xxx 项目,codebuild,staing 环境。
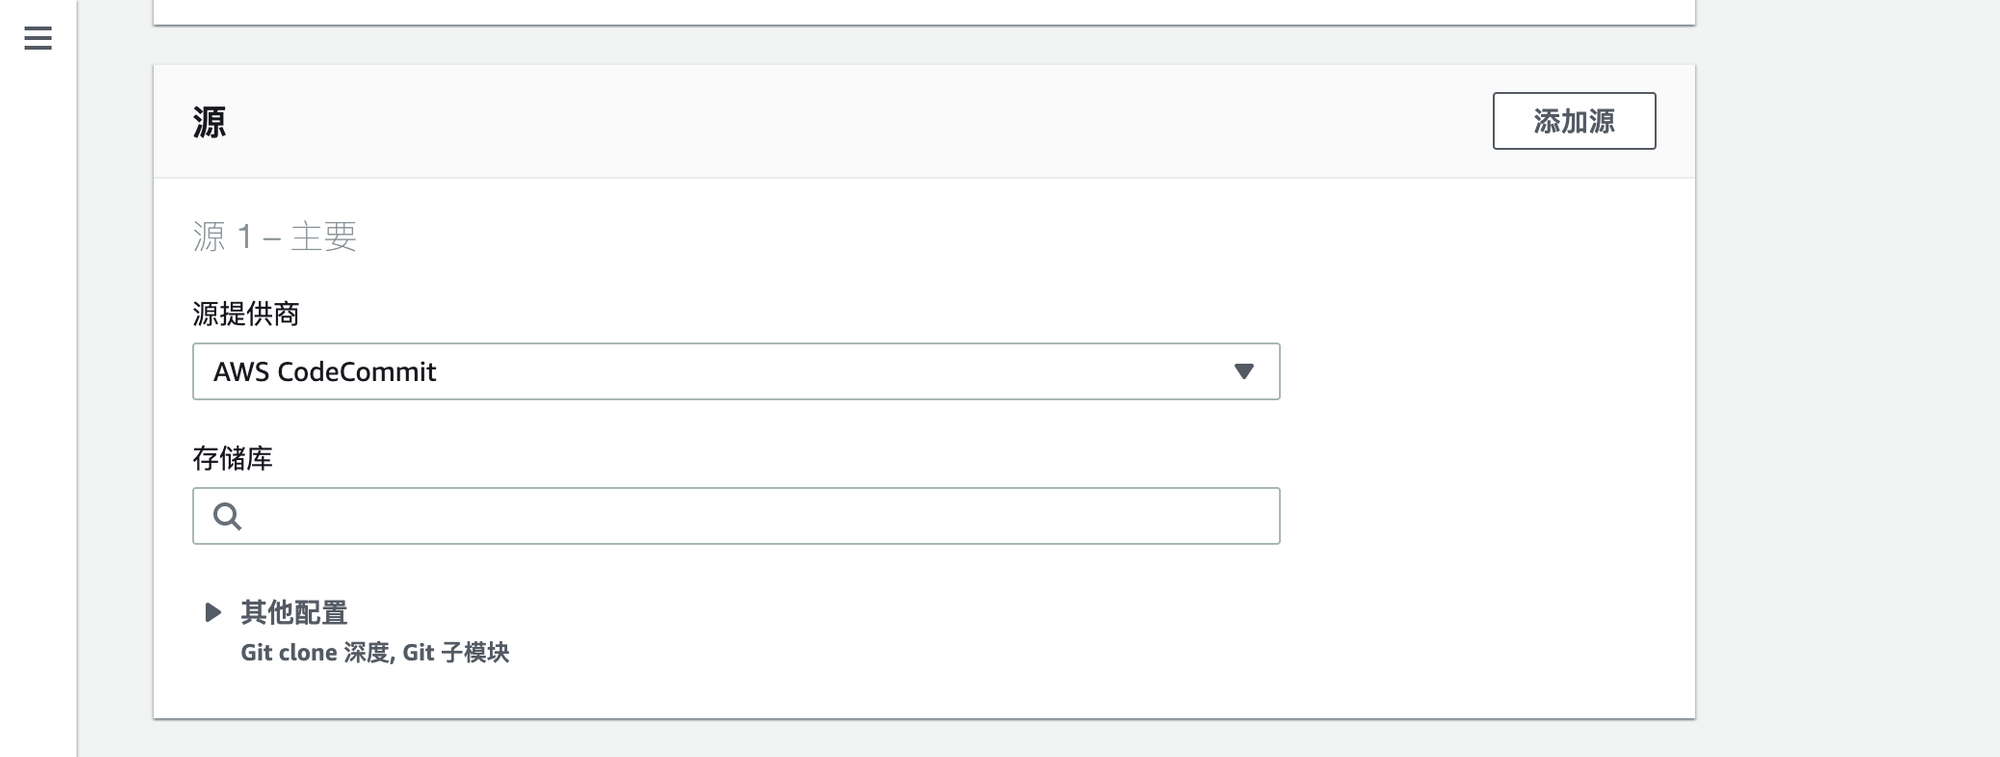
下拉菜单打开后如下图:
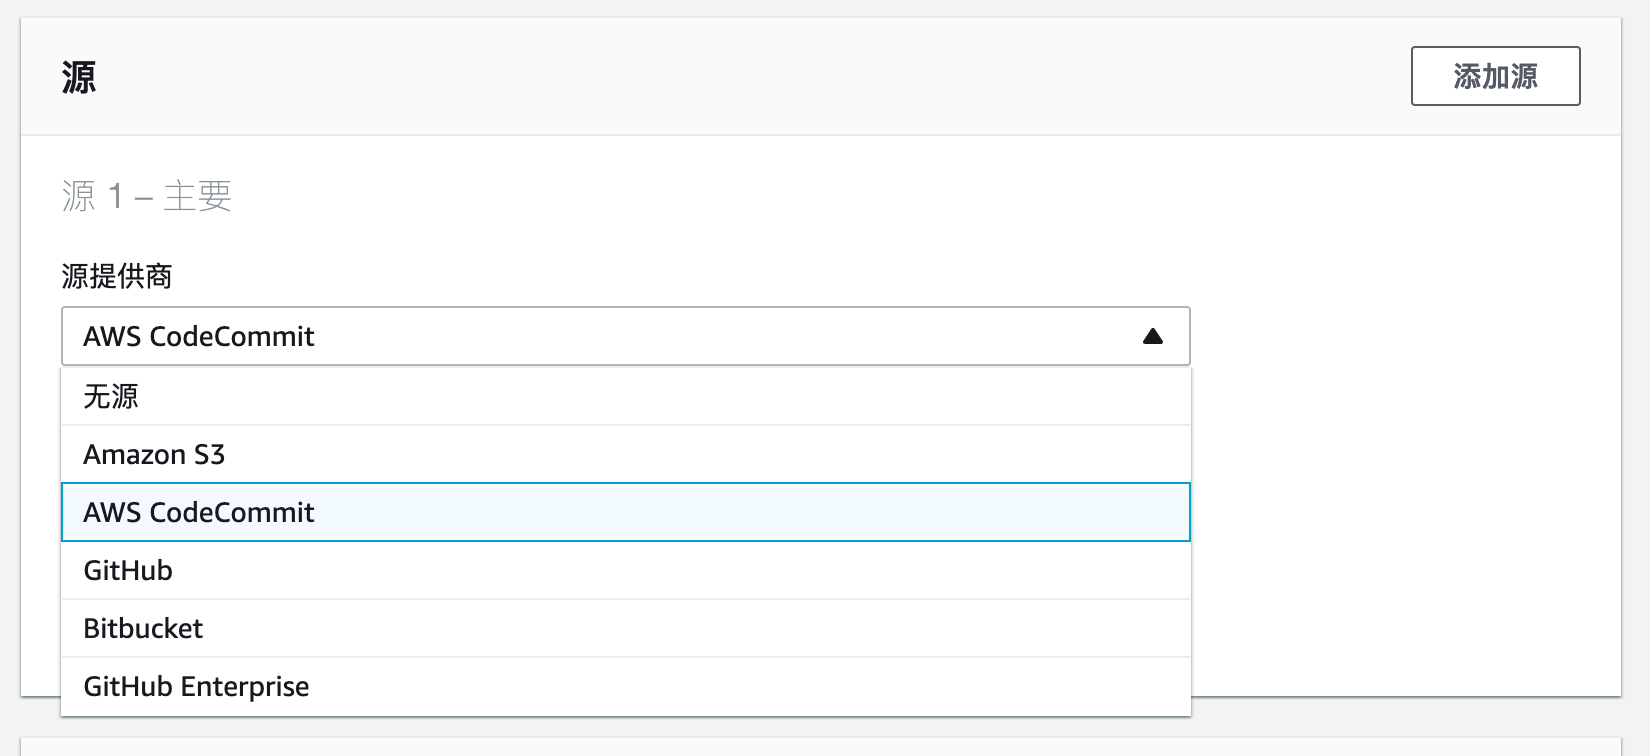
源不建议选 Github。
建议选择 Amazon S3。
意思就是:你的代码当然可以继续存在 Github 或者 Gitlab 或者随便哪里。
但是构建的时候,Codebuild 去 S3 里拿你的代码。
为什么这么干?
降低网络影响。
中国境内访问 Github 比较慢,如果选这个,每次要十几秒/几十秒/失败。
如果 Codebuild 直接从 S3 拿,速度非常快。可以在构建的"阶段详细信息"里看到 "DOWNLOAD_SOURCE" 这一步 "<1 sec"。
也就是说一秒就完成了(哪怕文件大点,2-5秒也搞定了)
怎么让 Codebuild 从 S3 拿代码?
我们上面 Codebuild 还没新建完成,
但是先讲这个话题,怎么把代码传到 S3 让 Codebuild 来获取。
我们先在 S3 新建一个 bucket,这个 bucket 不需要公开,
名字可以是 xxx-codebuild。
xxx 代表项目名。
Makefile
根目录下新建一个文件叫做 Makefile
# Create a Zip archive that contains the contents of the latest commit on the current branch.
# 把当前分支最新 commit 的代码打包成 "当前分支名.zip"
# 注意: .gitattributes 文件让 git archive 命令忽略了一些文件(因为对部署没用,所以忽略)
zip-current-branch:
	git archive -o "$$(git rev-parse --abbrev-ref HEAD).zip" HEAD
	echo "成功打包文件 $$(git rev-parse --abbrev-ref HEAD).zip"
上传到 s3
upload-to-aws-s3:
filename="$$(git rev-parse –abbrev-ref HEAD).zip" &&

bucket_name="xxx-codebuild" &&

echo "正在把文件: $$filename 上传到 AWS S3 的桶 $$bucket_name" &&

aws s3 cp $$filename s3://$$bucket_name/$$filename &&

rm $$filename
打包+上传
zip-current-branch-upload-to-aws-s3:
make zip-current-branch
make upload-to-aws-s3
注意:
- 缩进必须是 tab,不能是空格,否则 make 命令会失败。
- 你本地电脑必须登录了 aws cli,这个部分不展开讲,自行上网搜索,提示:运行
aws configure
怎么运行?
make zip-current-branch-upload-to-aws-s3
假设你当前分支是 staging,那么会打包出一个 staging.zip 文件夹。
然后上传到 S3 xxx-codebuild bucket(注意看 upload-to-aws-s3 那一段写的 bucket_name 是什么)
好的,完成,这下你就知道了怎么把本地代码打包成 zip 放到 AWS S3。
我们回到正题,继续新建 Codebuild
继续新建 Codebuild
接下来设置环境
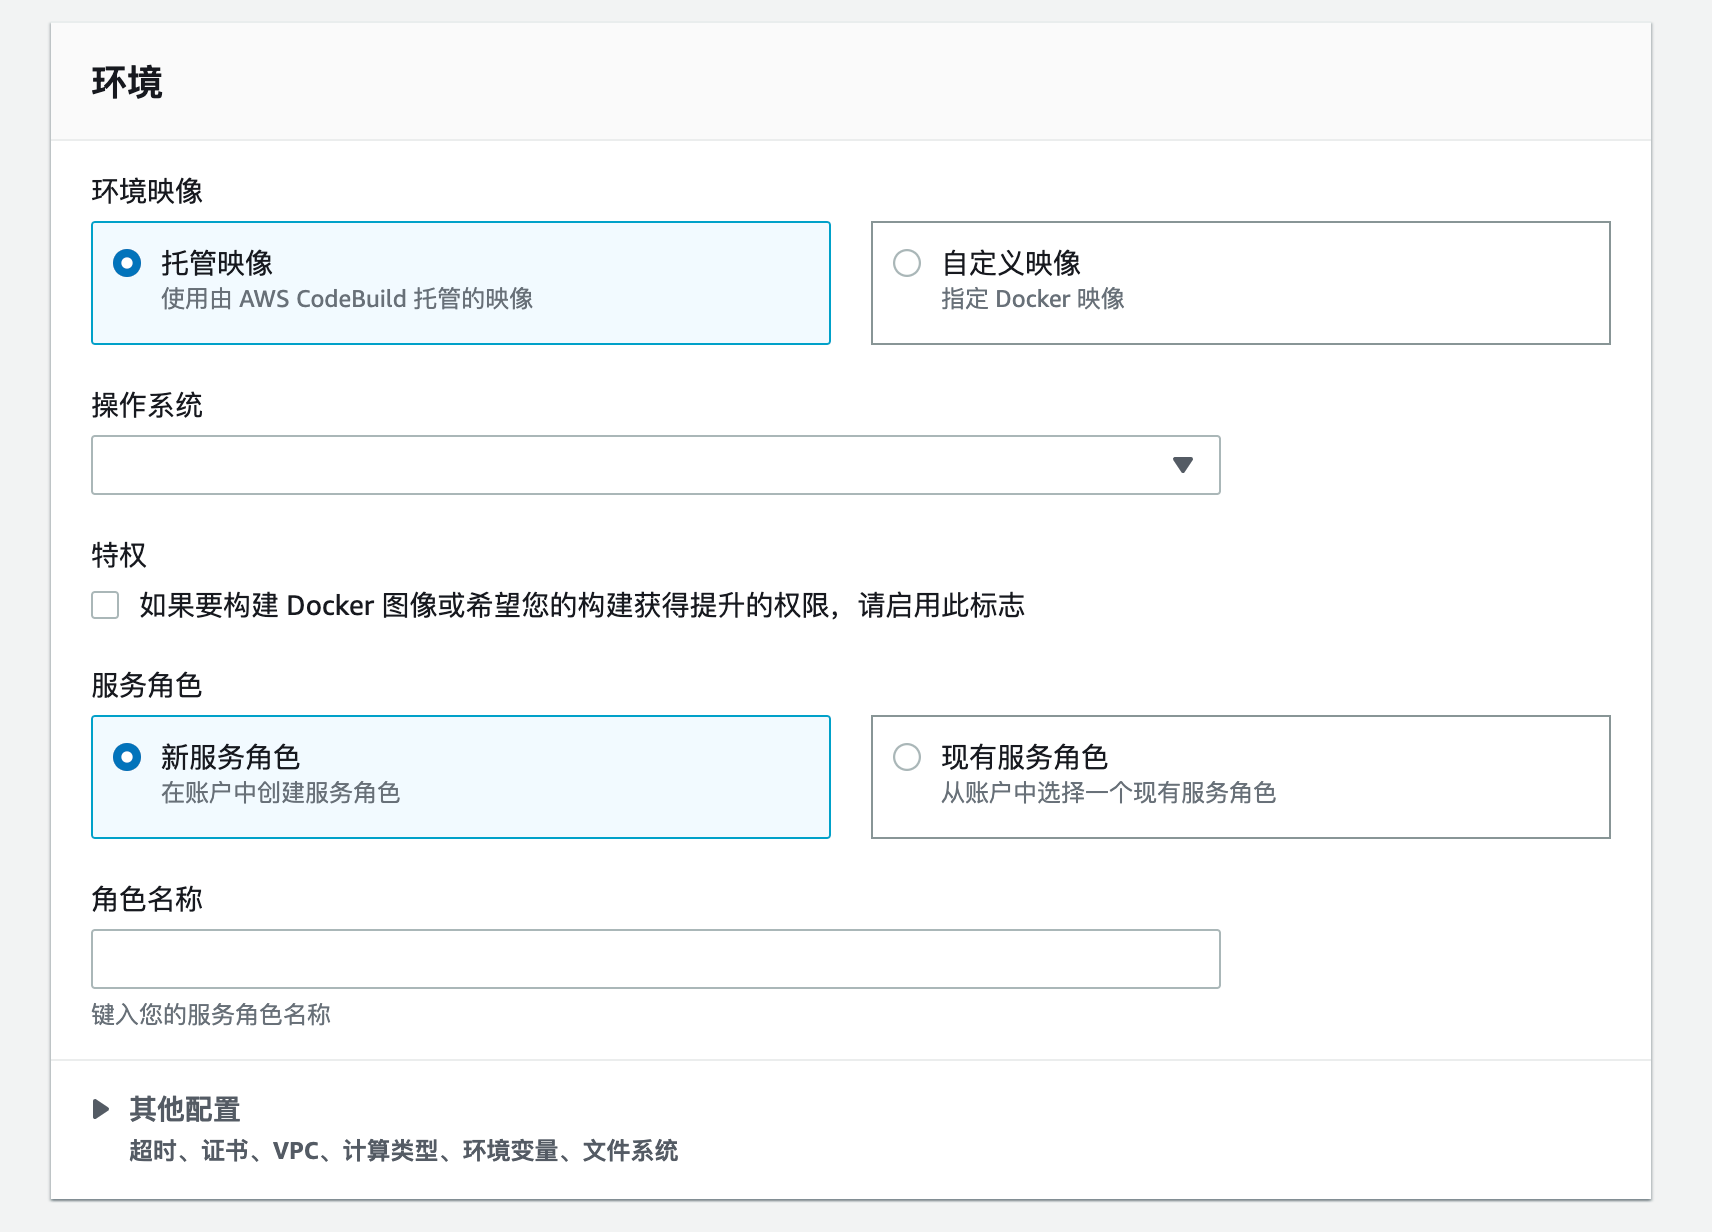
我是这样设置的
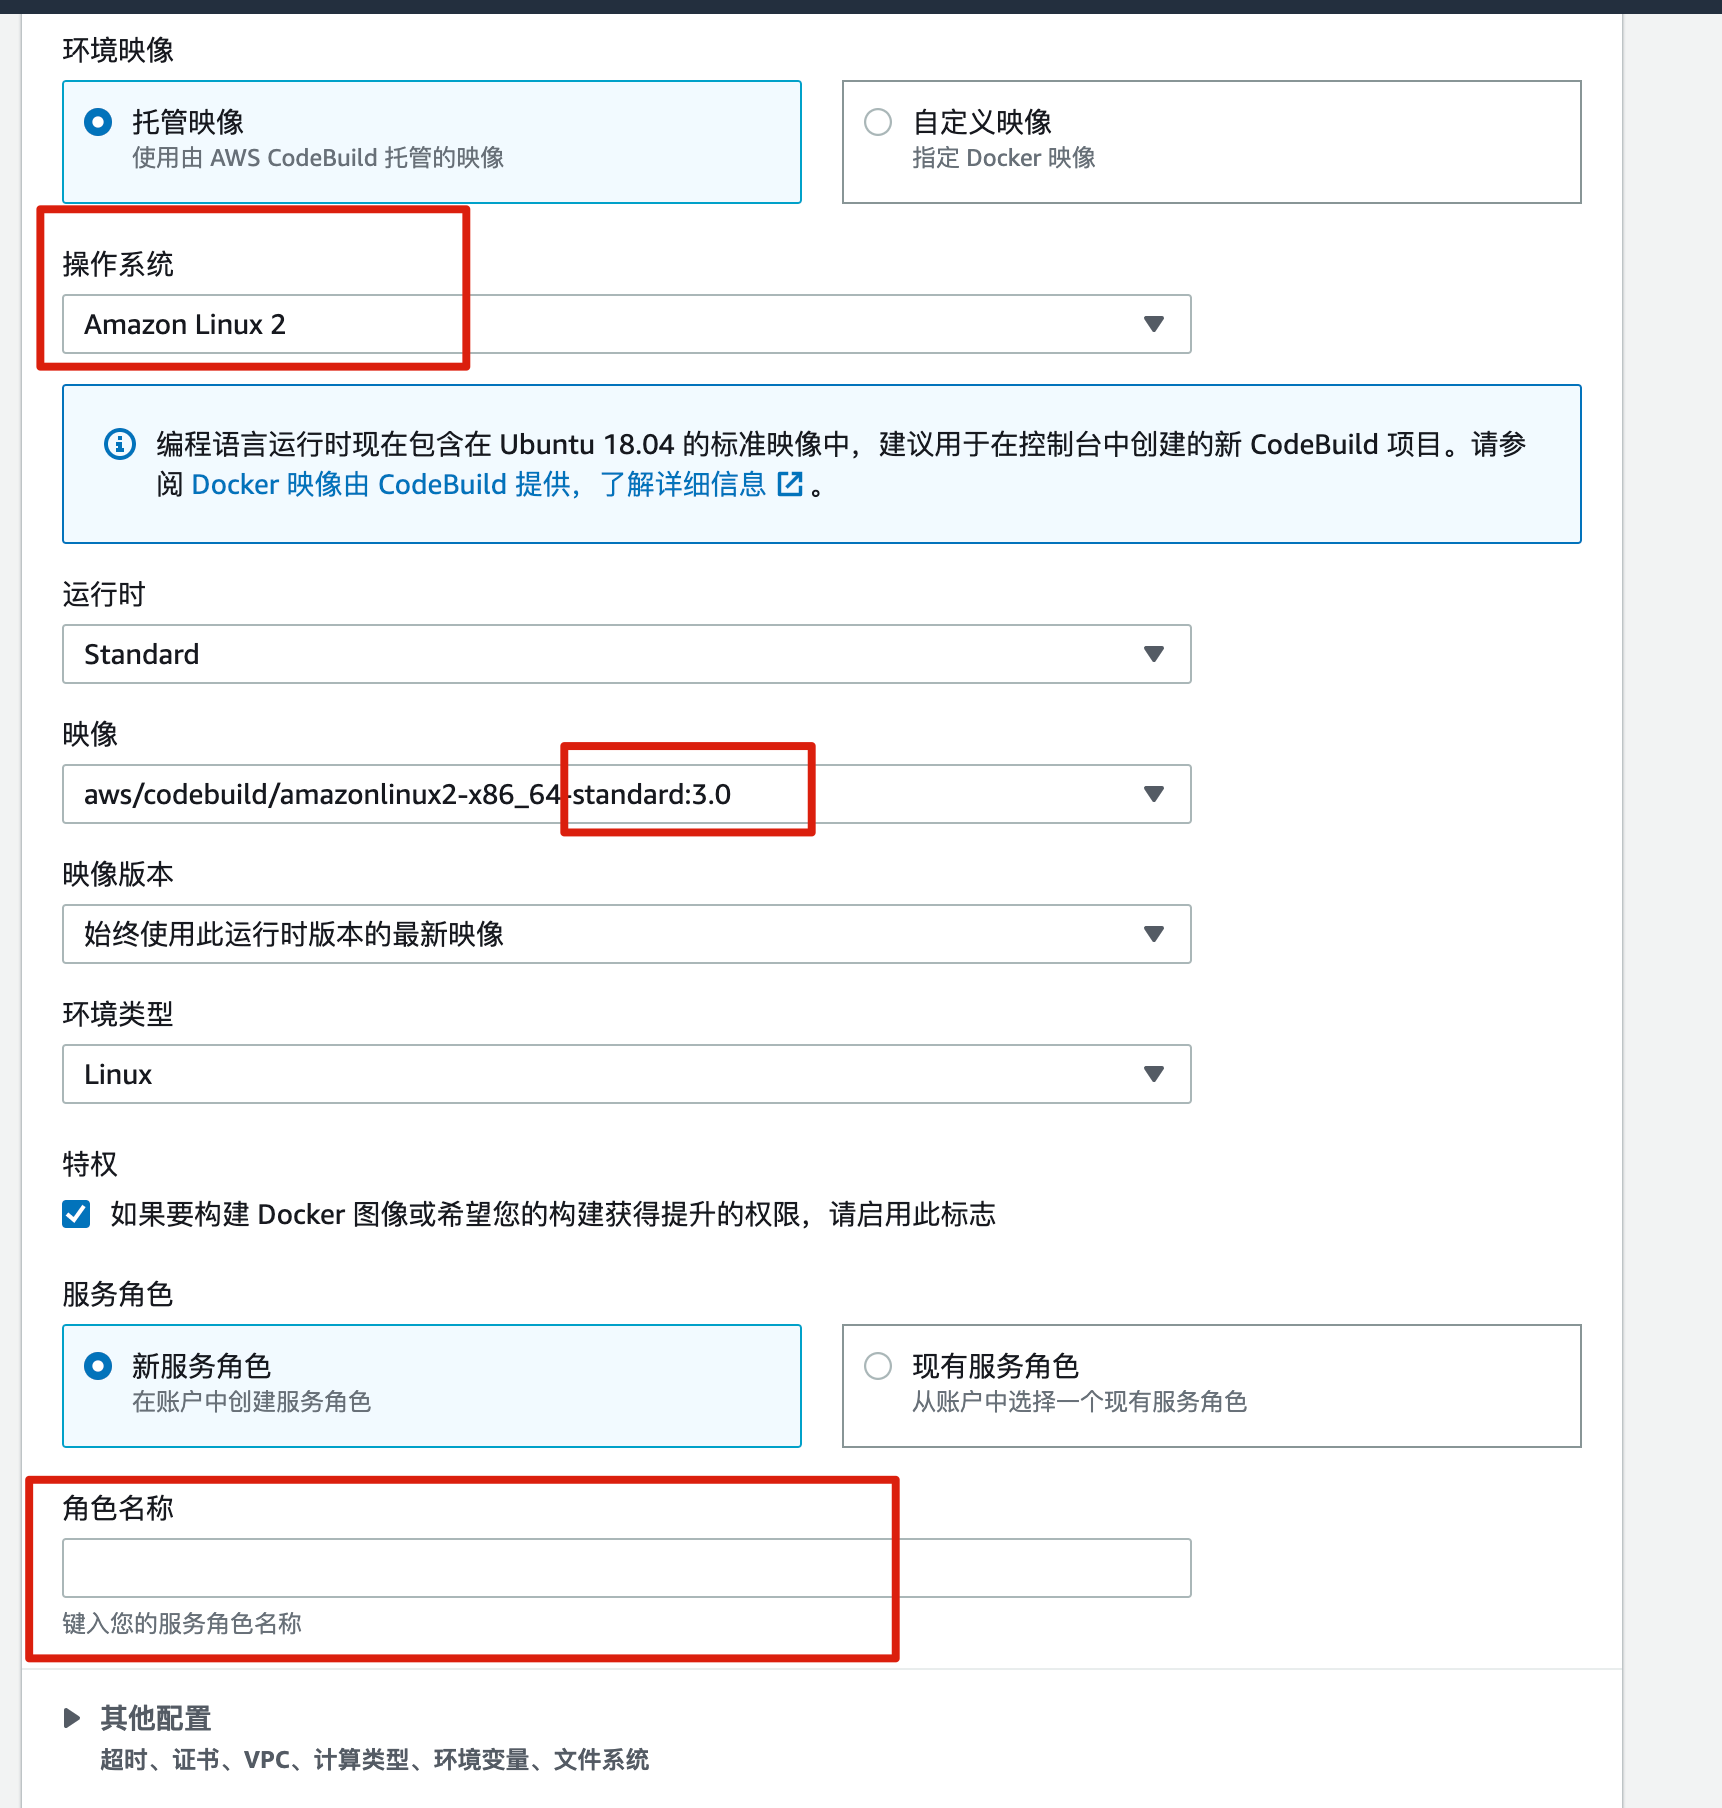
角色这里随便写个名字。比如 xxx-codebuild-service-role 之类的。
我们需要给这个 role 新增一个权限(去 IAM 里面设置),如下图:
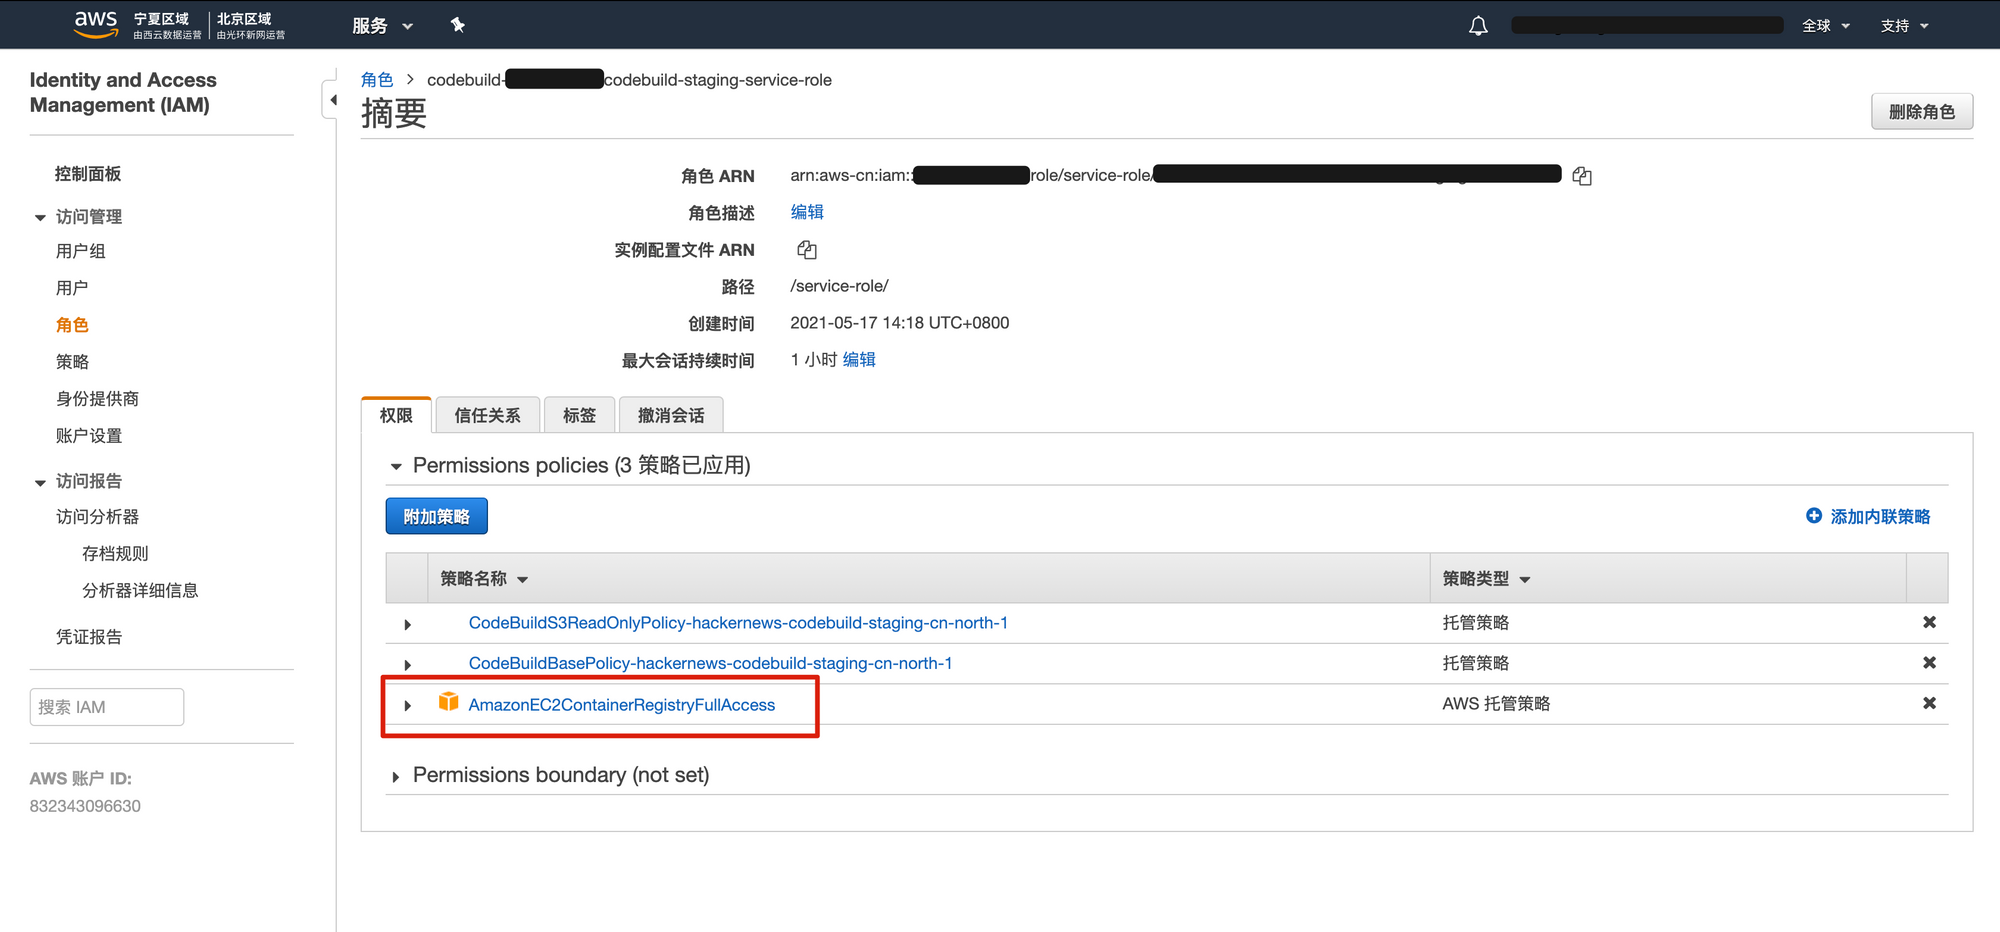
加一个 AmazonEC2ContainerRegistryFullAccess 权限。
原因是如果不加,Codebuild 无法运行 aws ecr 登录命令。
就没有权限把镜像 push 到 ECR 里。
下一步:设置环境变量

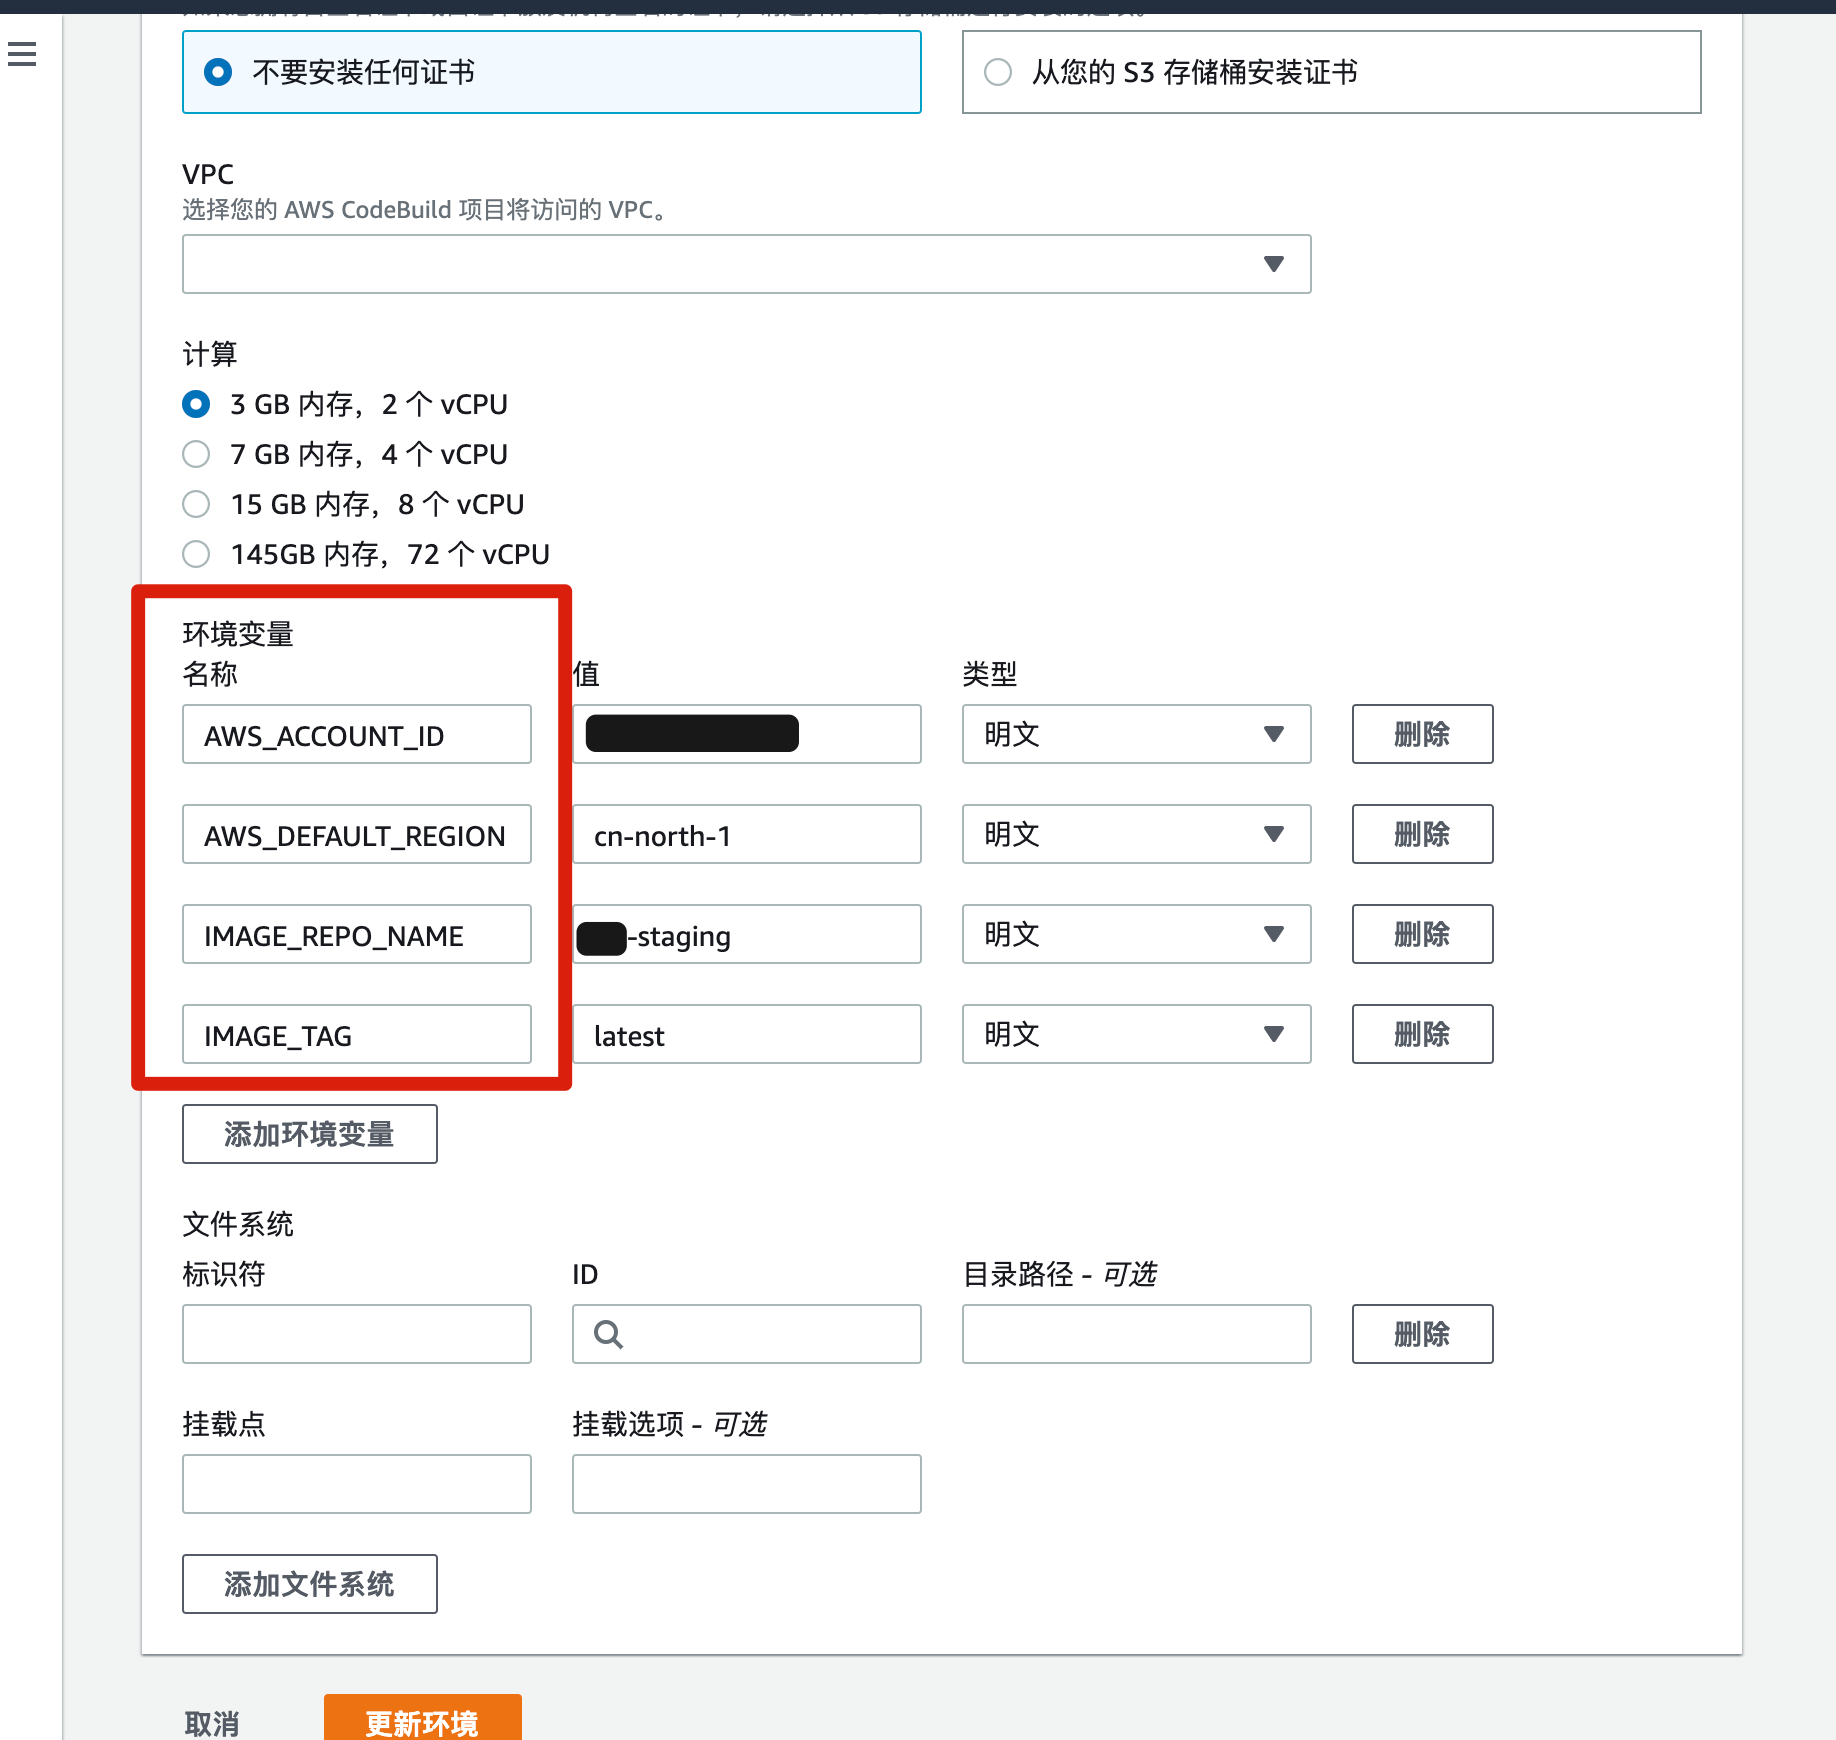
这里设置了4个环境变量。
注意,这些环境变量是和 buildspec.yml 对应的。
如果不设置这些环境变量,buildspec.yml 就会失败。
下一步 Buildspec

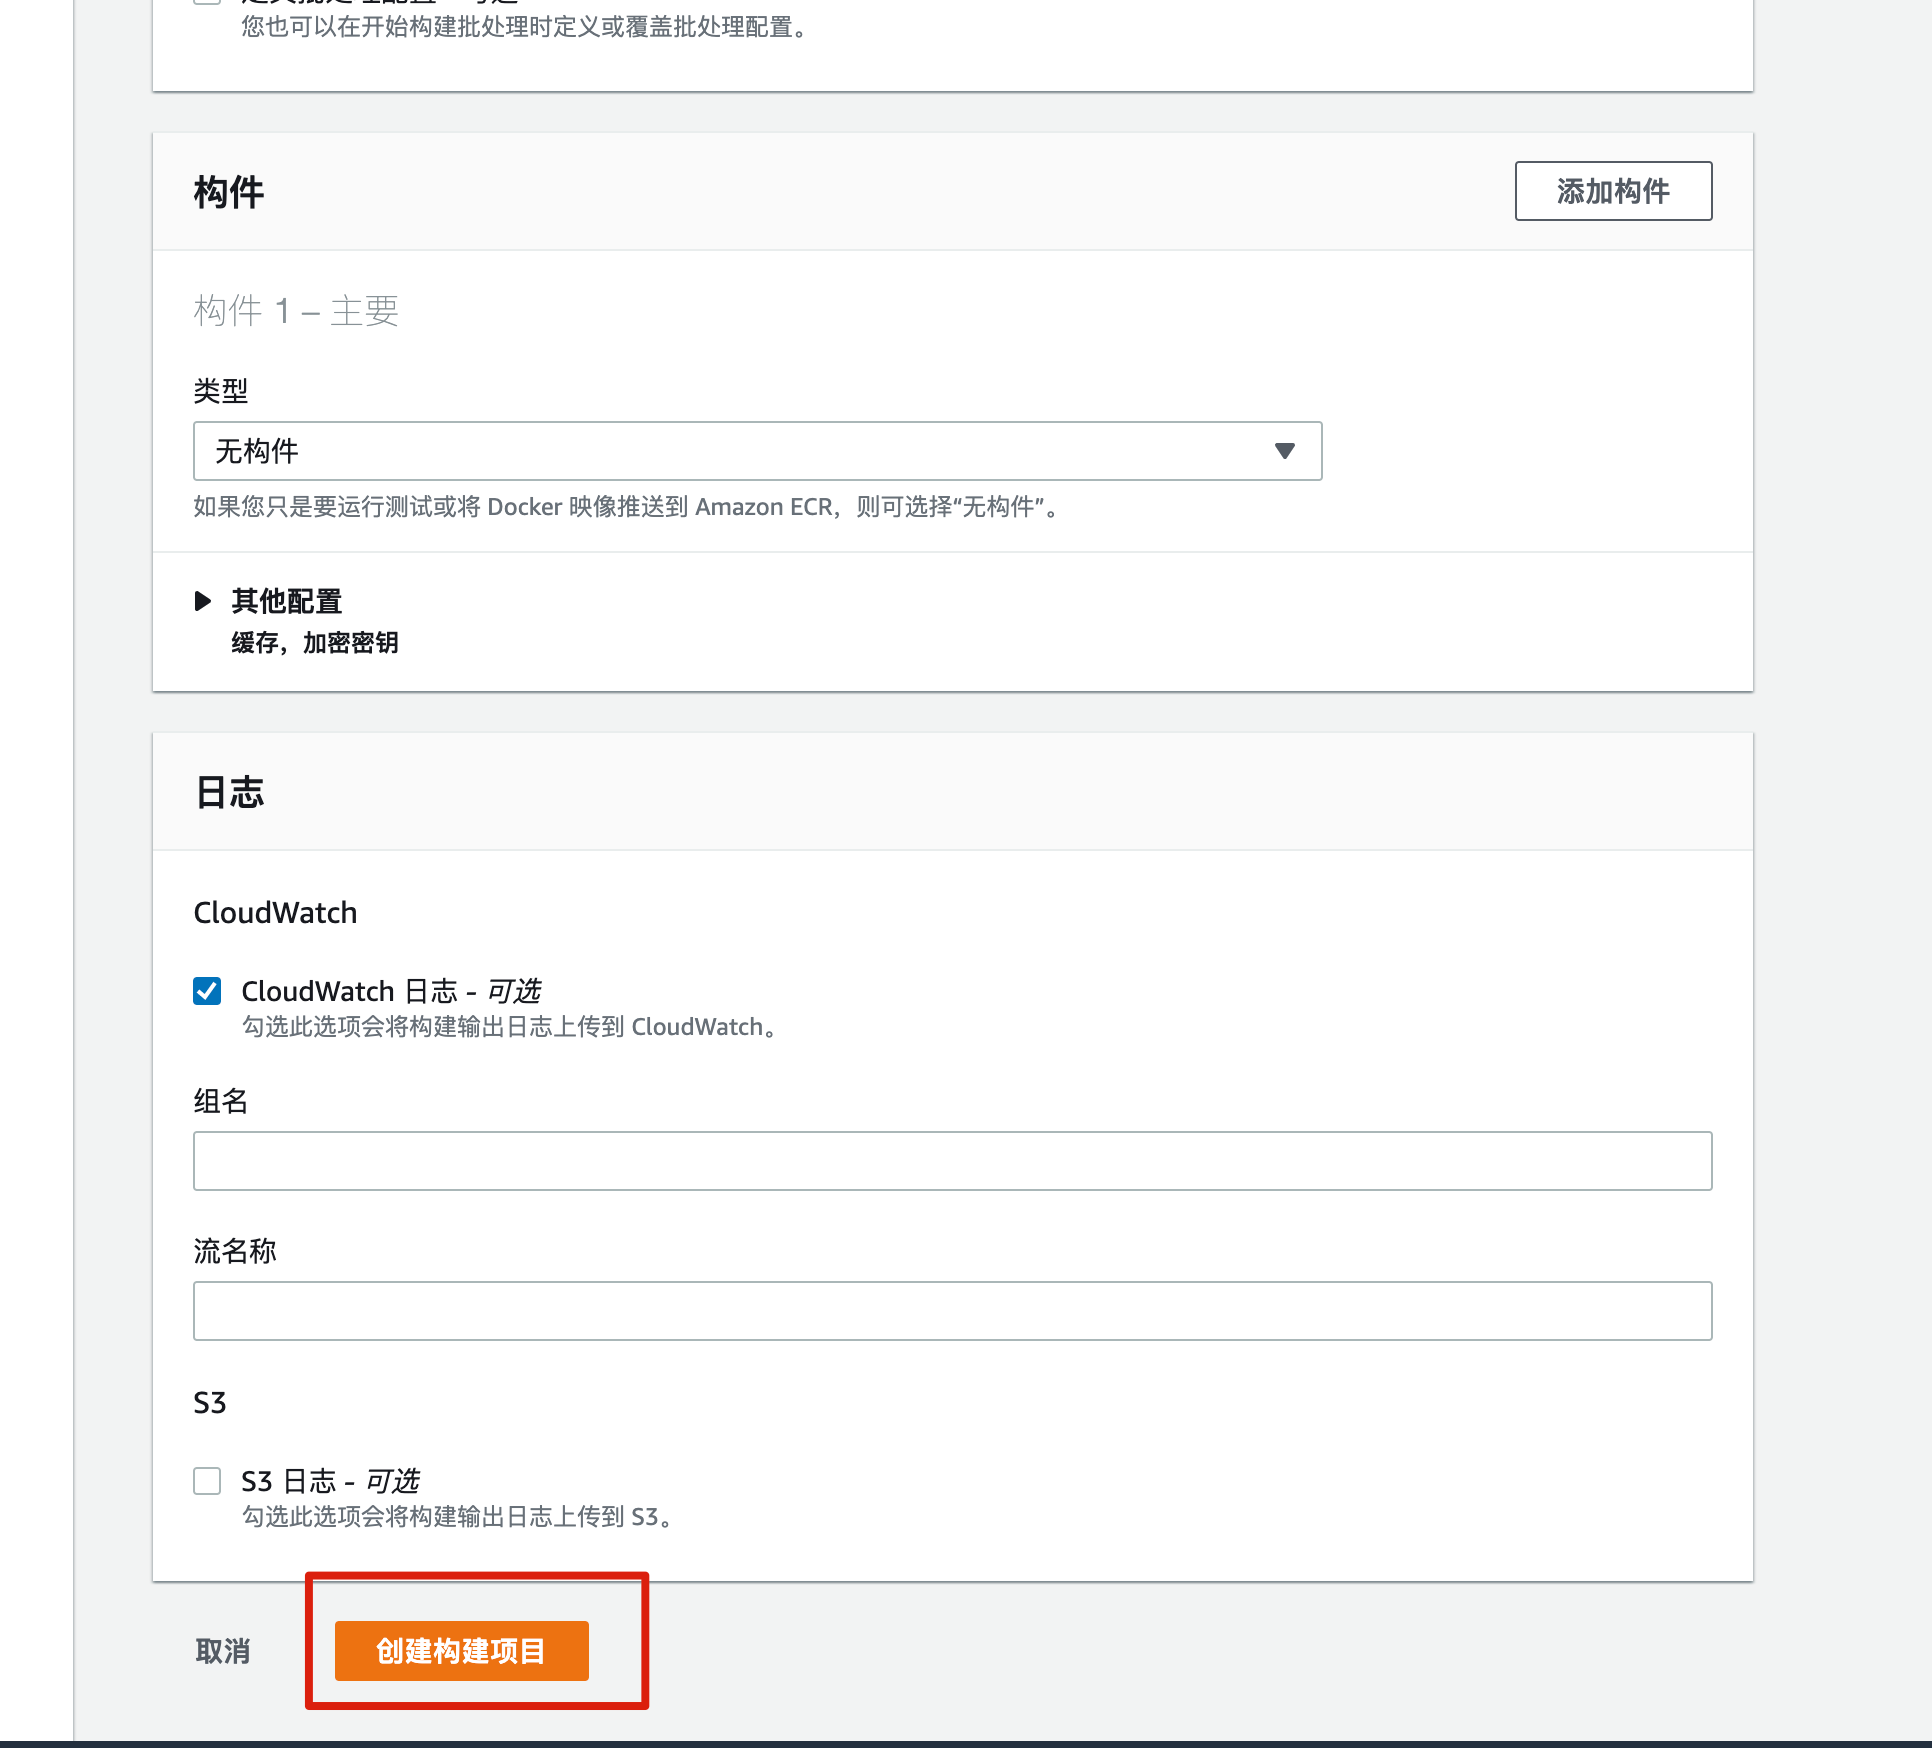
这里用默认的就行,可以不填这里,默认用 buildspec.yml 文件。
确认新建
最后
既然设置完了,此时可以在 Codebuild 中触发构建。
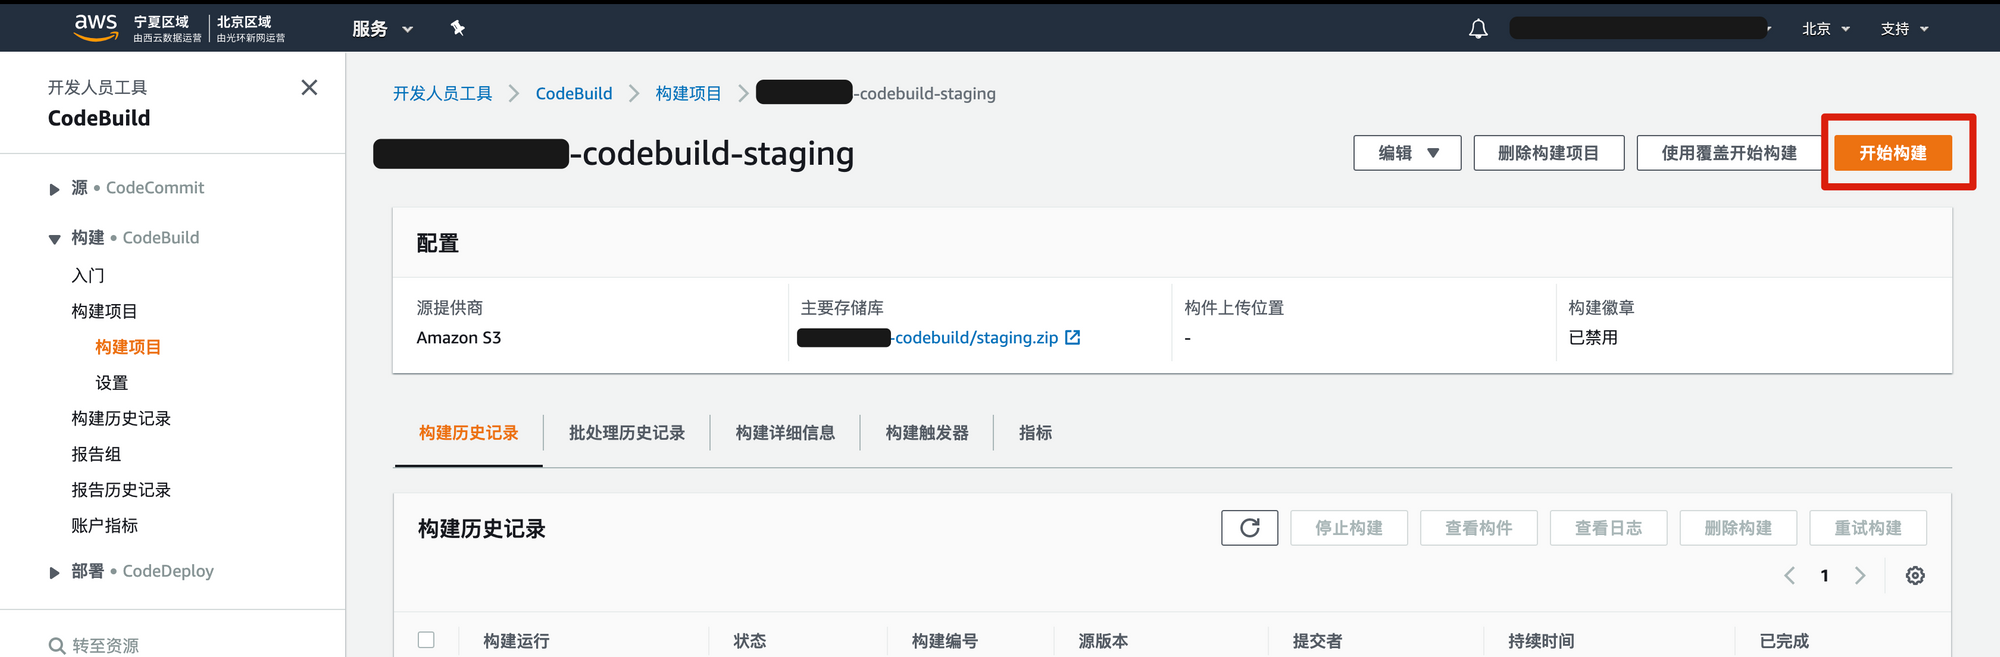
当然你也可以用 aws cli 触发 Codebuild,比如
aws codebuild start-build --project-name xxx-codebuild