[教程] 用 curl 跑通 Azure 的 Speech to Text API
如果你想做 Azure 的语音转文字 API,这篇教程至少可以节省你1个小时的时间

![[教程] 用 curl 跑通 Azure 的 Speech to Text API](/content/images/size/w2000/2020/04/speech-to-text.jpg)
这篇文章讲什么?
如何使用 curl 跑通 Azure(微软) 的 Speech to Text API(语音转文字)
最终结果:成功把语音 ->
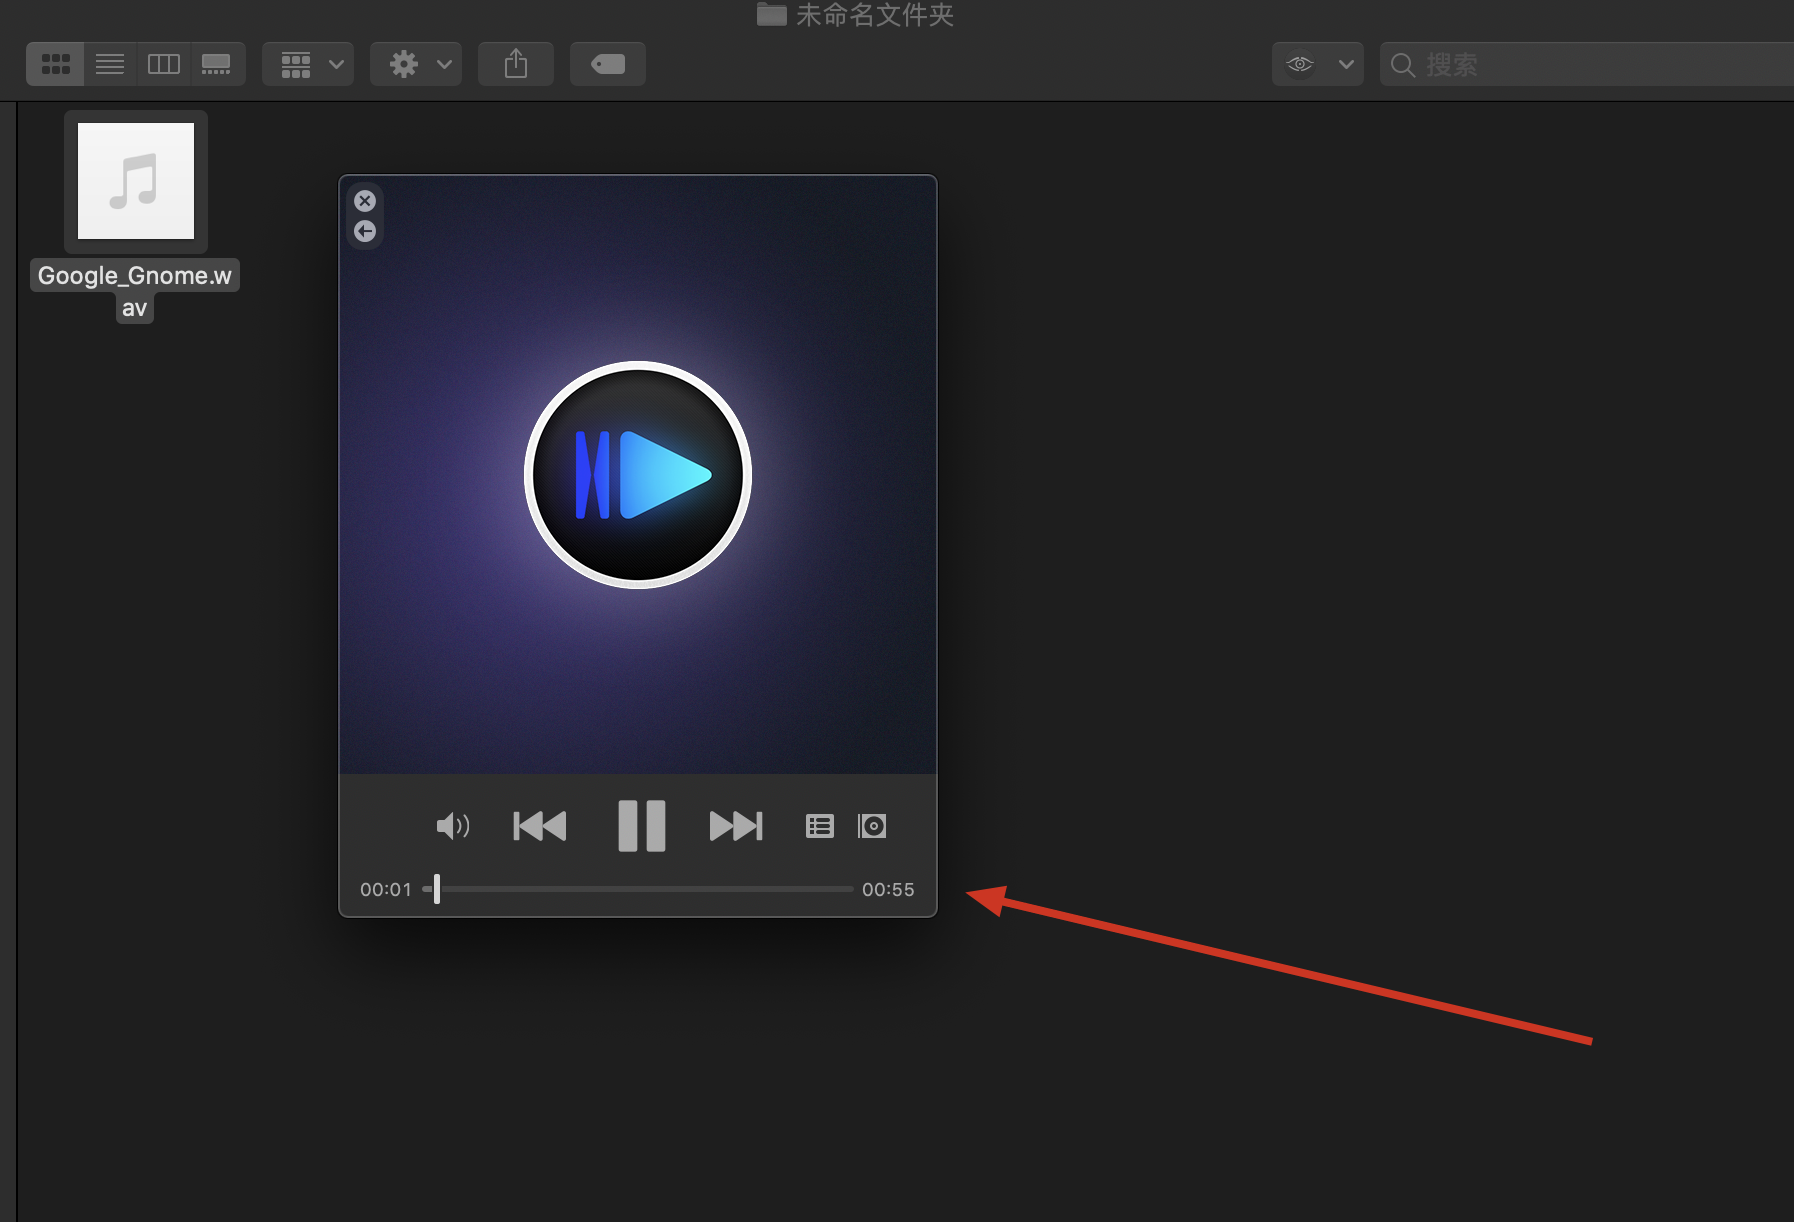
(注:因为只是测试,Google_Gnome.wav 是我网上随便找来测试的文件,
和谷歌没有啥关系)
这个文件的下载地址是:
https://github.com/googleapis/nodejs-speech/blob/master/samples/resources/Google_Gnome.wav
(之前做谷歌的语音转文字拿到了这个示例文件,所以这次就顺手拿来测 Azure 了)
转成文字:
为什么用 curl (命令行)?
- 我试过 Azure 官方提供的 "Speech to Text" Javascript/Node.js SDK
没能成功,报错信息不好理解,例子就1个,我也没心情去死磕这个 SDK
反正归根到底都是 HTTP 请求,那就直接用 HTTP
这篇文章对谁有用?
- 程序员
- 需要实现 Azure 的语音转文字 API 的程序员
这篇文章有什么用?
- 节省时间:至少替你节省了1个小时看文档的时间
正文开始
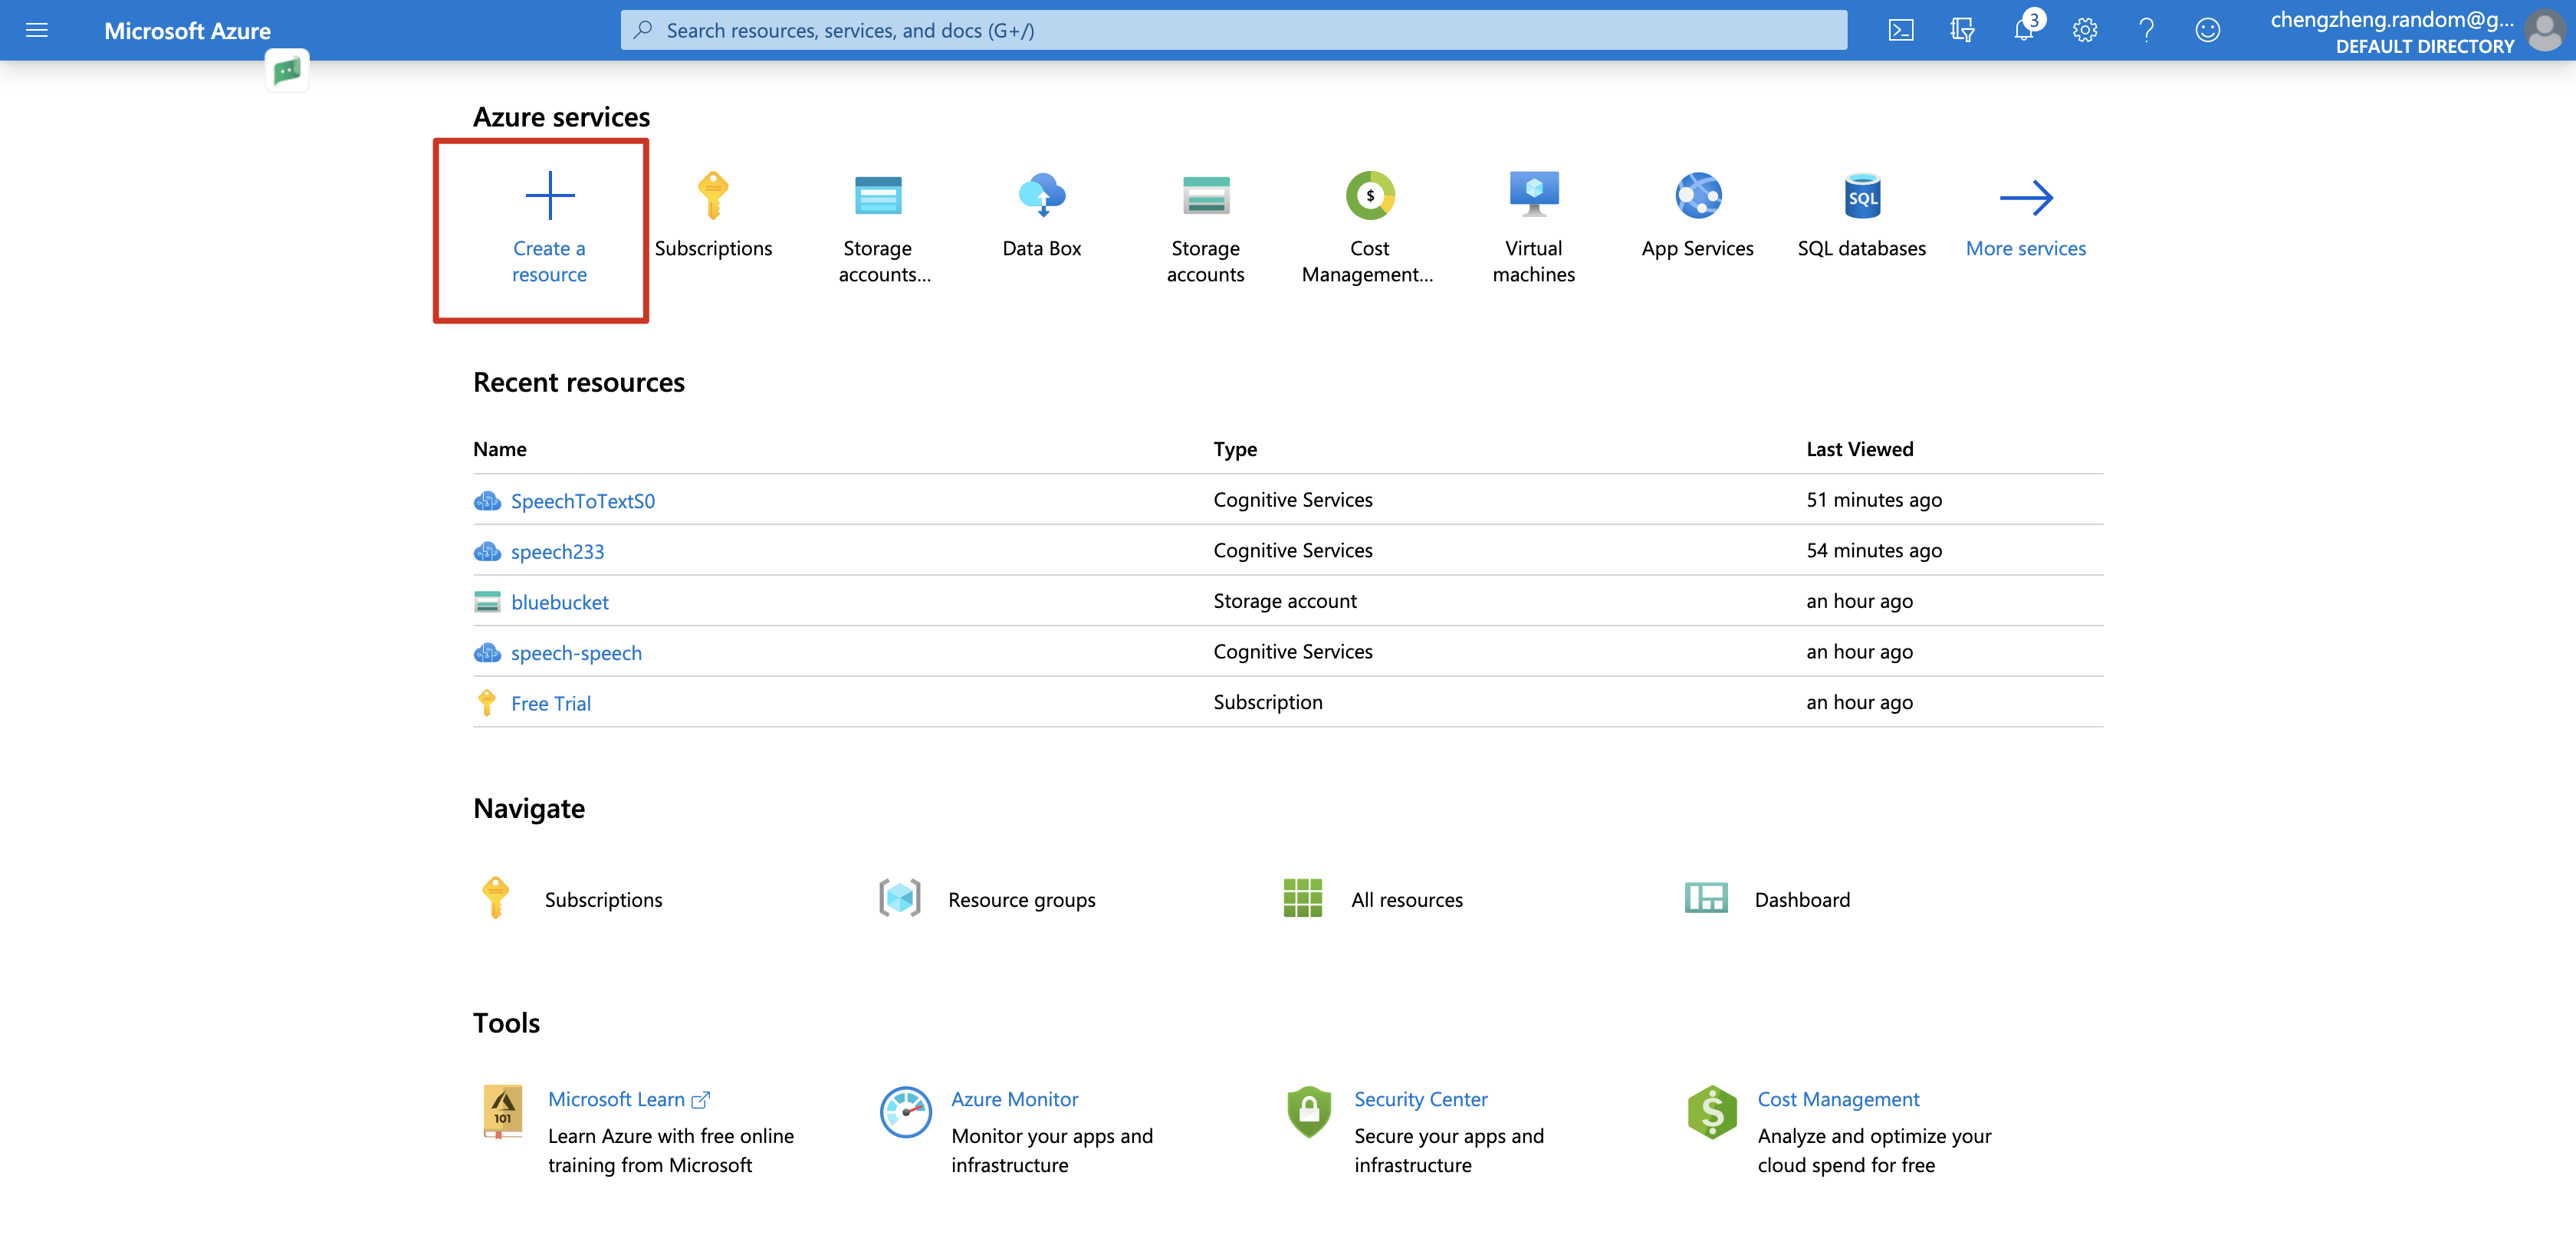
第一步,创建资源
点击左上角 Create a resource
选择 Speech 这个应用
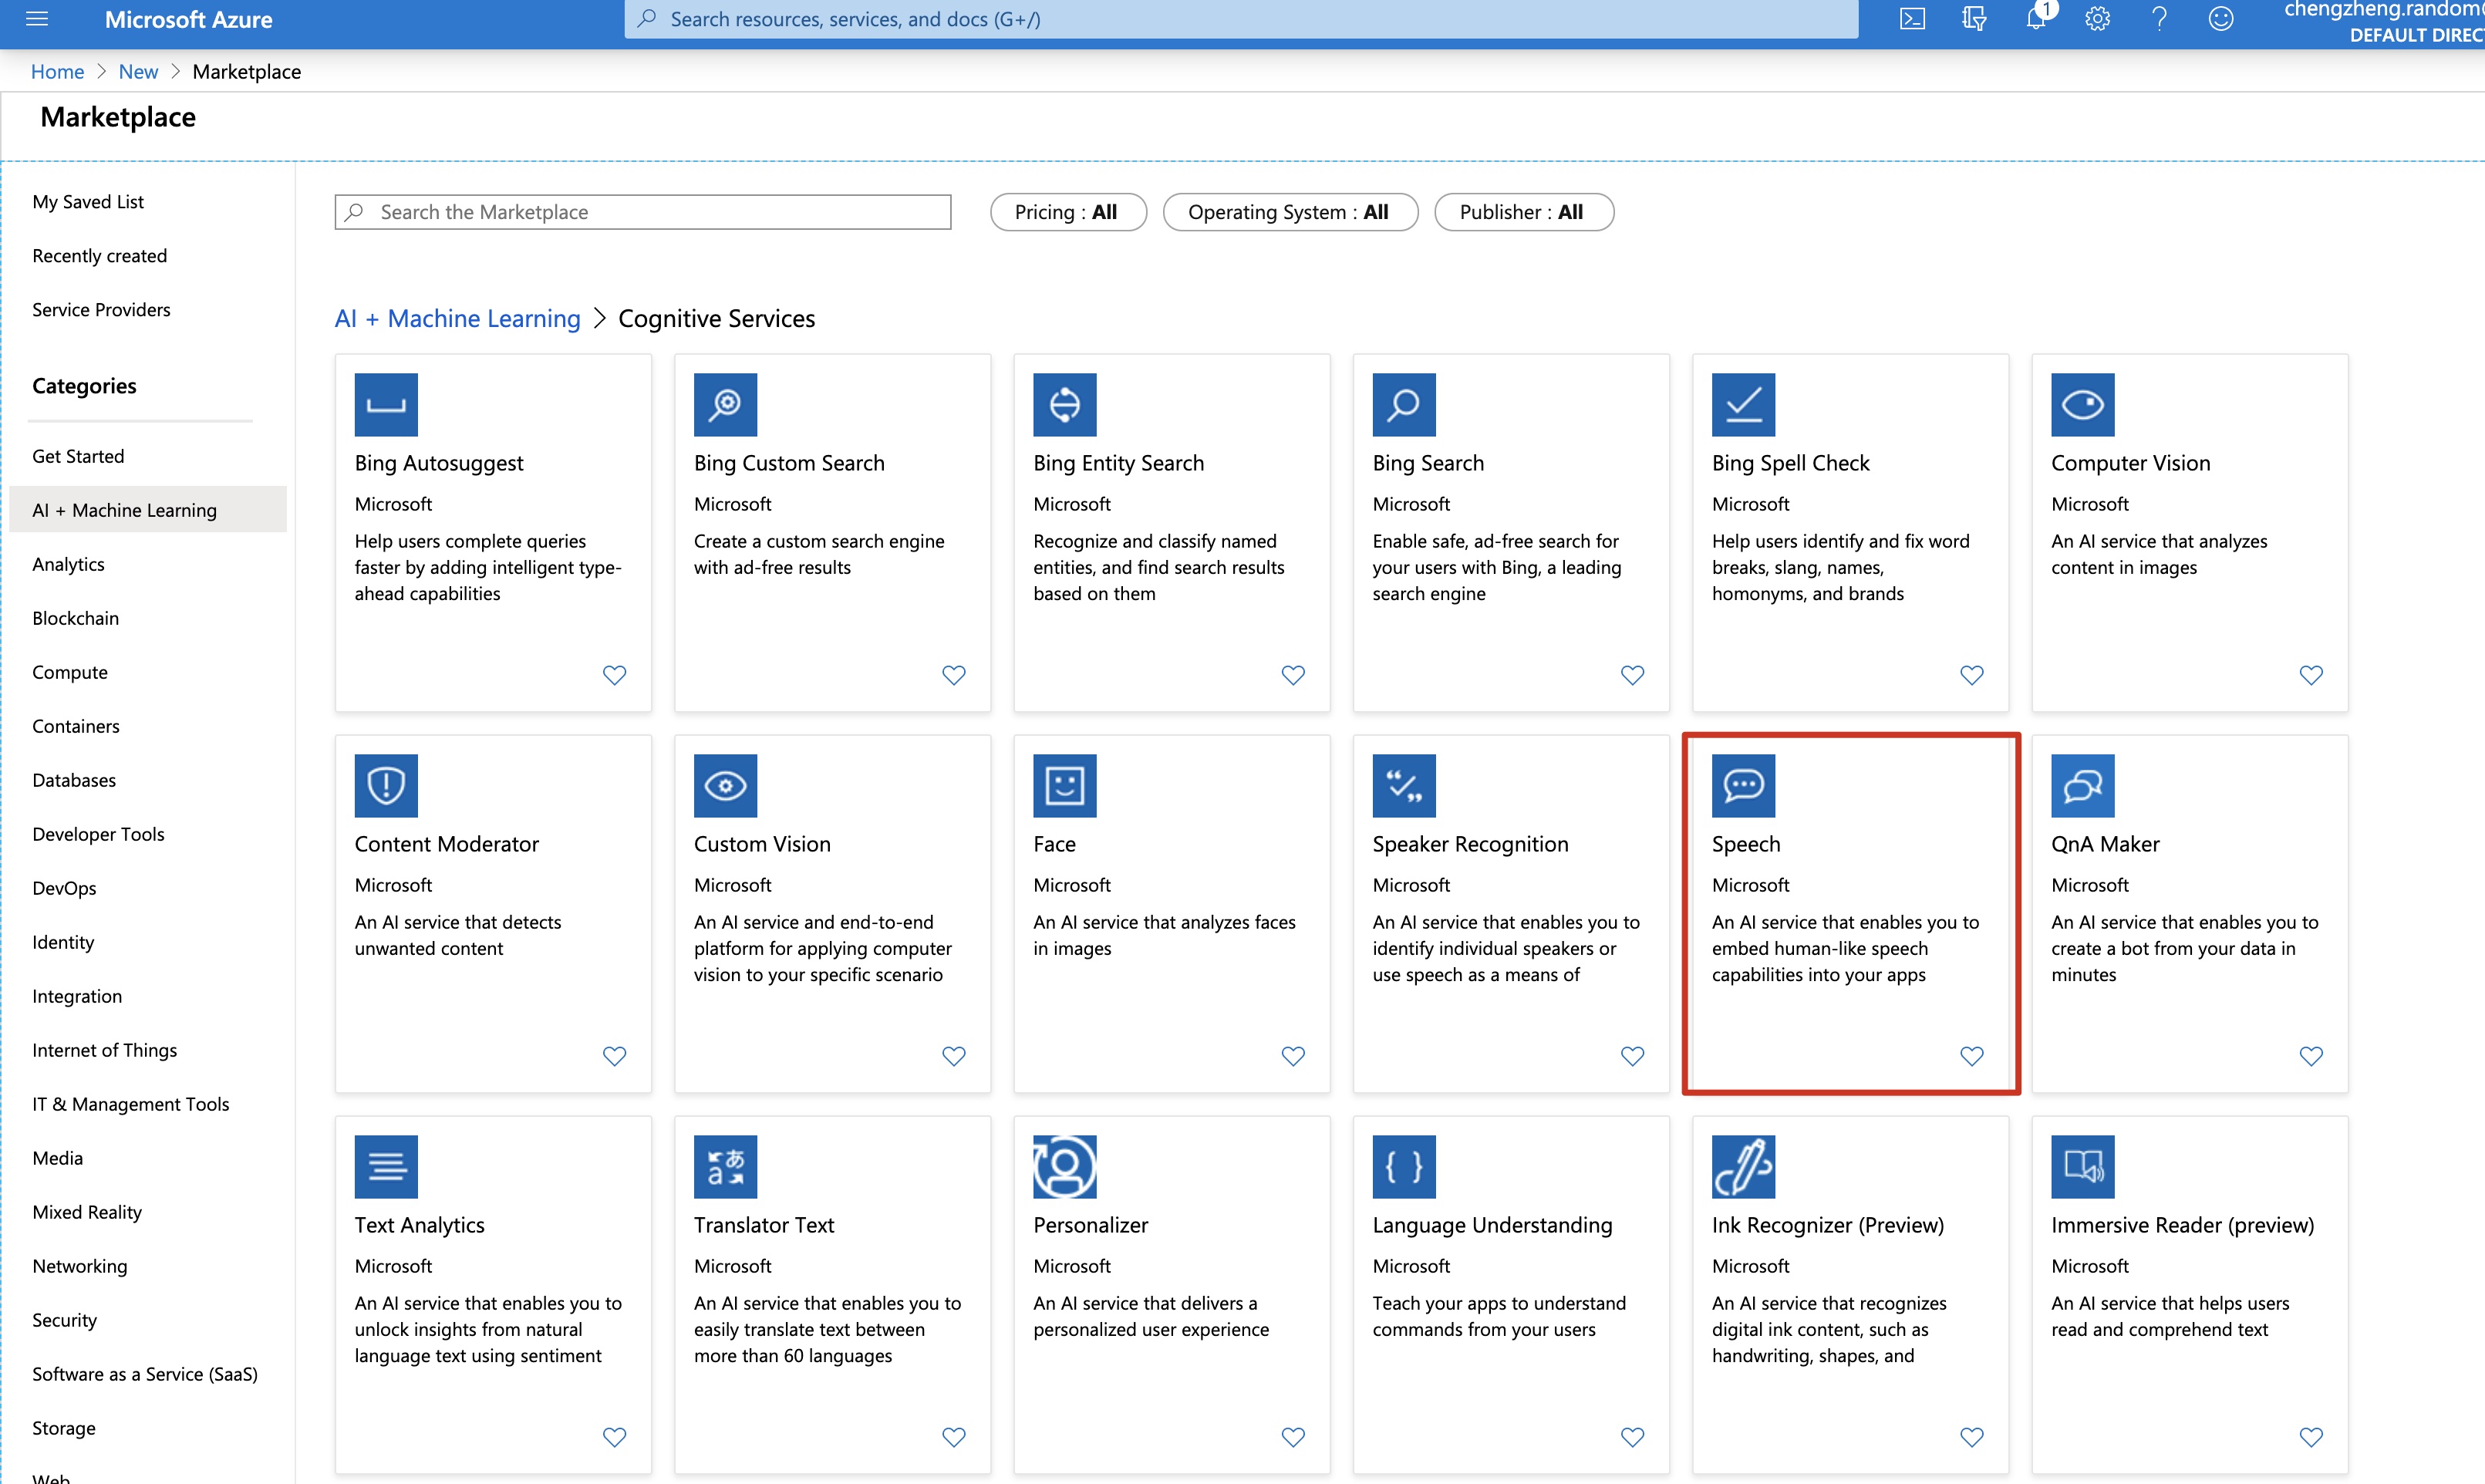
选择 create

接下来如何填写
- Name 随便写
- Subscription 随便选,有 Free Trial 就选 Free Trial,没有就选 Pay as you go 之类的
- Location 选 East US
因为后面的例子会以 eastus 为基础,如果你和我选的不一样,后面的例子就跑不通了。
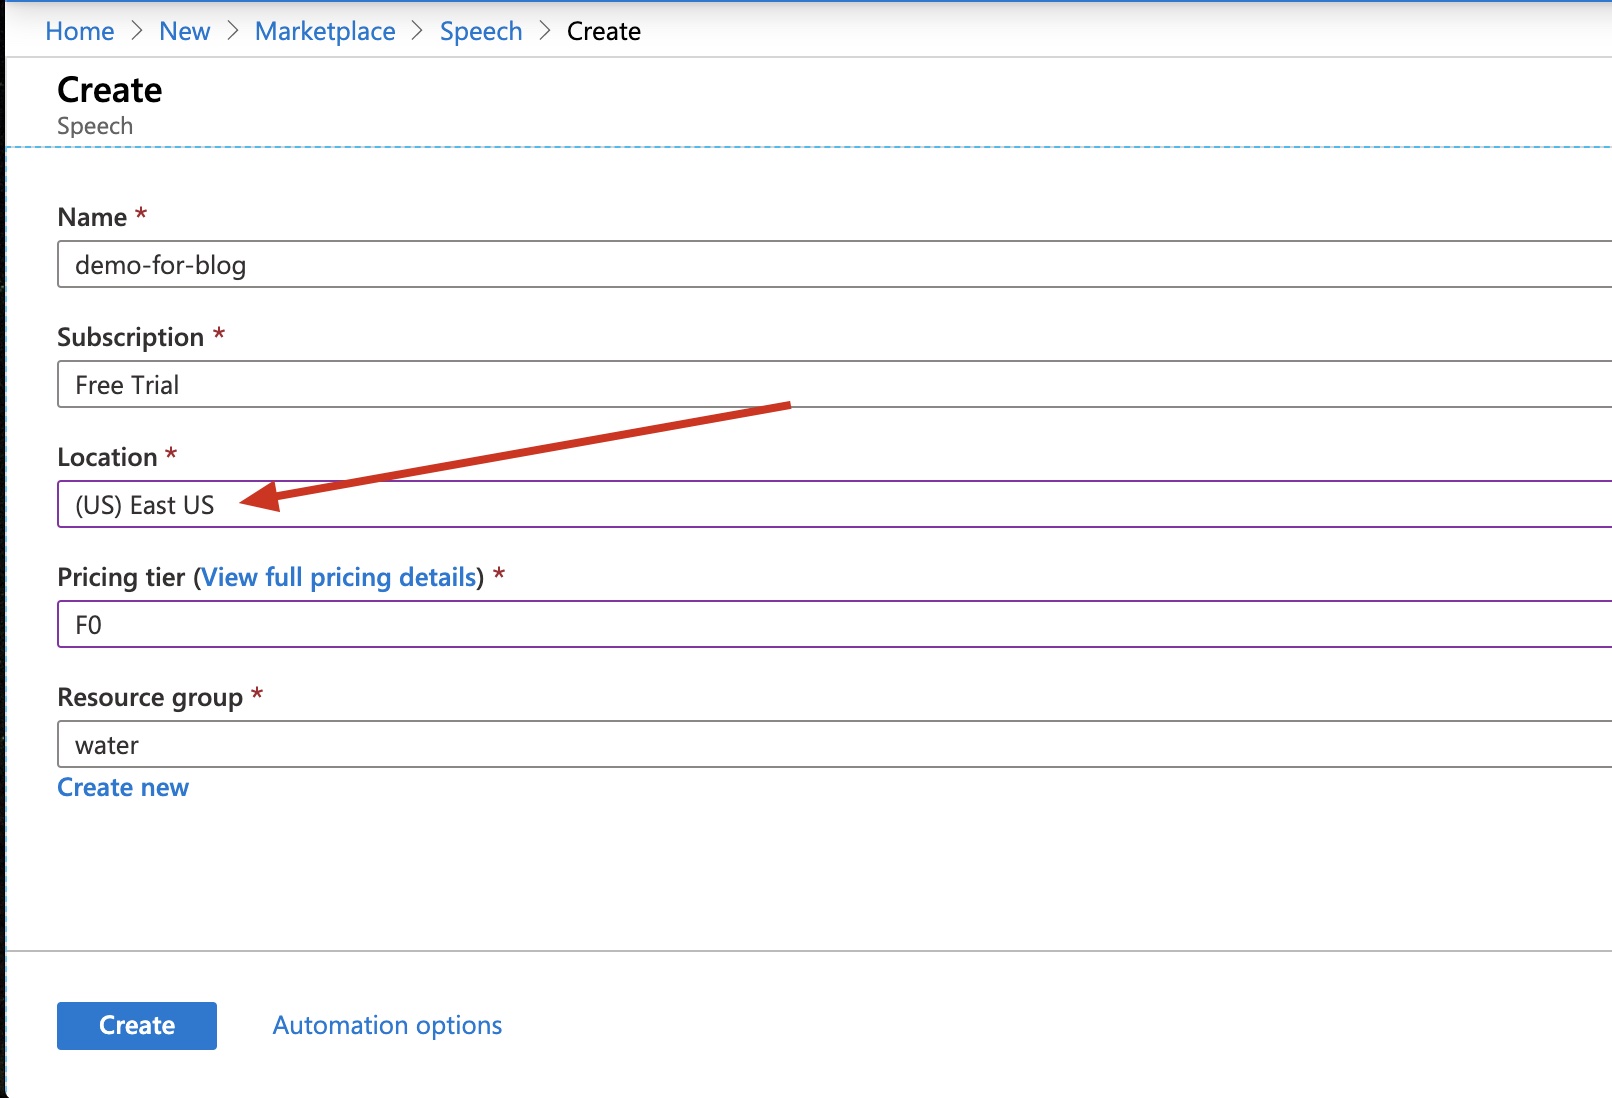
点击 Create,
稍等片刻就可以了:
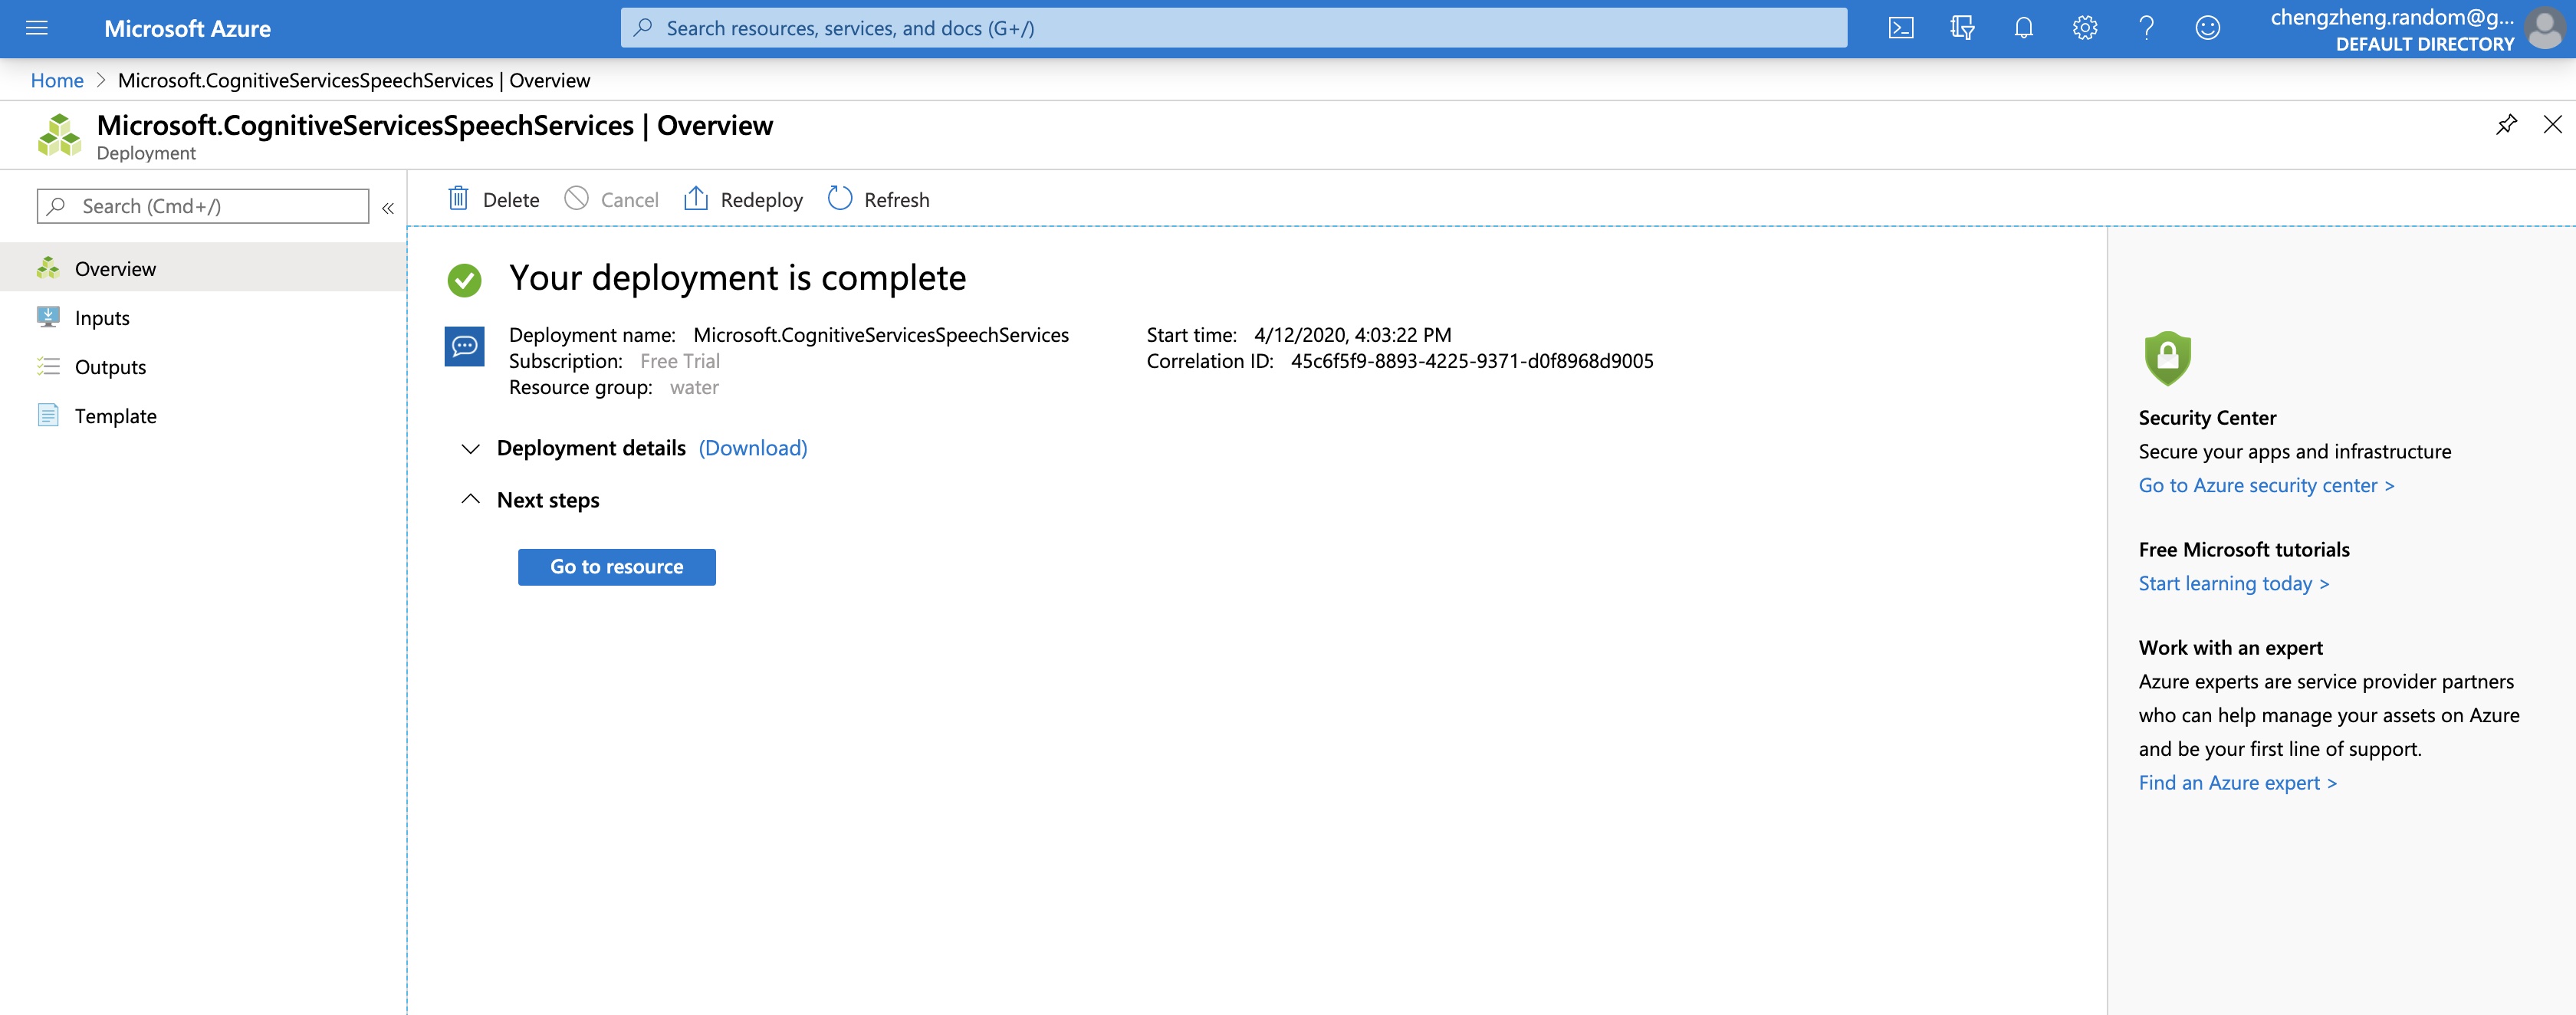
如果蓝色按钮 Go to resource 是灰色的,点击不了。
可以点一下右上角的 Refresh
点击 Go to resource 之后长这样:
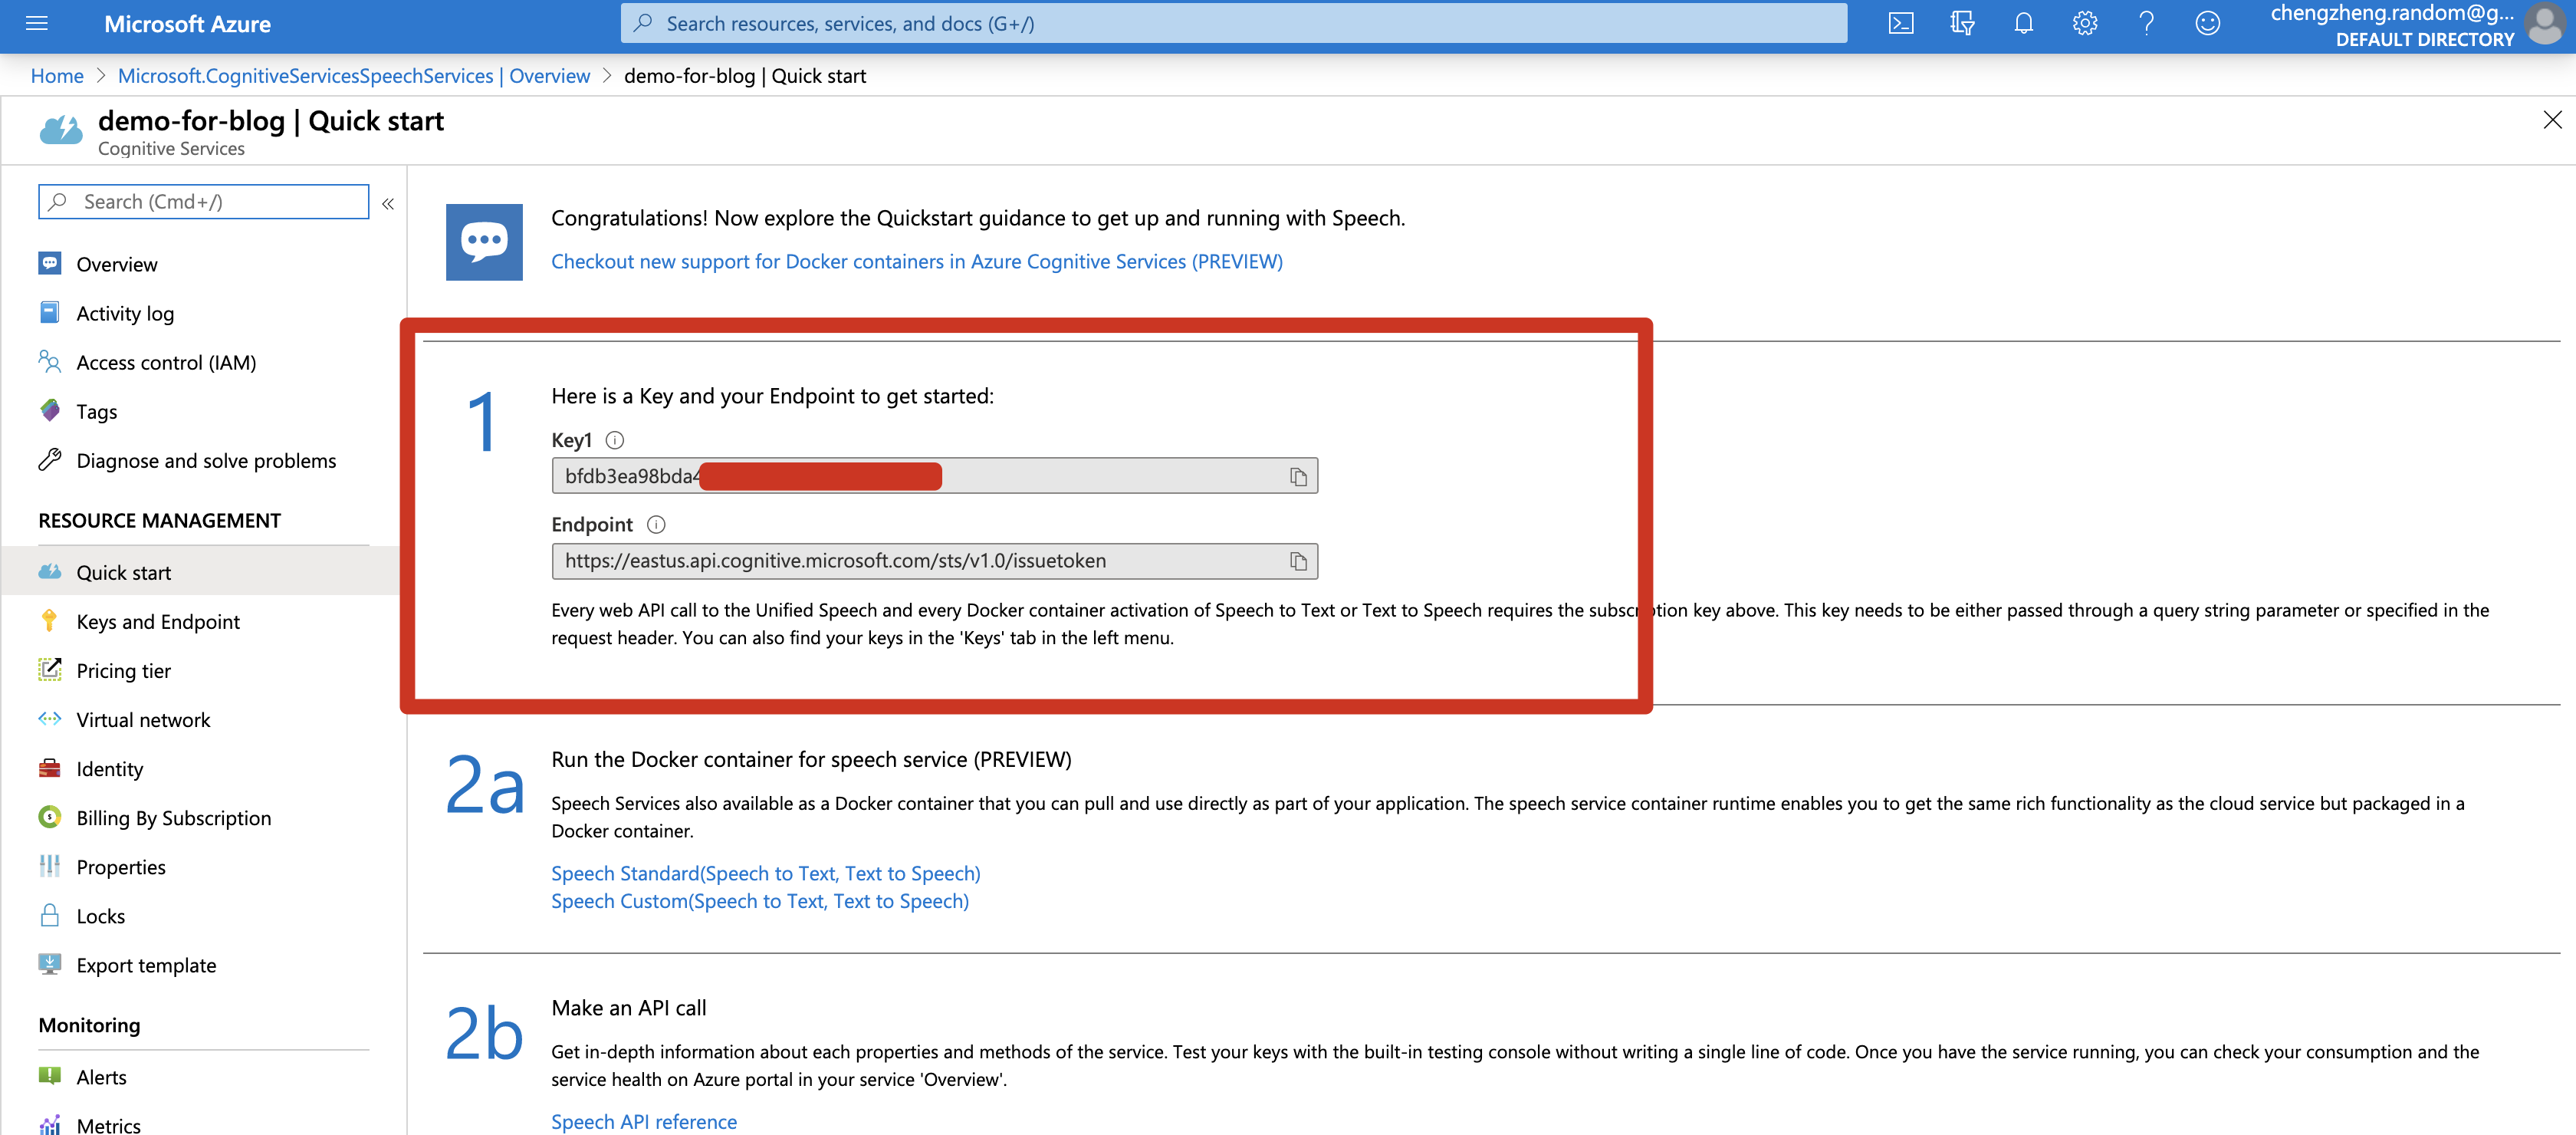
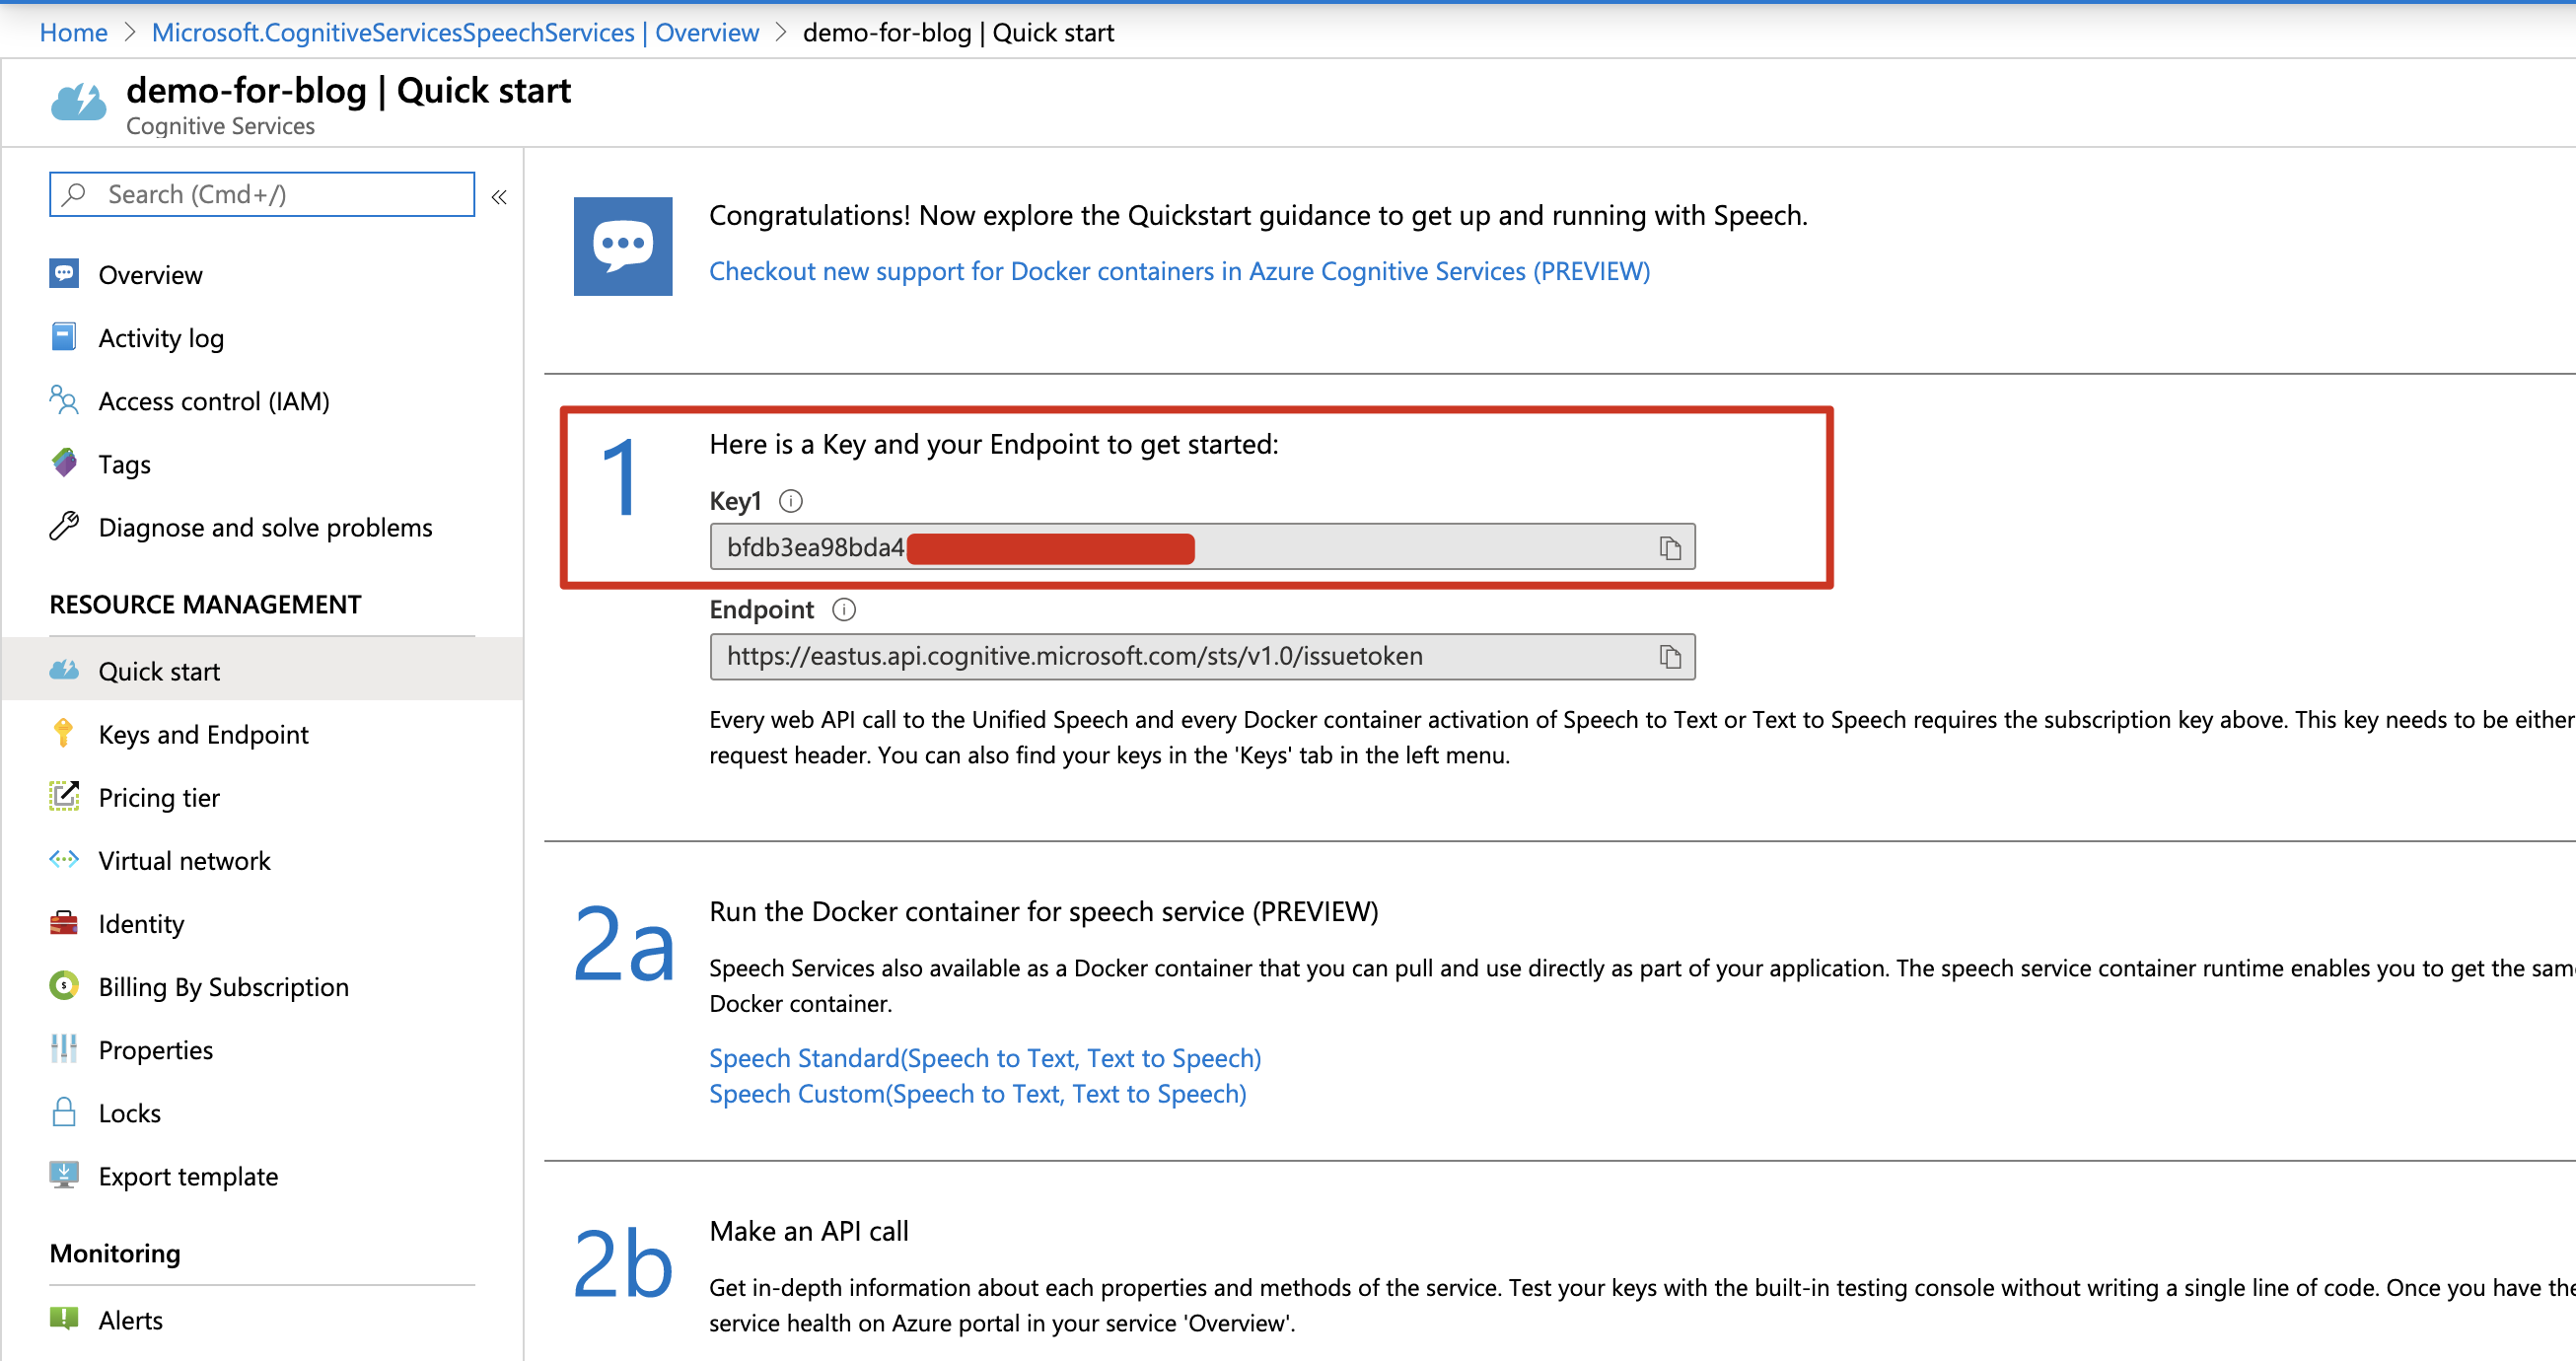
我们要的就是这个 Key1 和 Endpoint
好,必要的信息拿到了,接下来我们用 curl
第二步:使用 curl 以及 Swagger
如果只给出 curl 命令会让人觉得莫名其妙,这些命令是哪里来的?
所以我们配合官方文档来一步步解释
重要概念1:身份
https://docs.microsoft.com/en-us/azure/cognitive-services/authentication
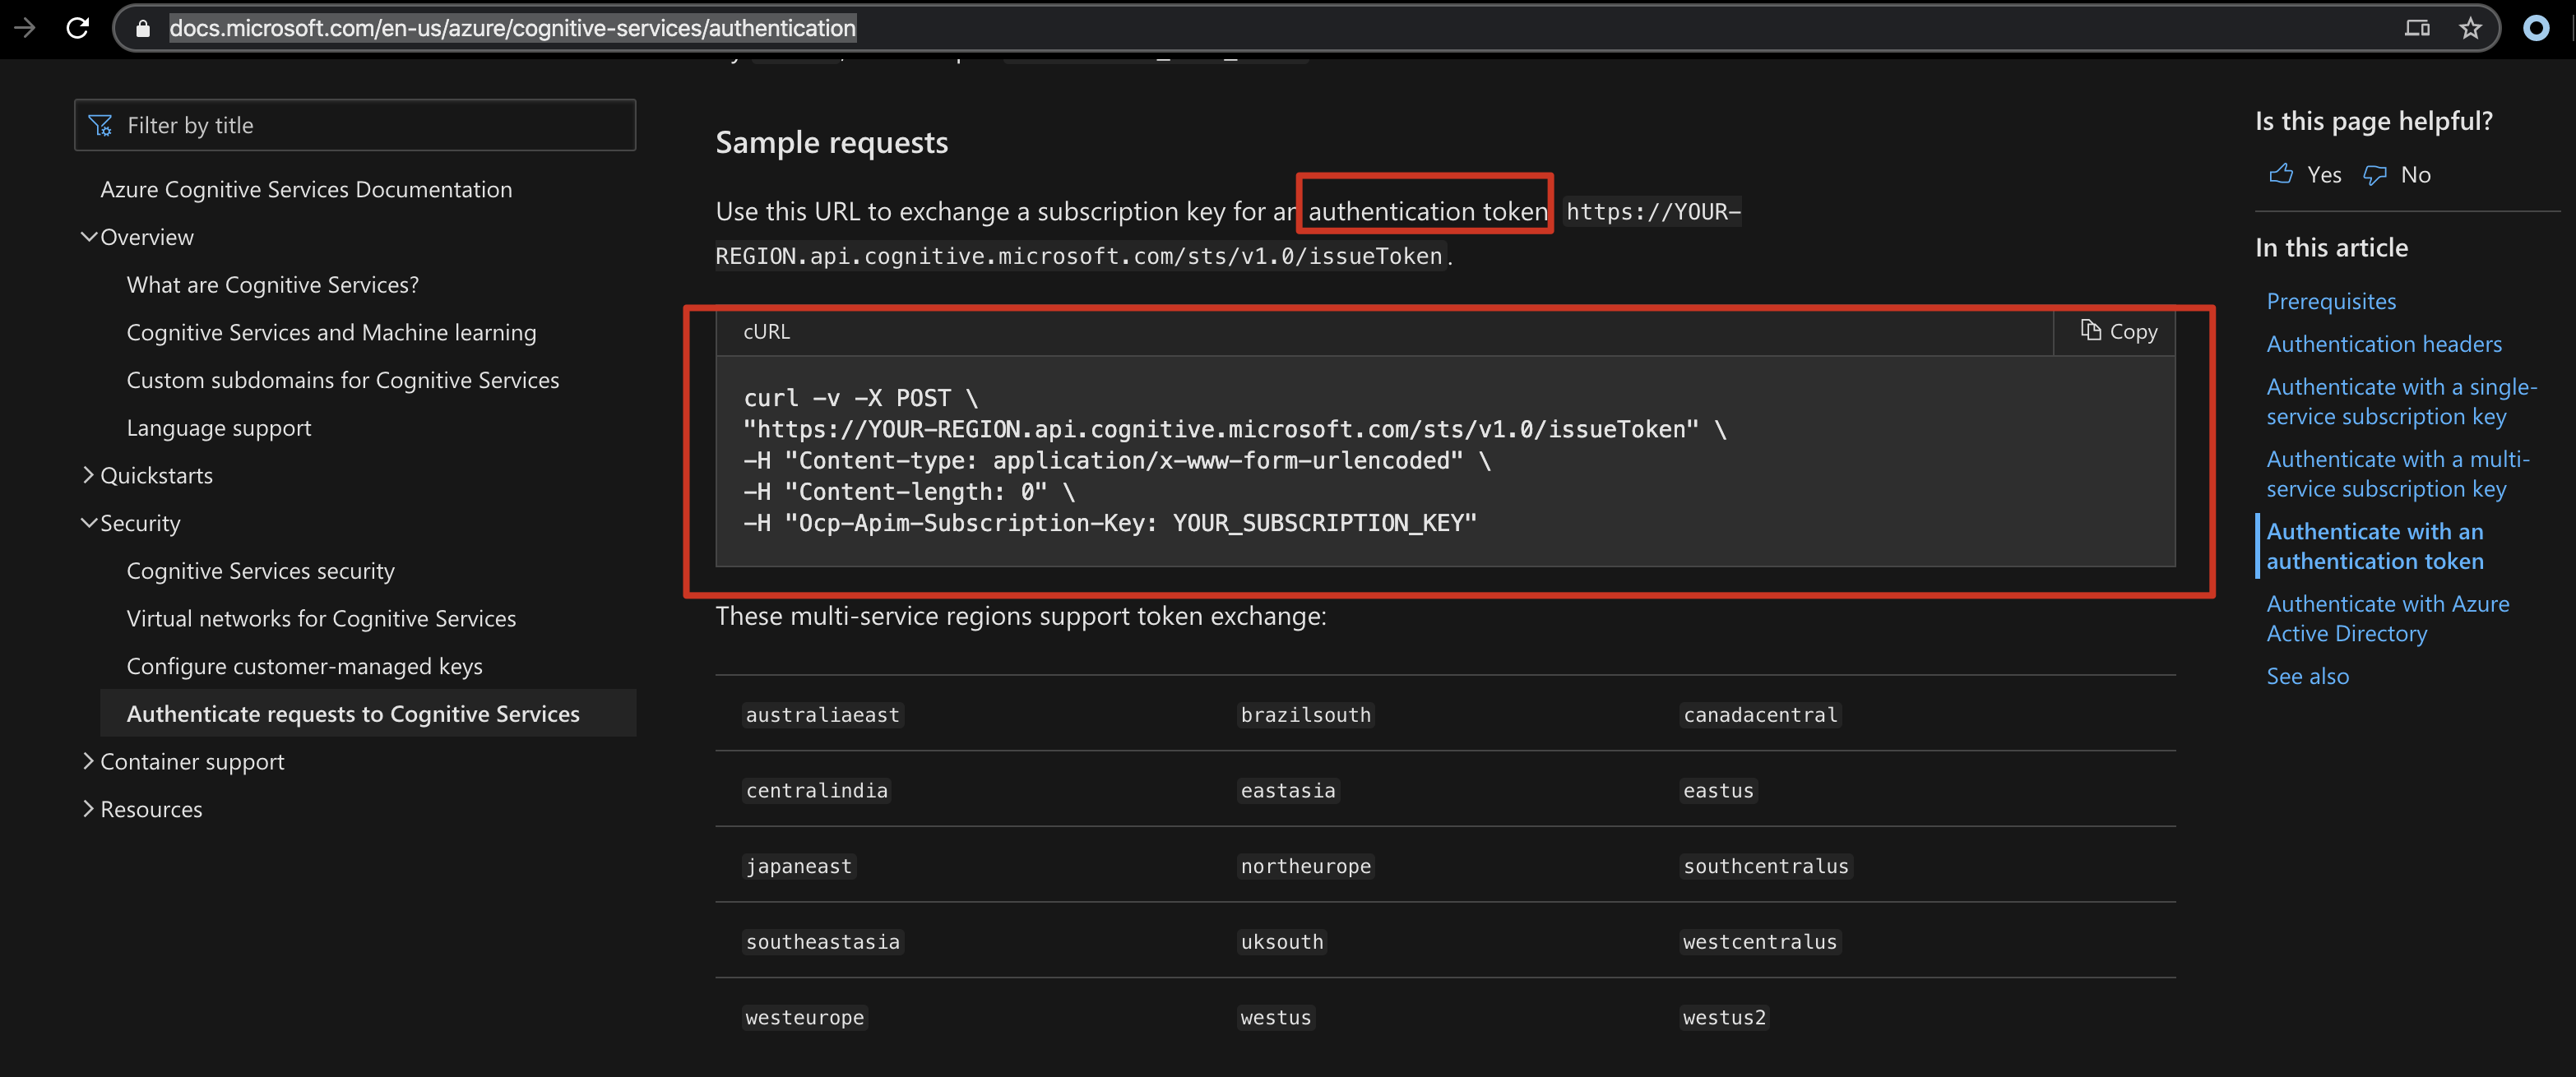
发 HTTP 请求当然需要身份认证了,为了身份认证需要 authentication token
为了获取 authentication token
我们跑一下这条命令:
curl -X POST \
"https://eastus.api.cognitive.microsoft.com/sts/v1.0/issuetoken?scope=speechservicesmanagement" \
-H "Content-type: application/x-www-form-urlencoded" \
-H "Content-length: 0" \
-H "Ocp-Apim-Subscription-Key: [填入你的 Key1]"
注意,Ocp-Apim-Subscription-Key 的值需要换成你自己的 Key1 (前文提到过)
比如这样:
curl -X POST \
"https://eastus.api.cognitive.microsoft.com/sts/v1.0/issuetoken?scope=speechservicesmanagement" \
-H "Content-type: application/x-www-form-urlencoded" \
-H "Content-length: 0" \
-H "Ocp-Apim-Subscription-Key: 75ba067f9f72427baxxxc32e59p63xxx"
运行结果:

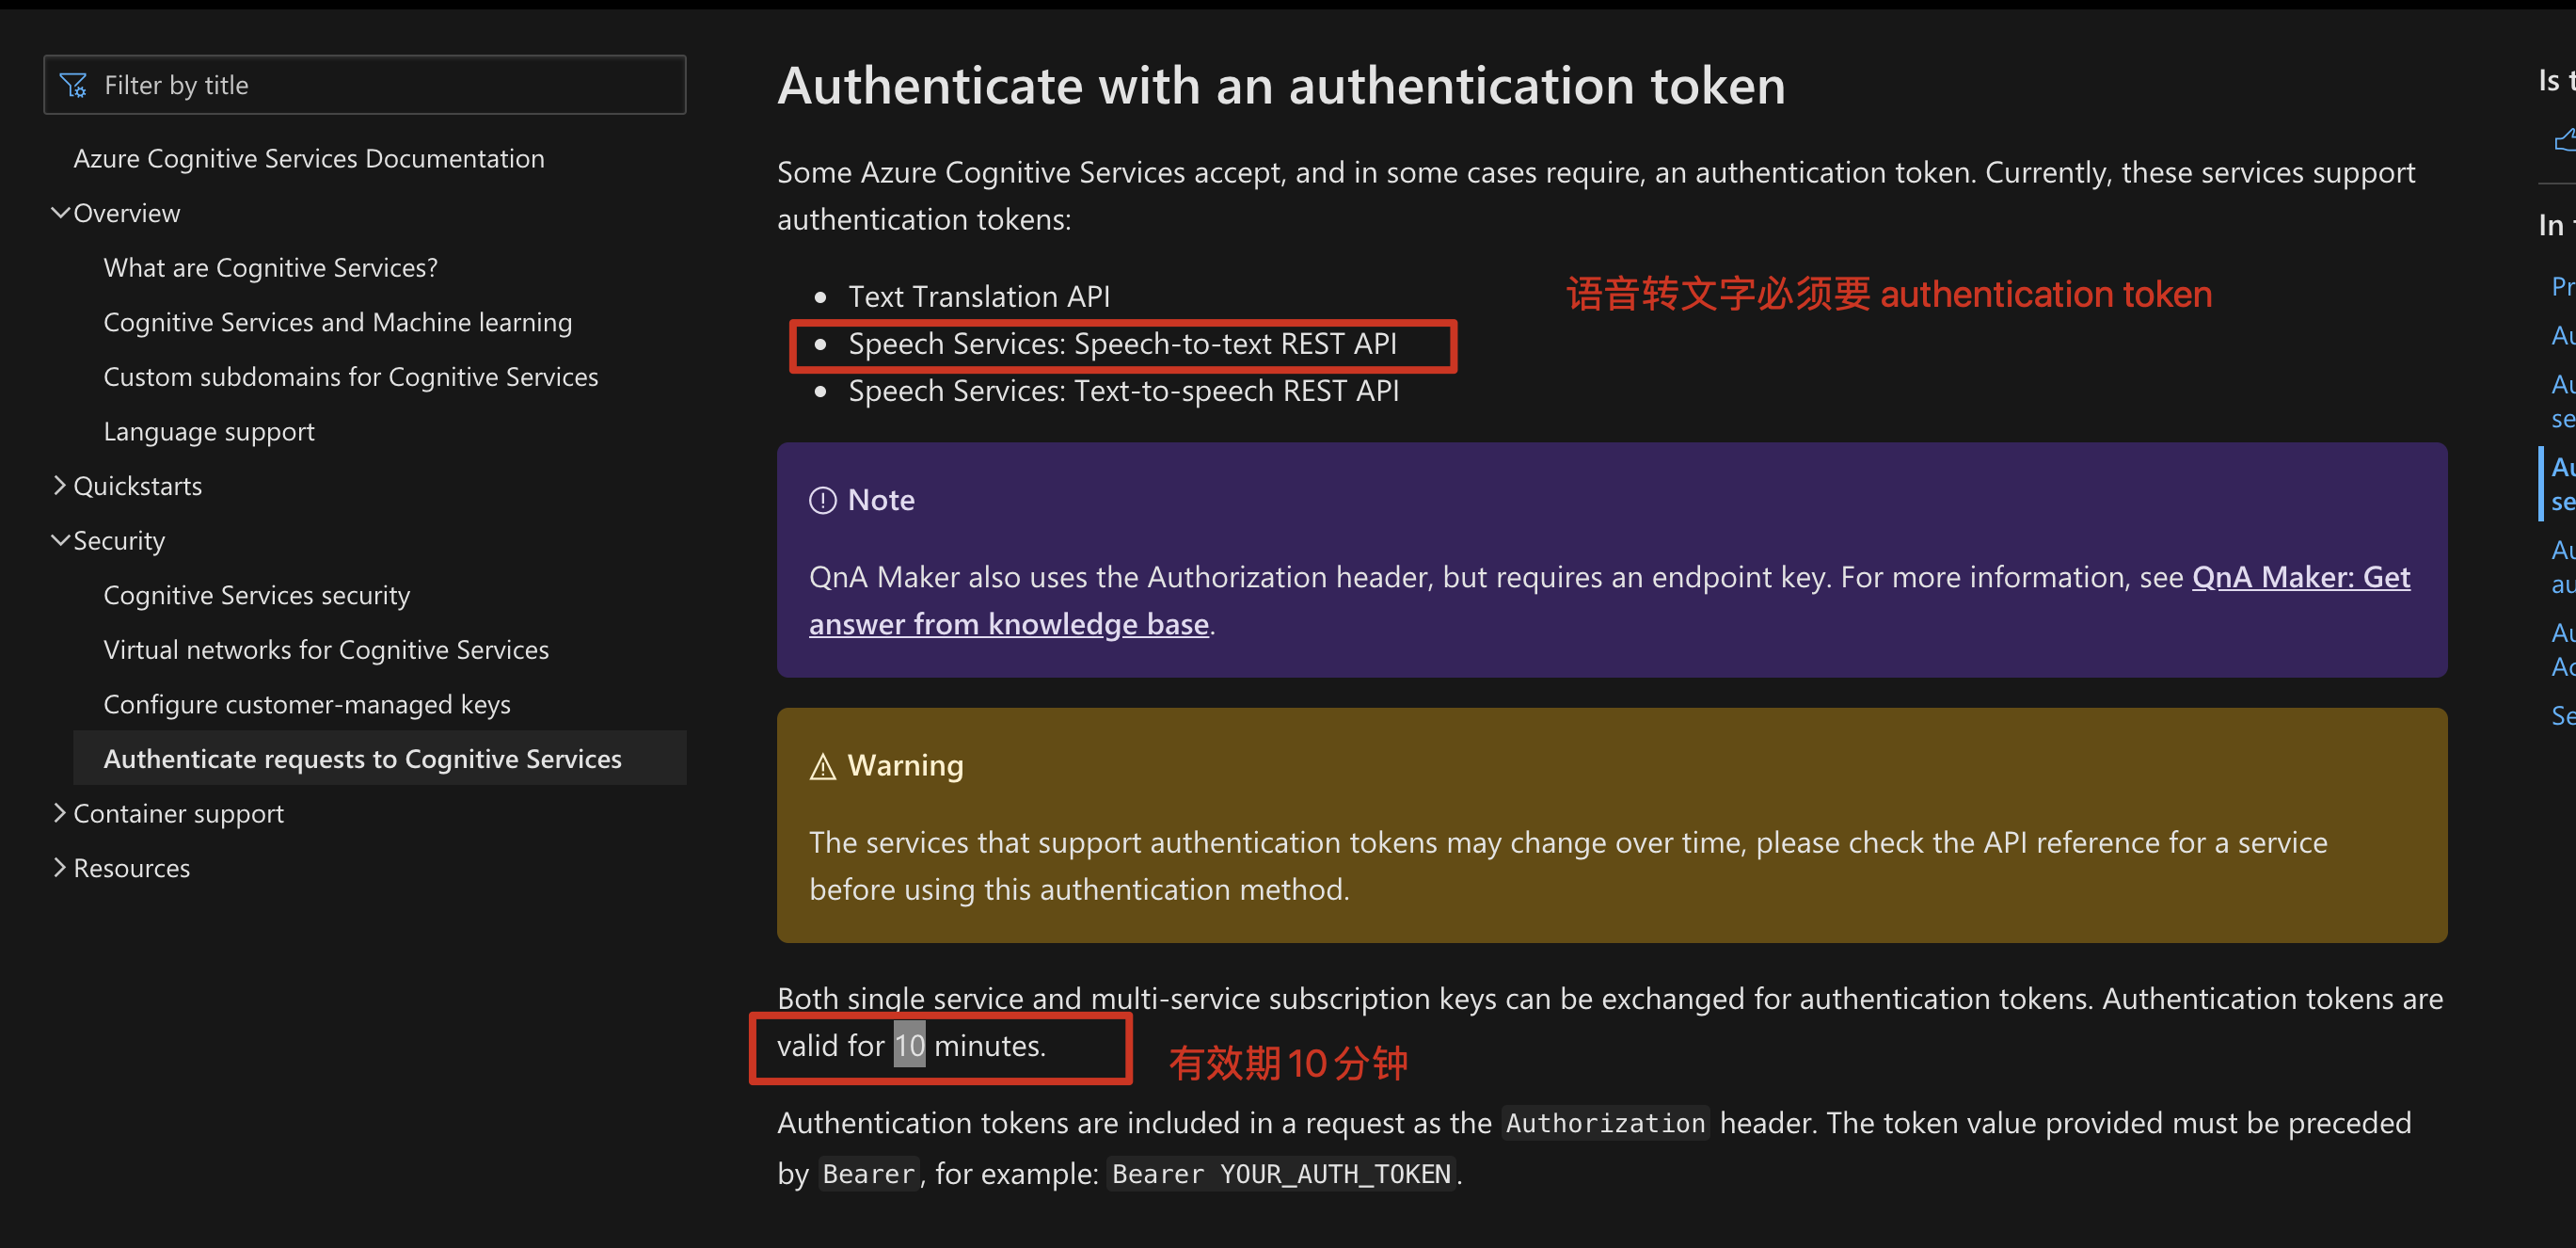
看下下面的文档:
- 这个 token 是必须要的
- 有效期10分钟
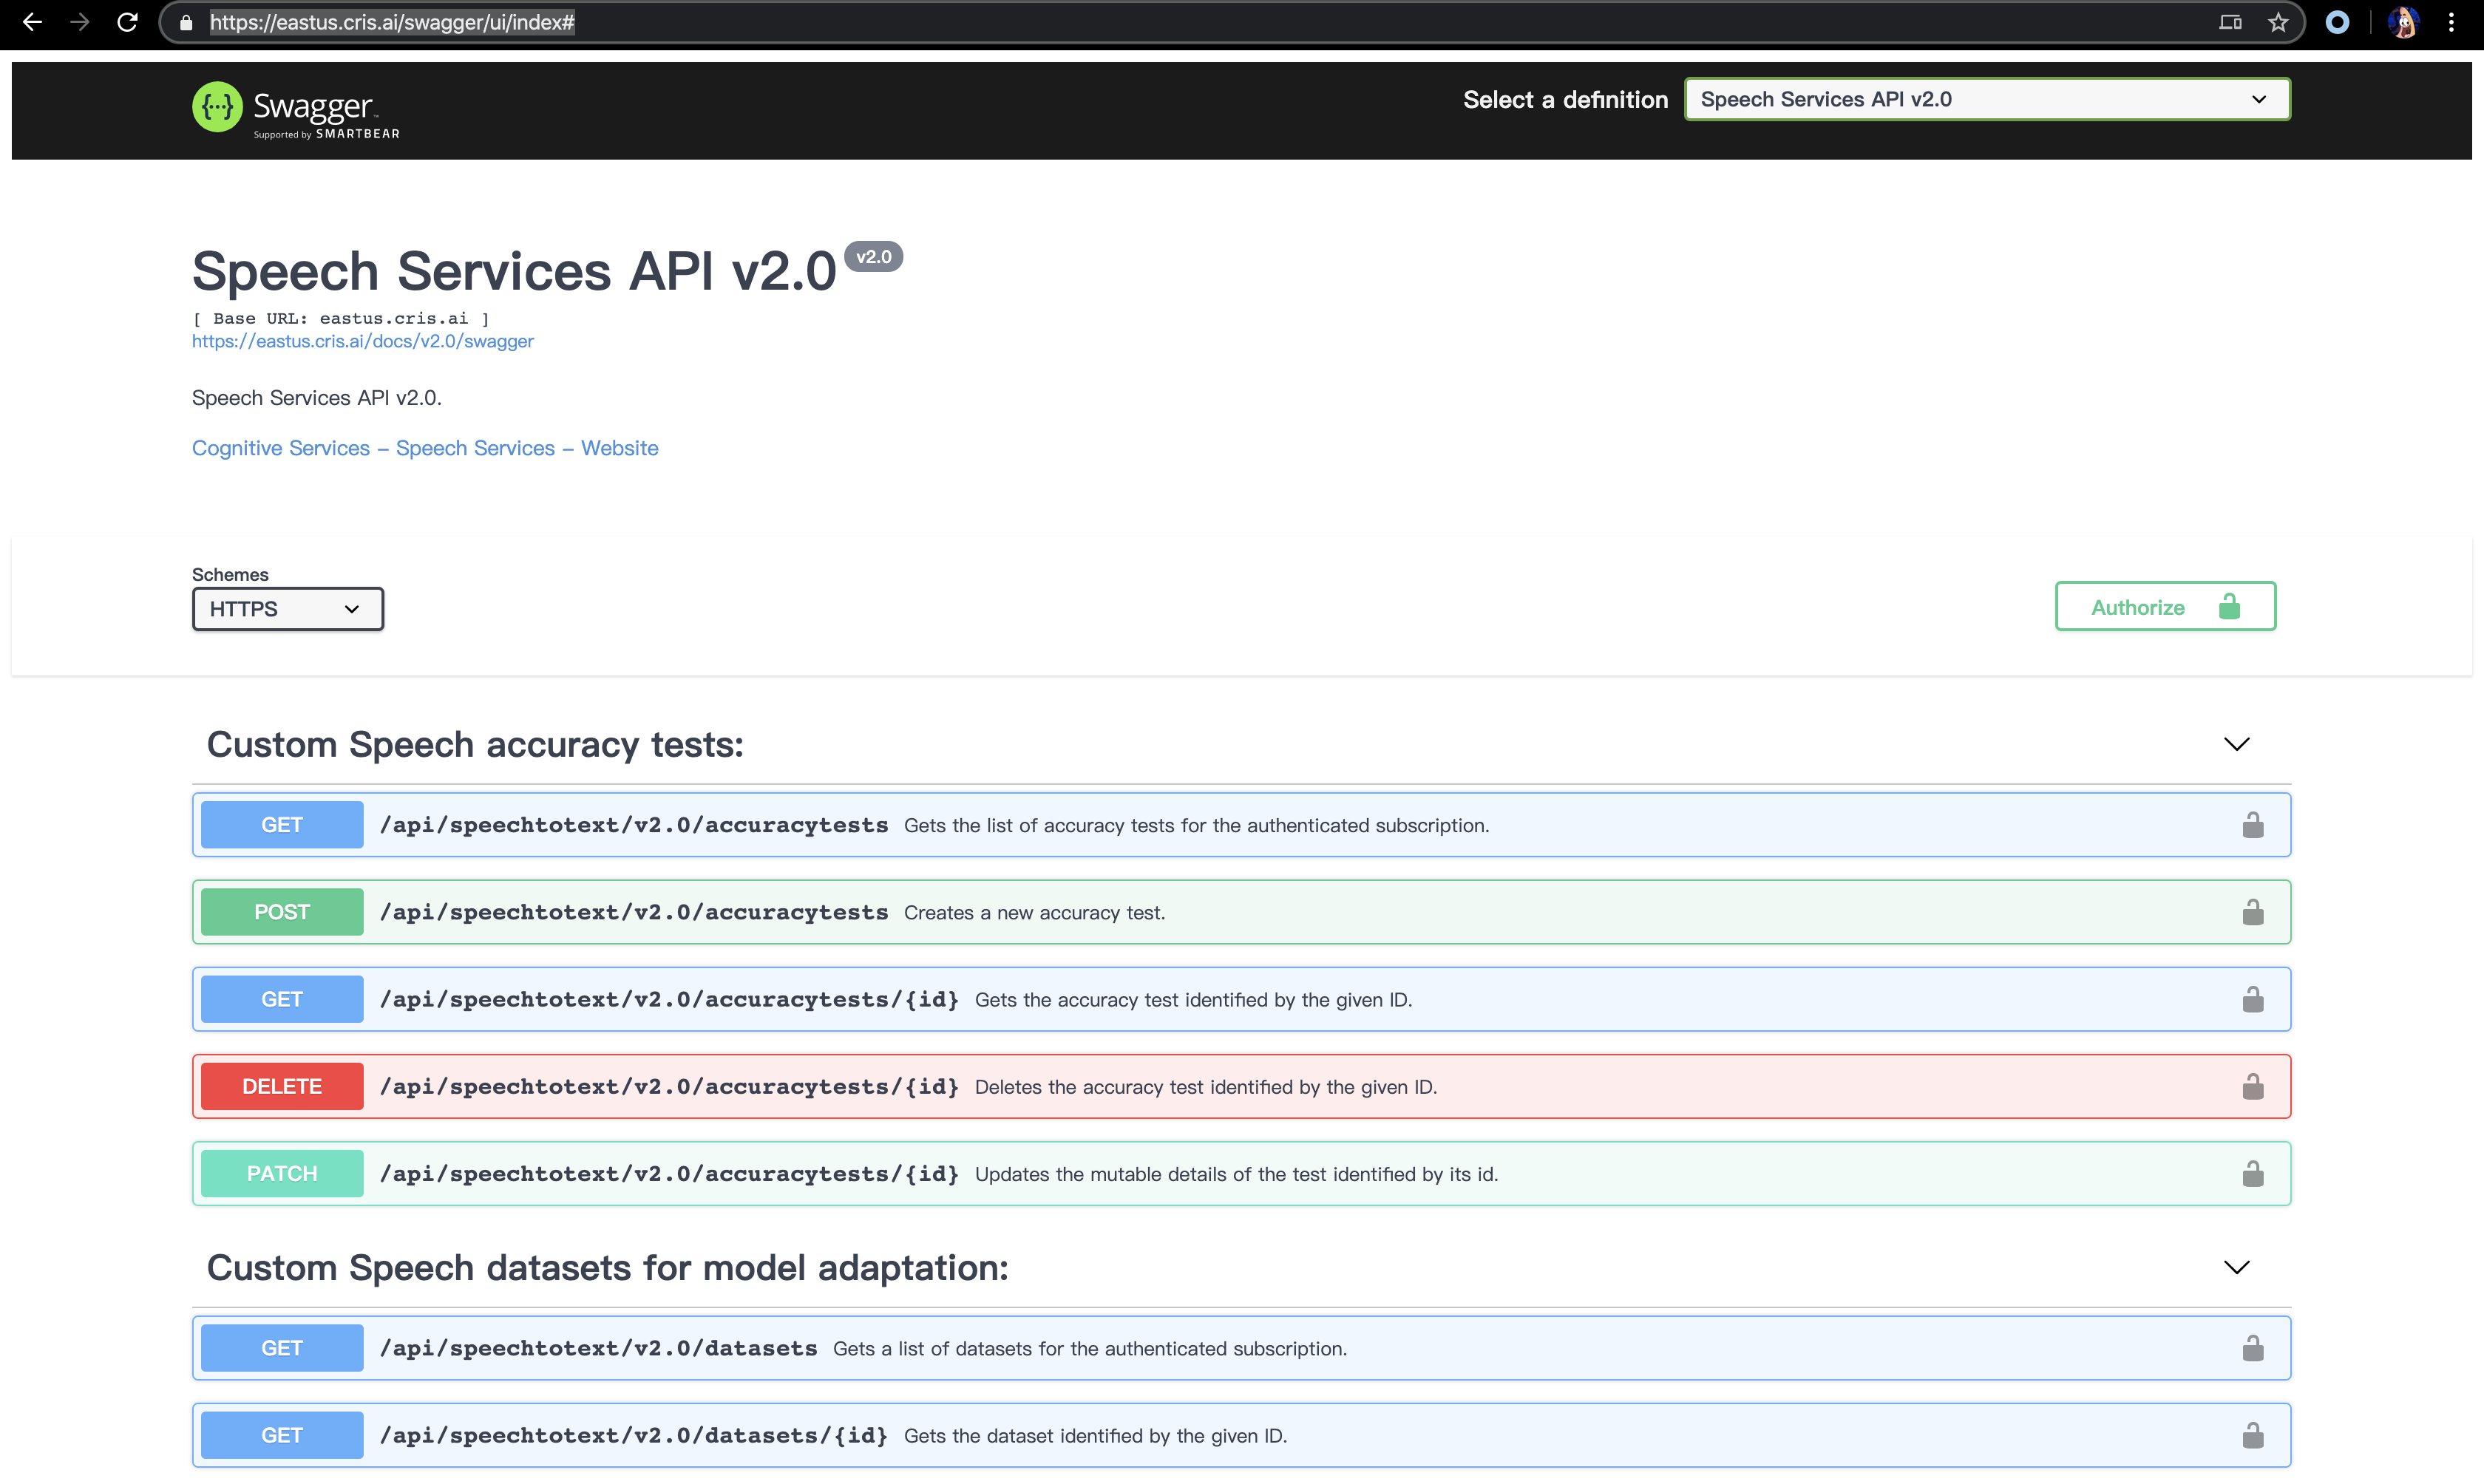
第三步,使用官方的 Swagger
访问:https://eastus.cris.ai/swagger/ui/index#
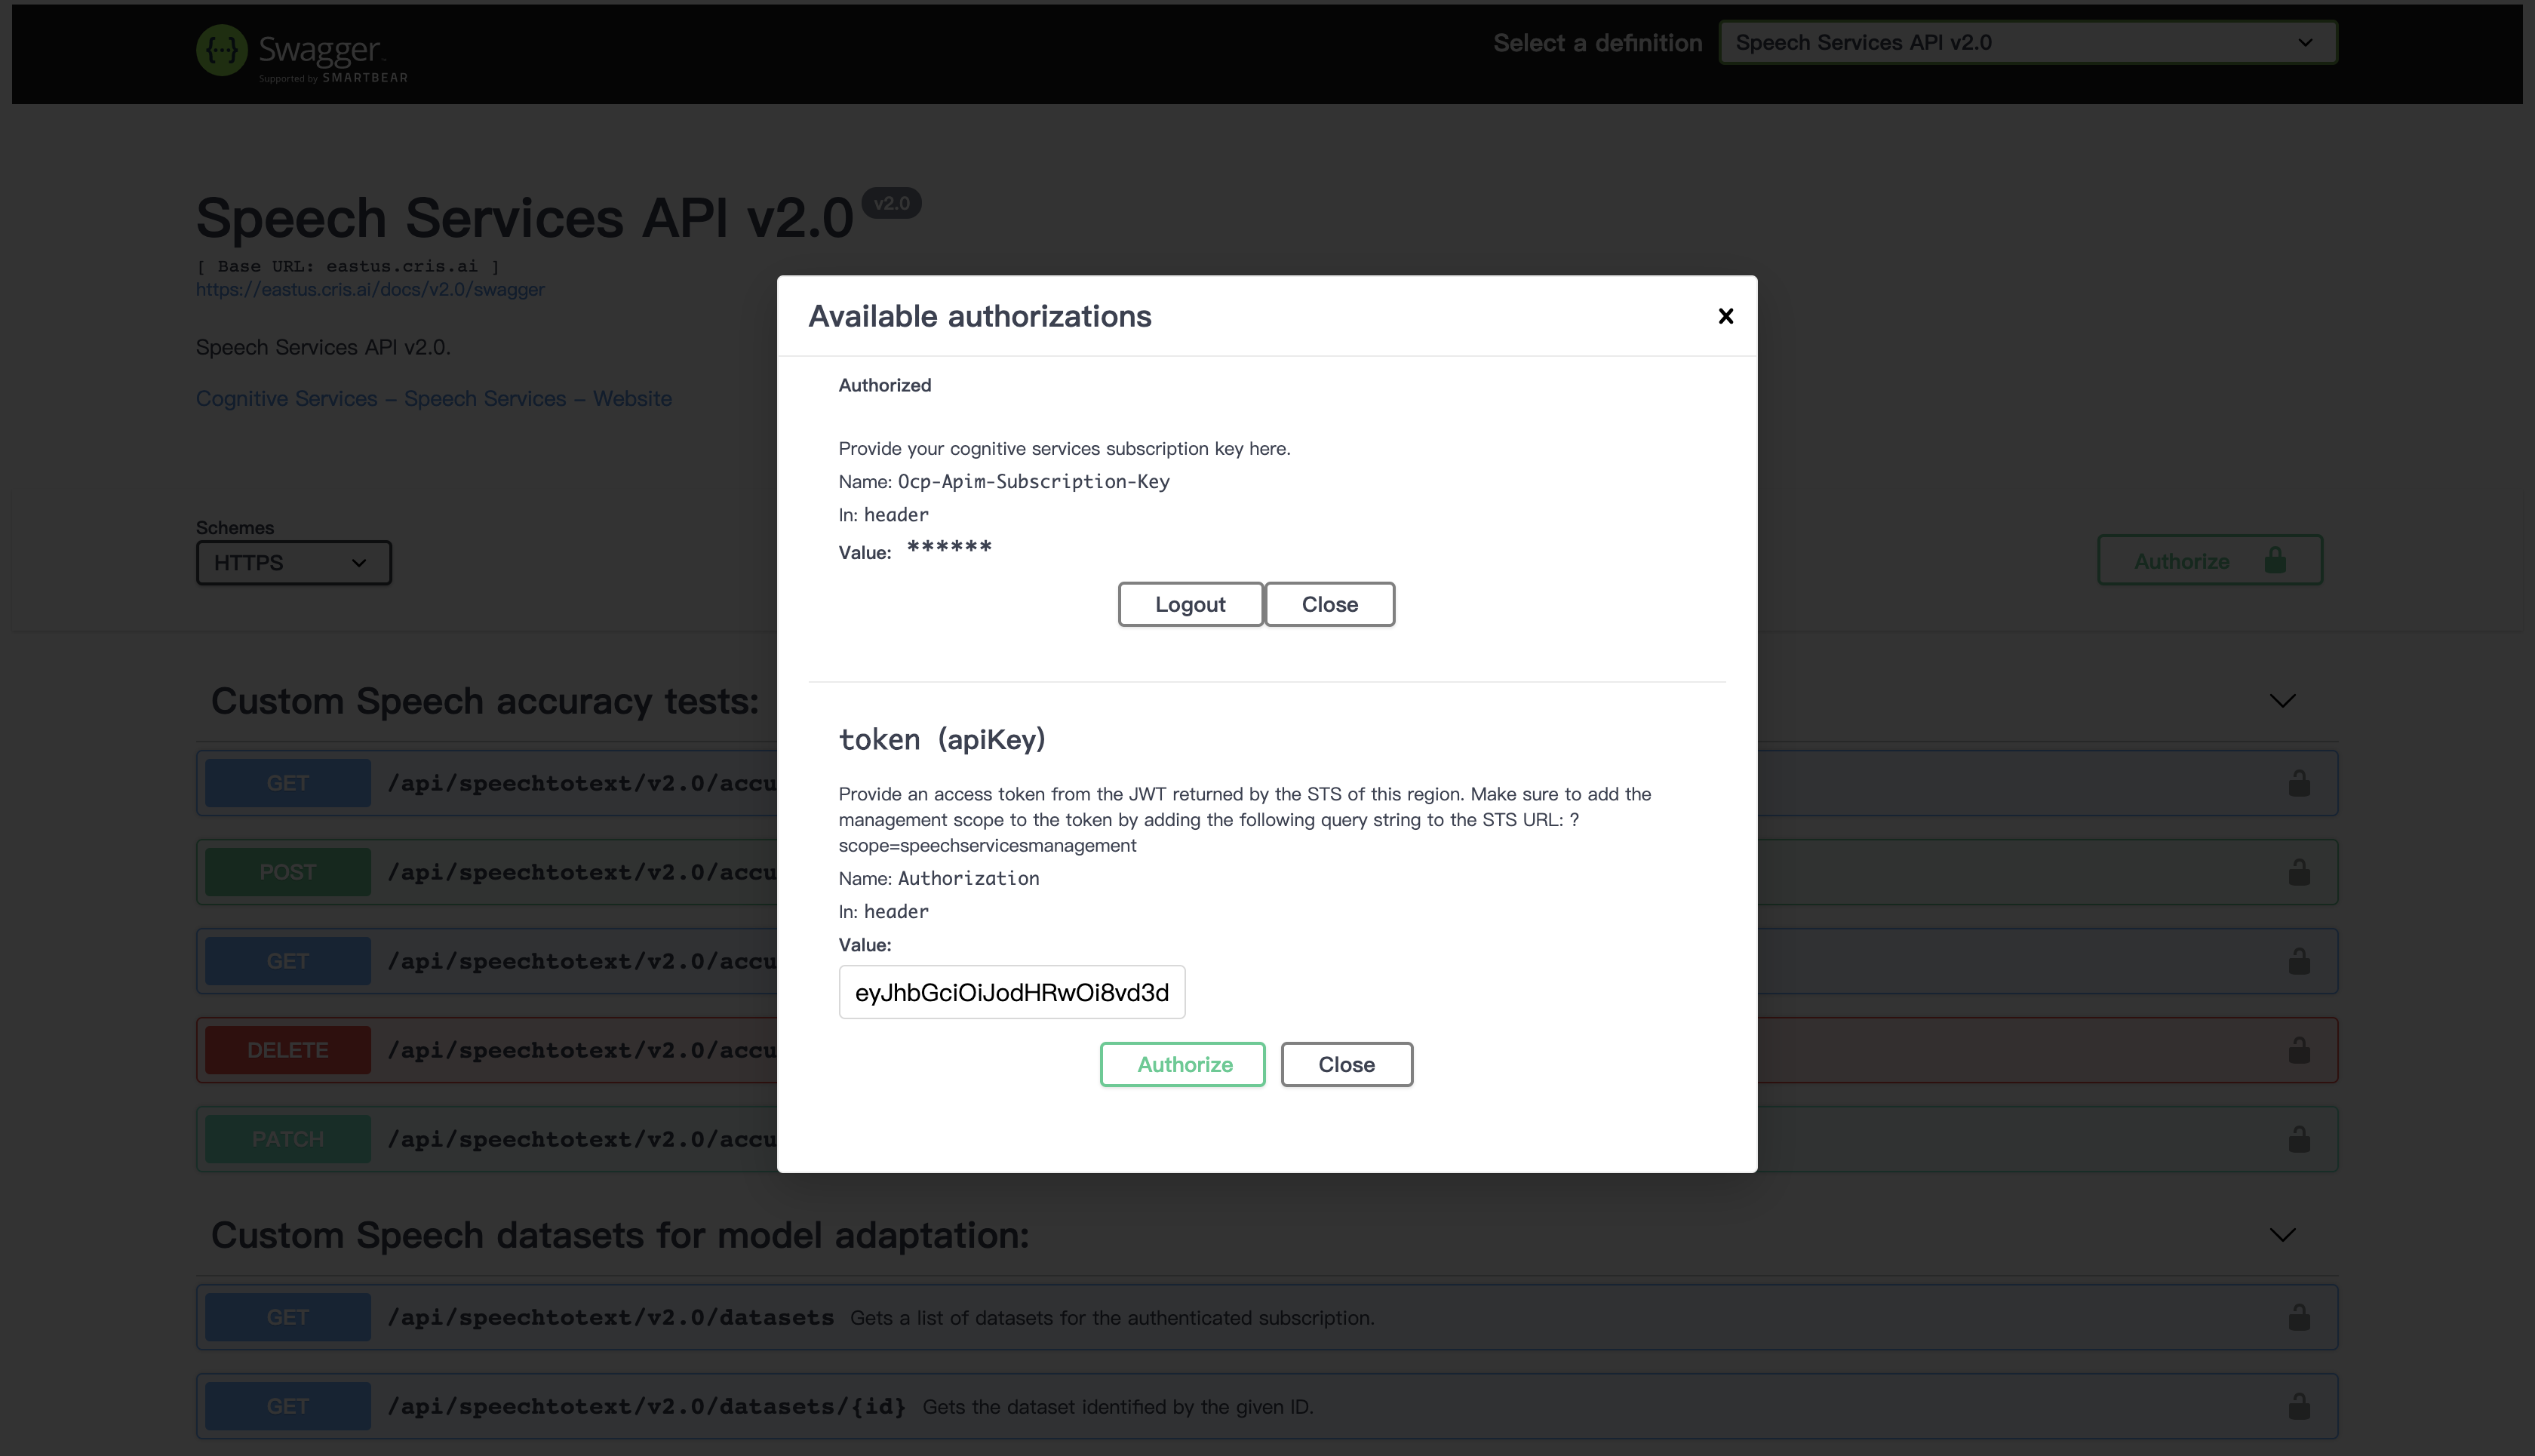
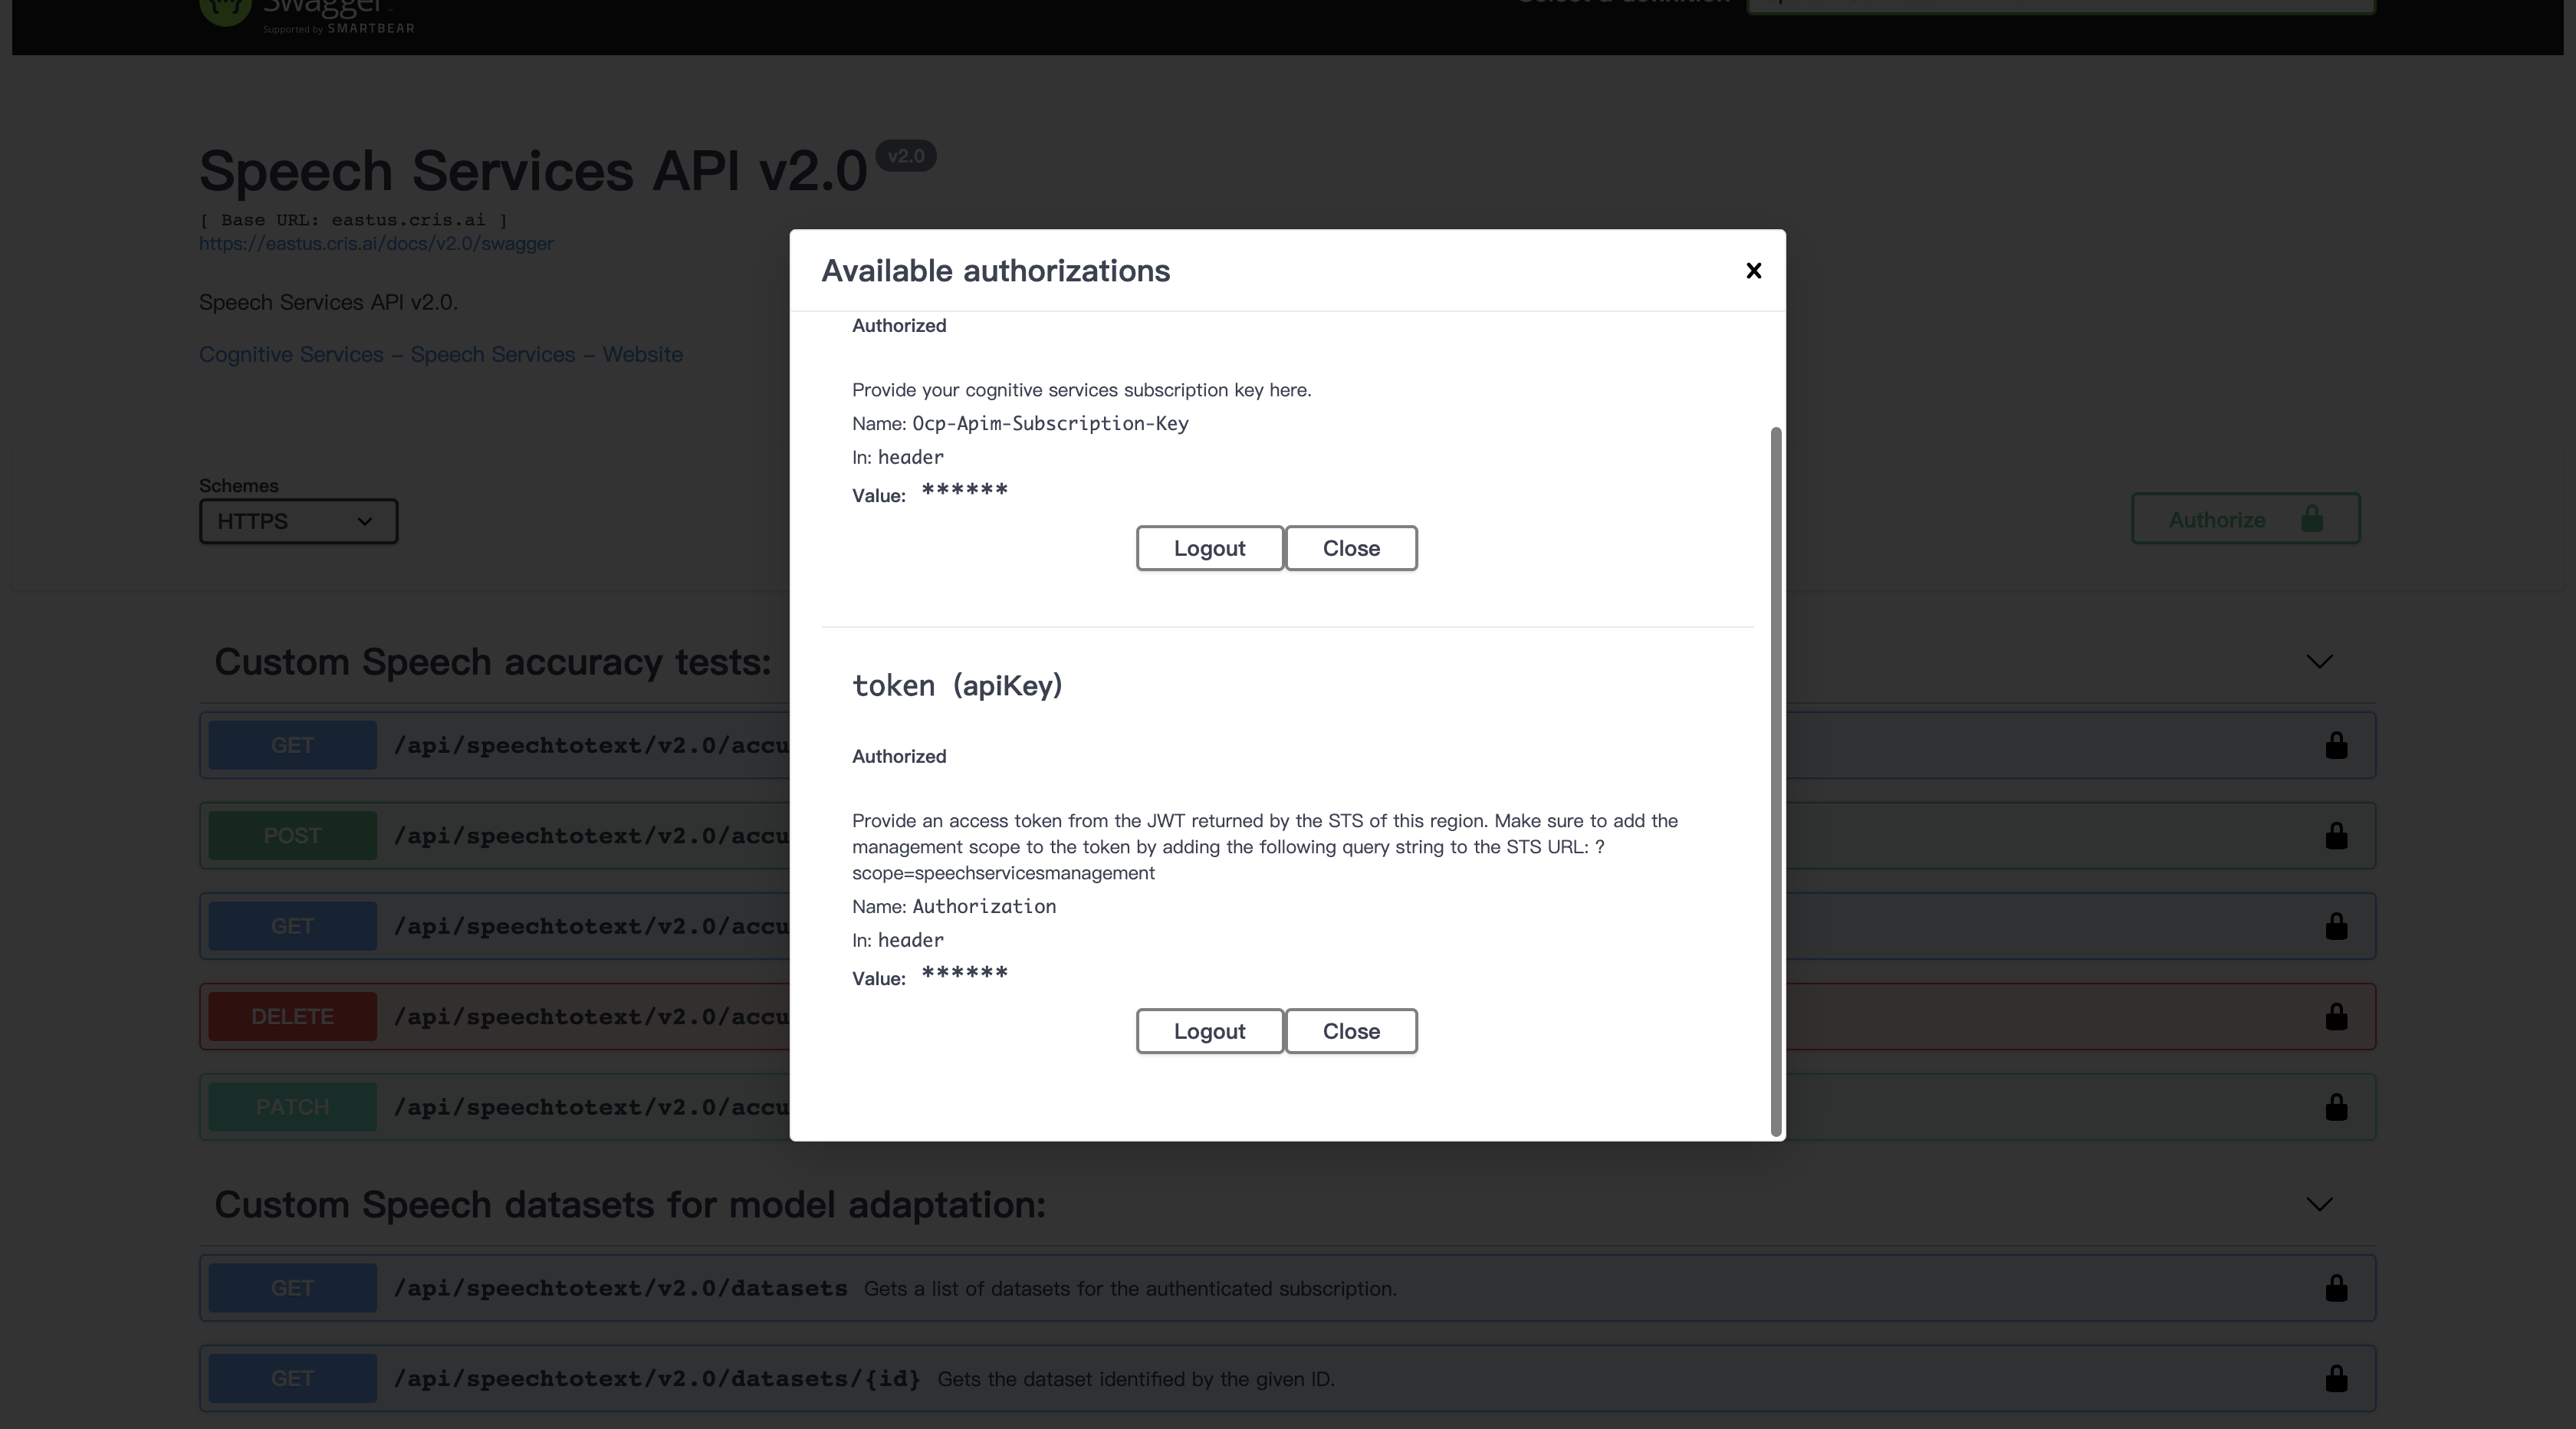
填入身份验证所必须的信息:
点击右侧的 Authorize 按钮
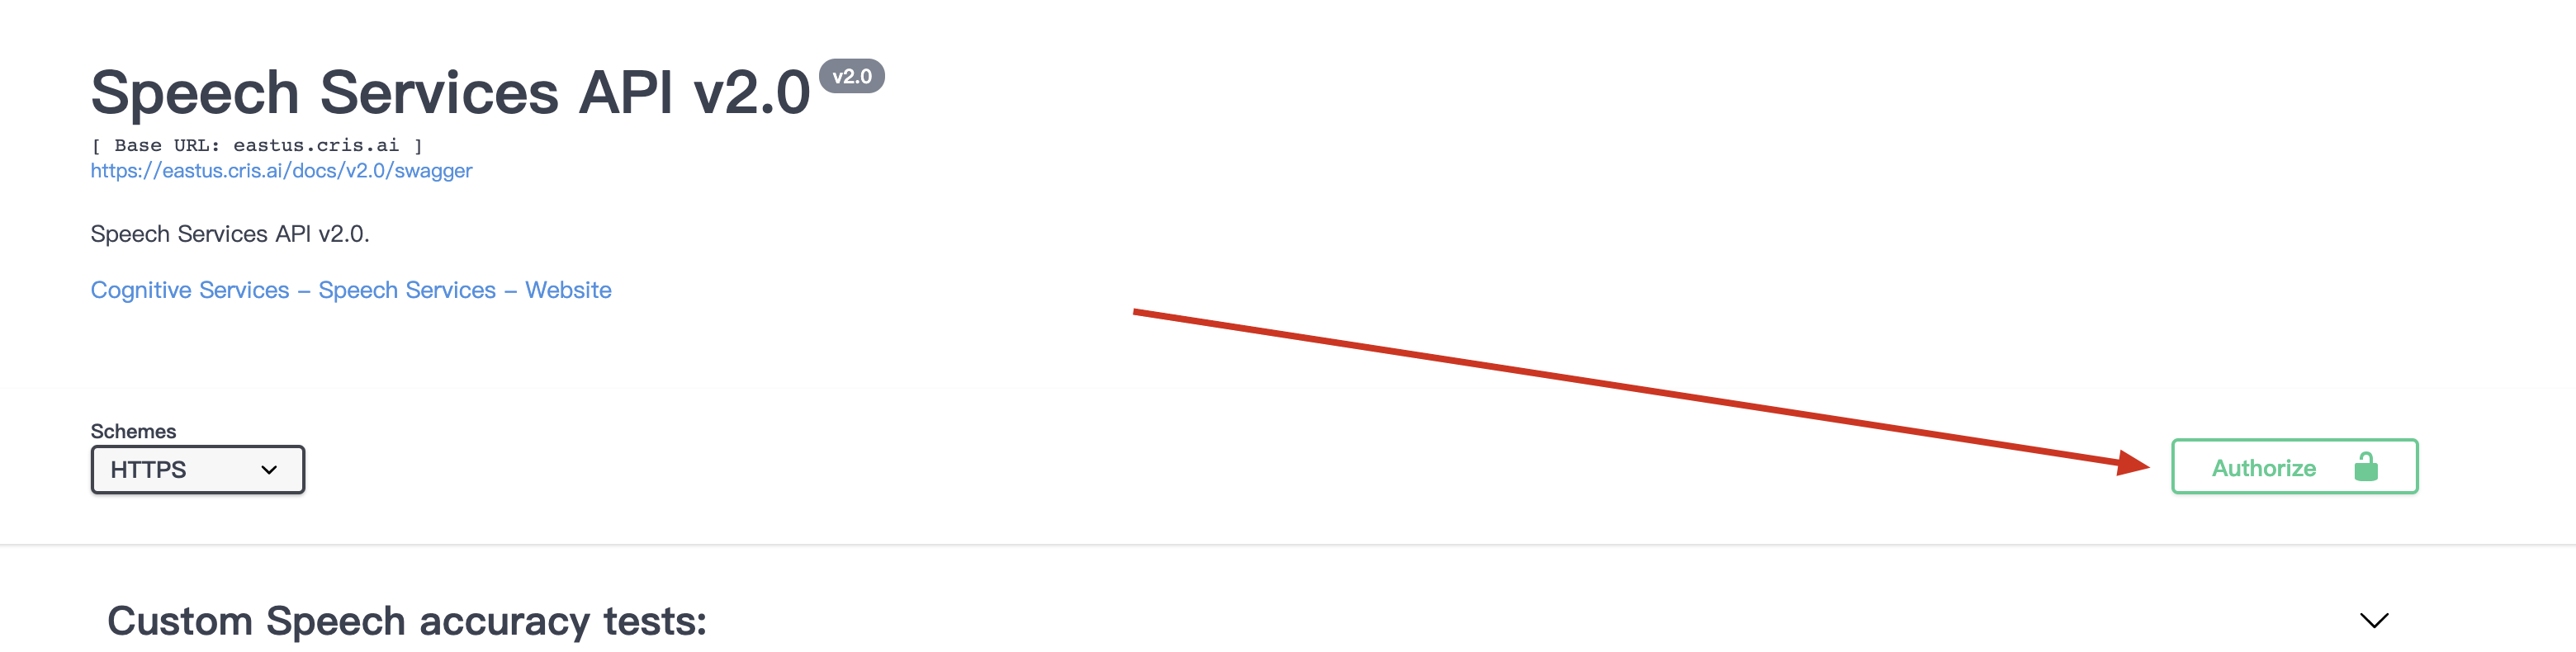
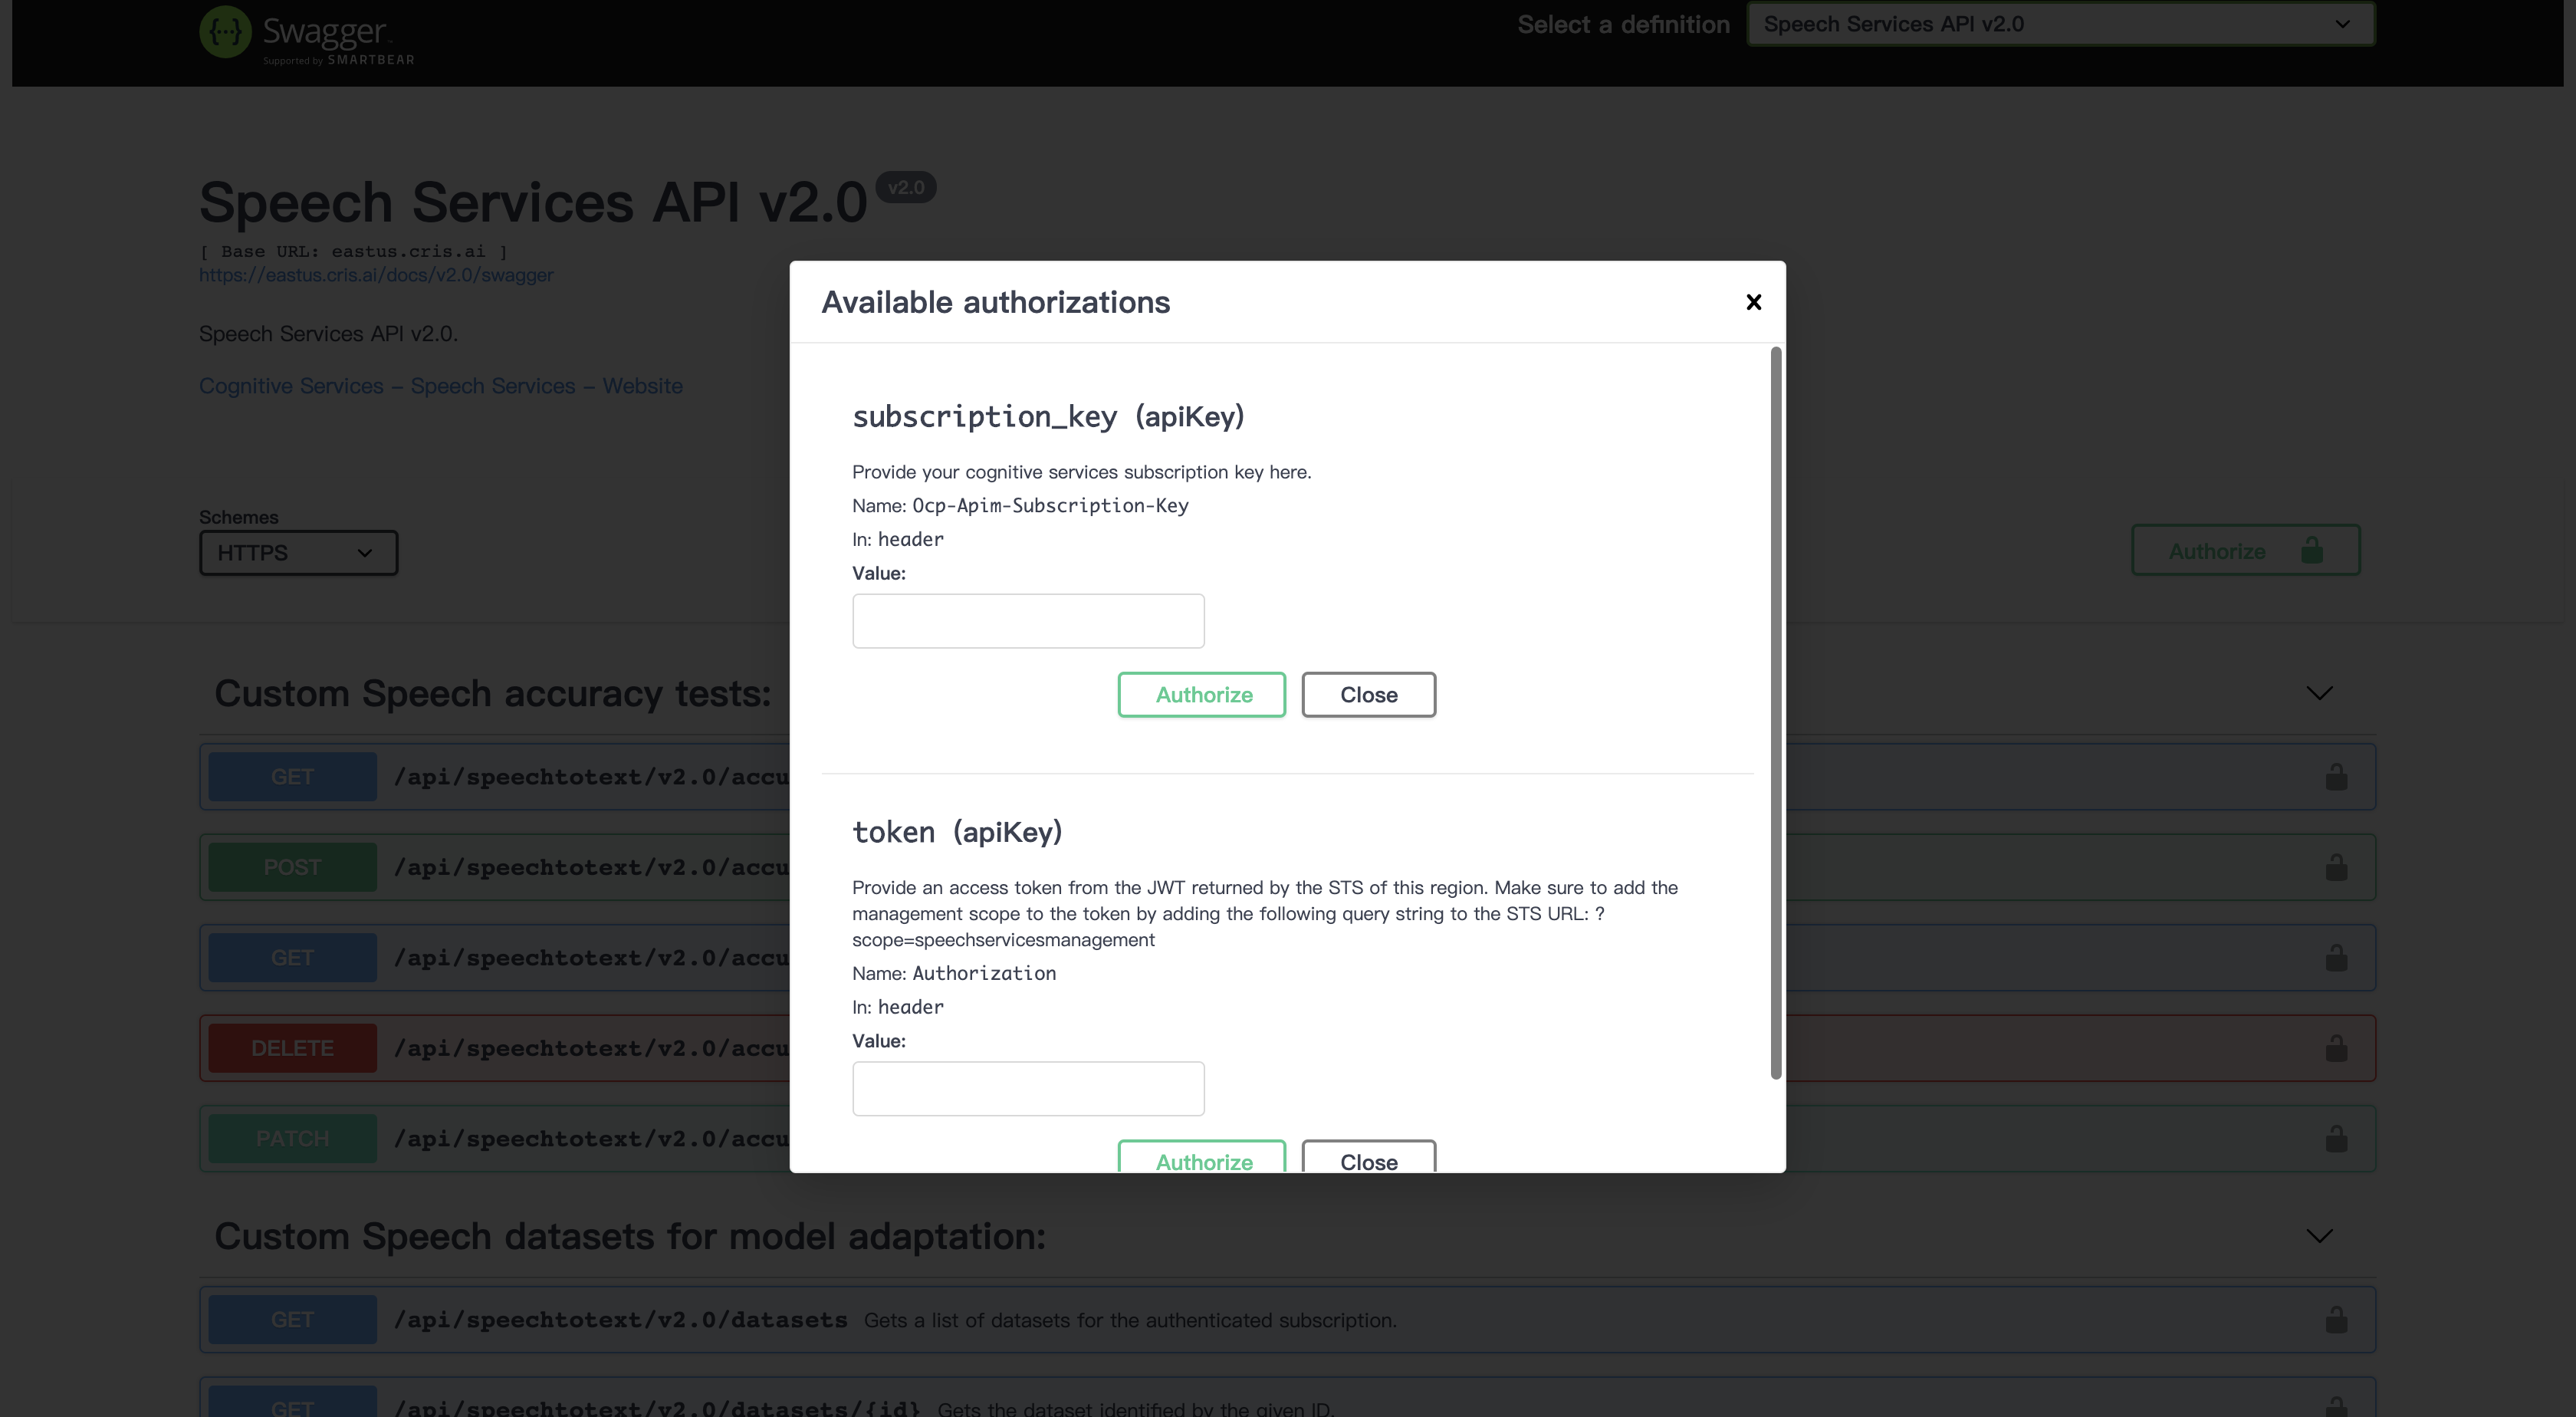
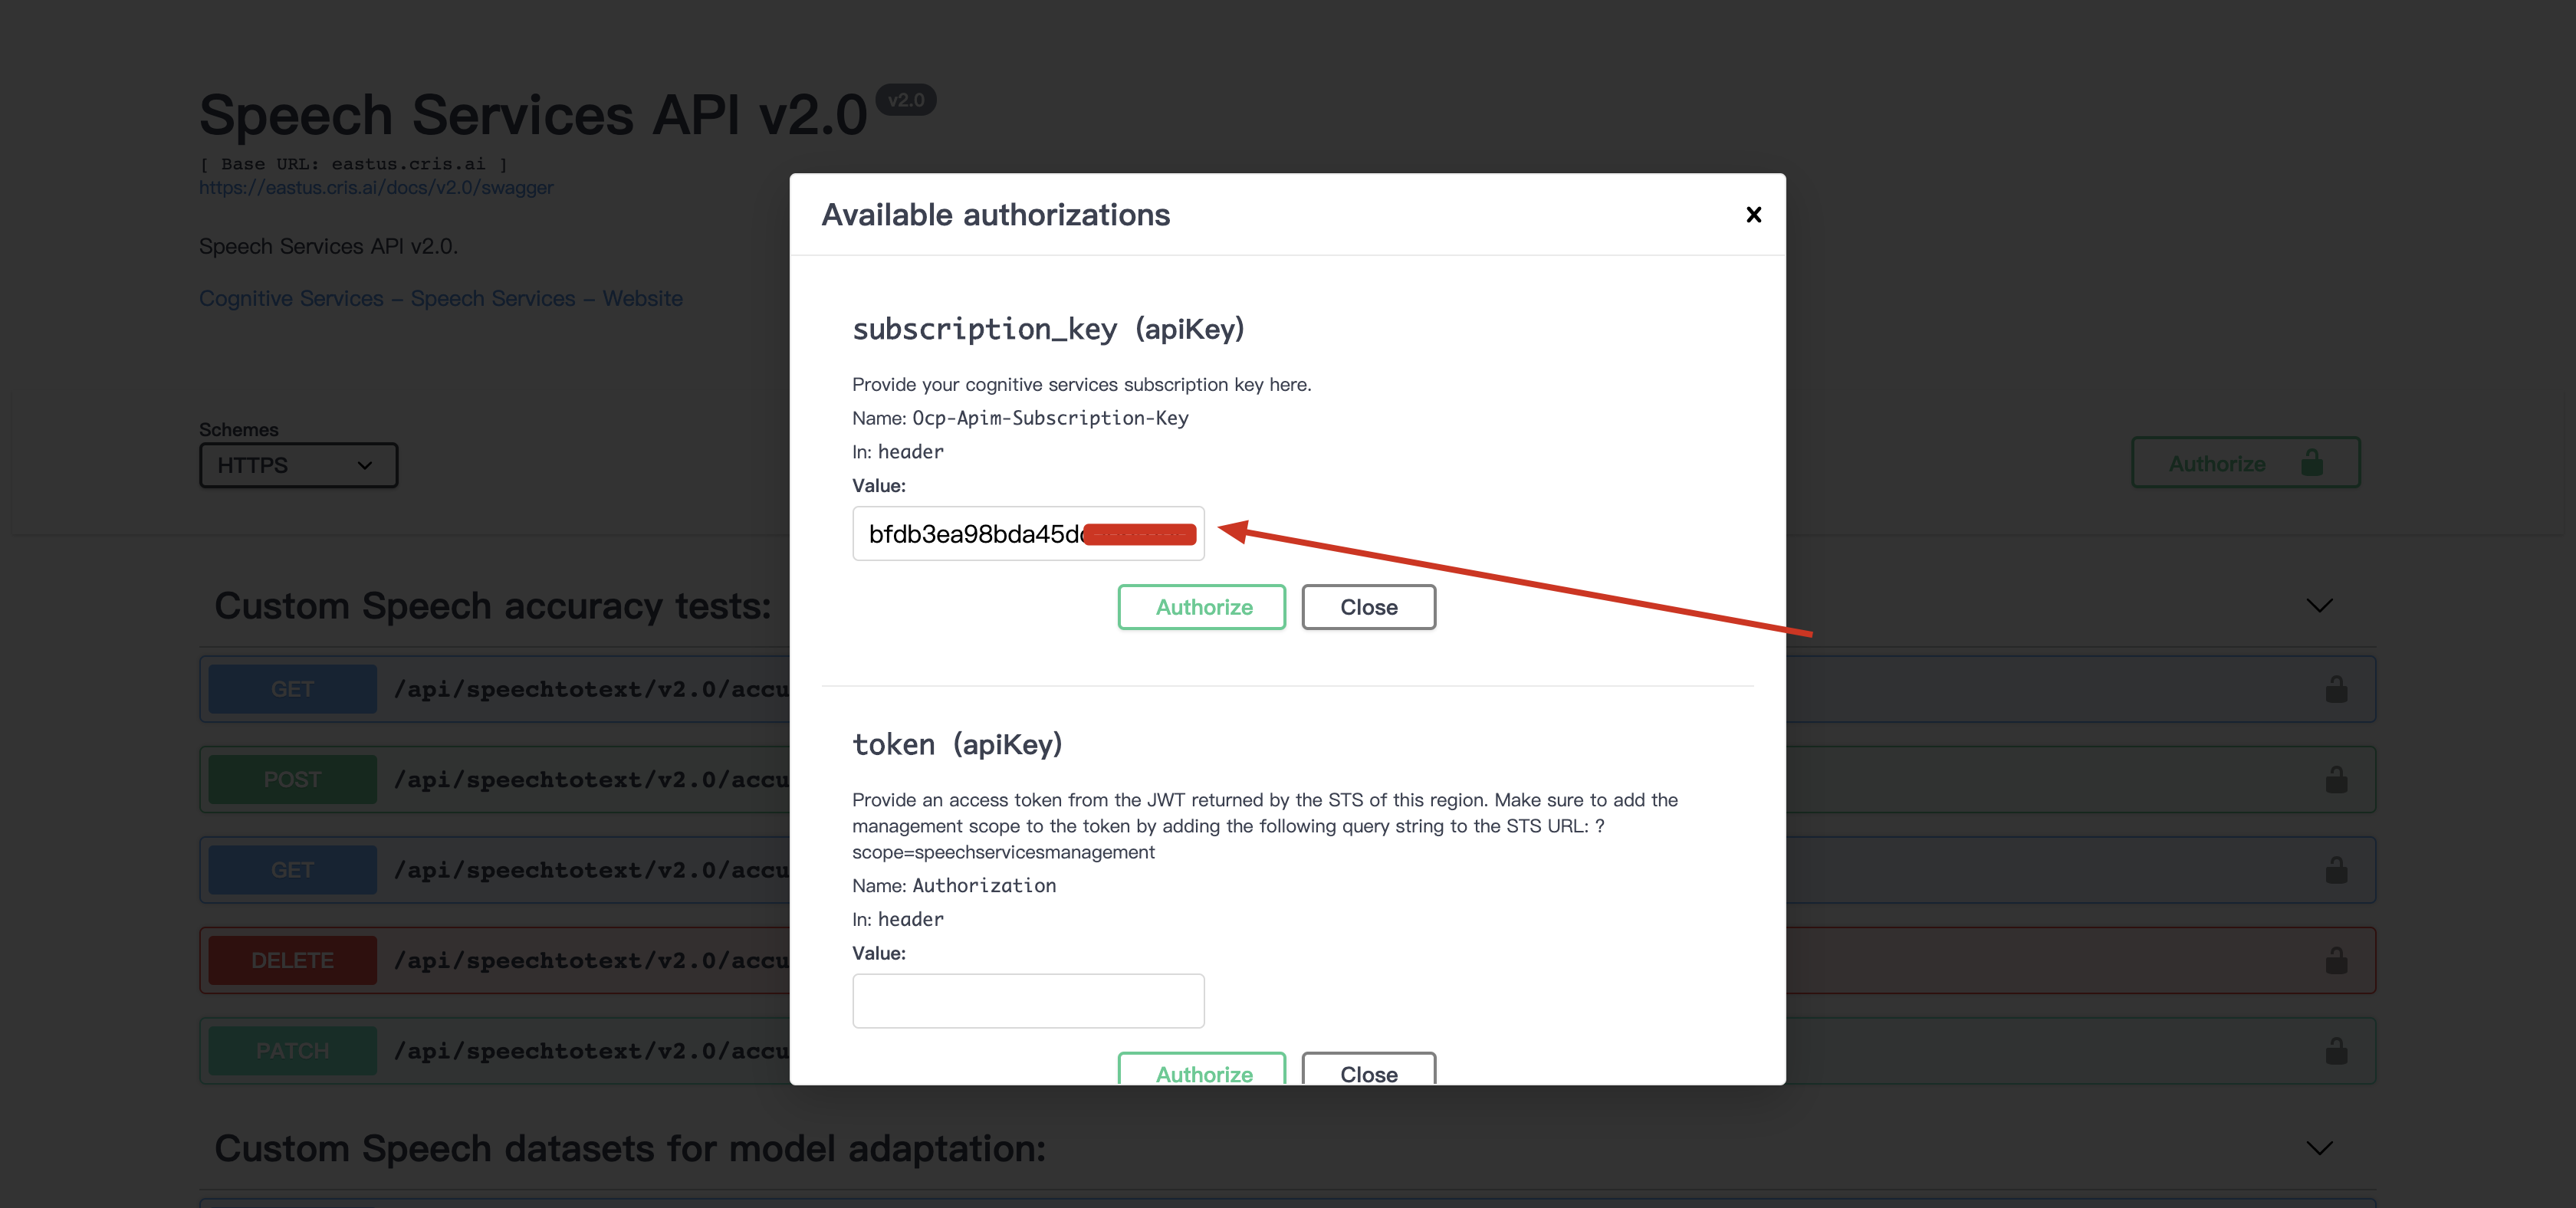
subscription_key (apiKey) 填入 Key 1
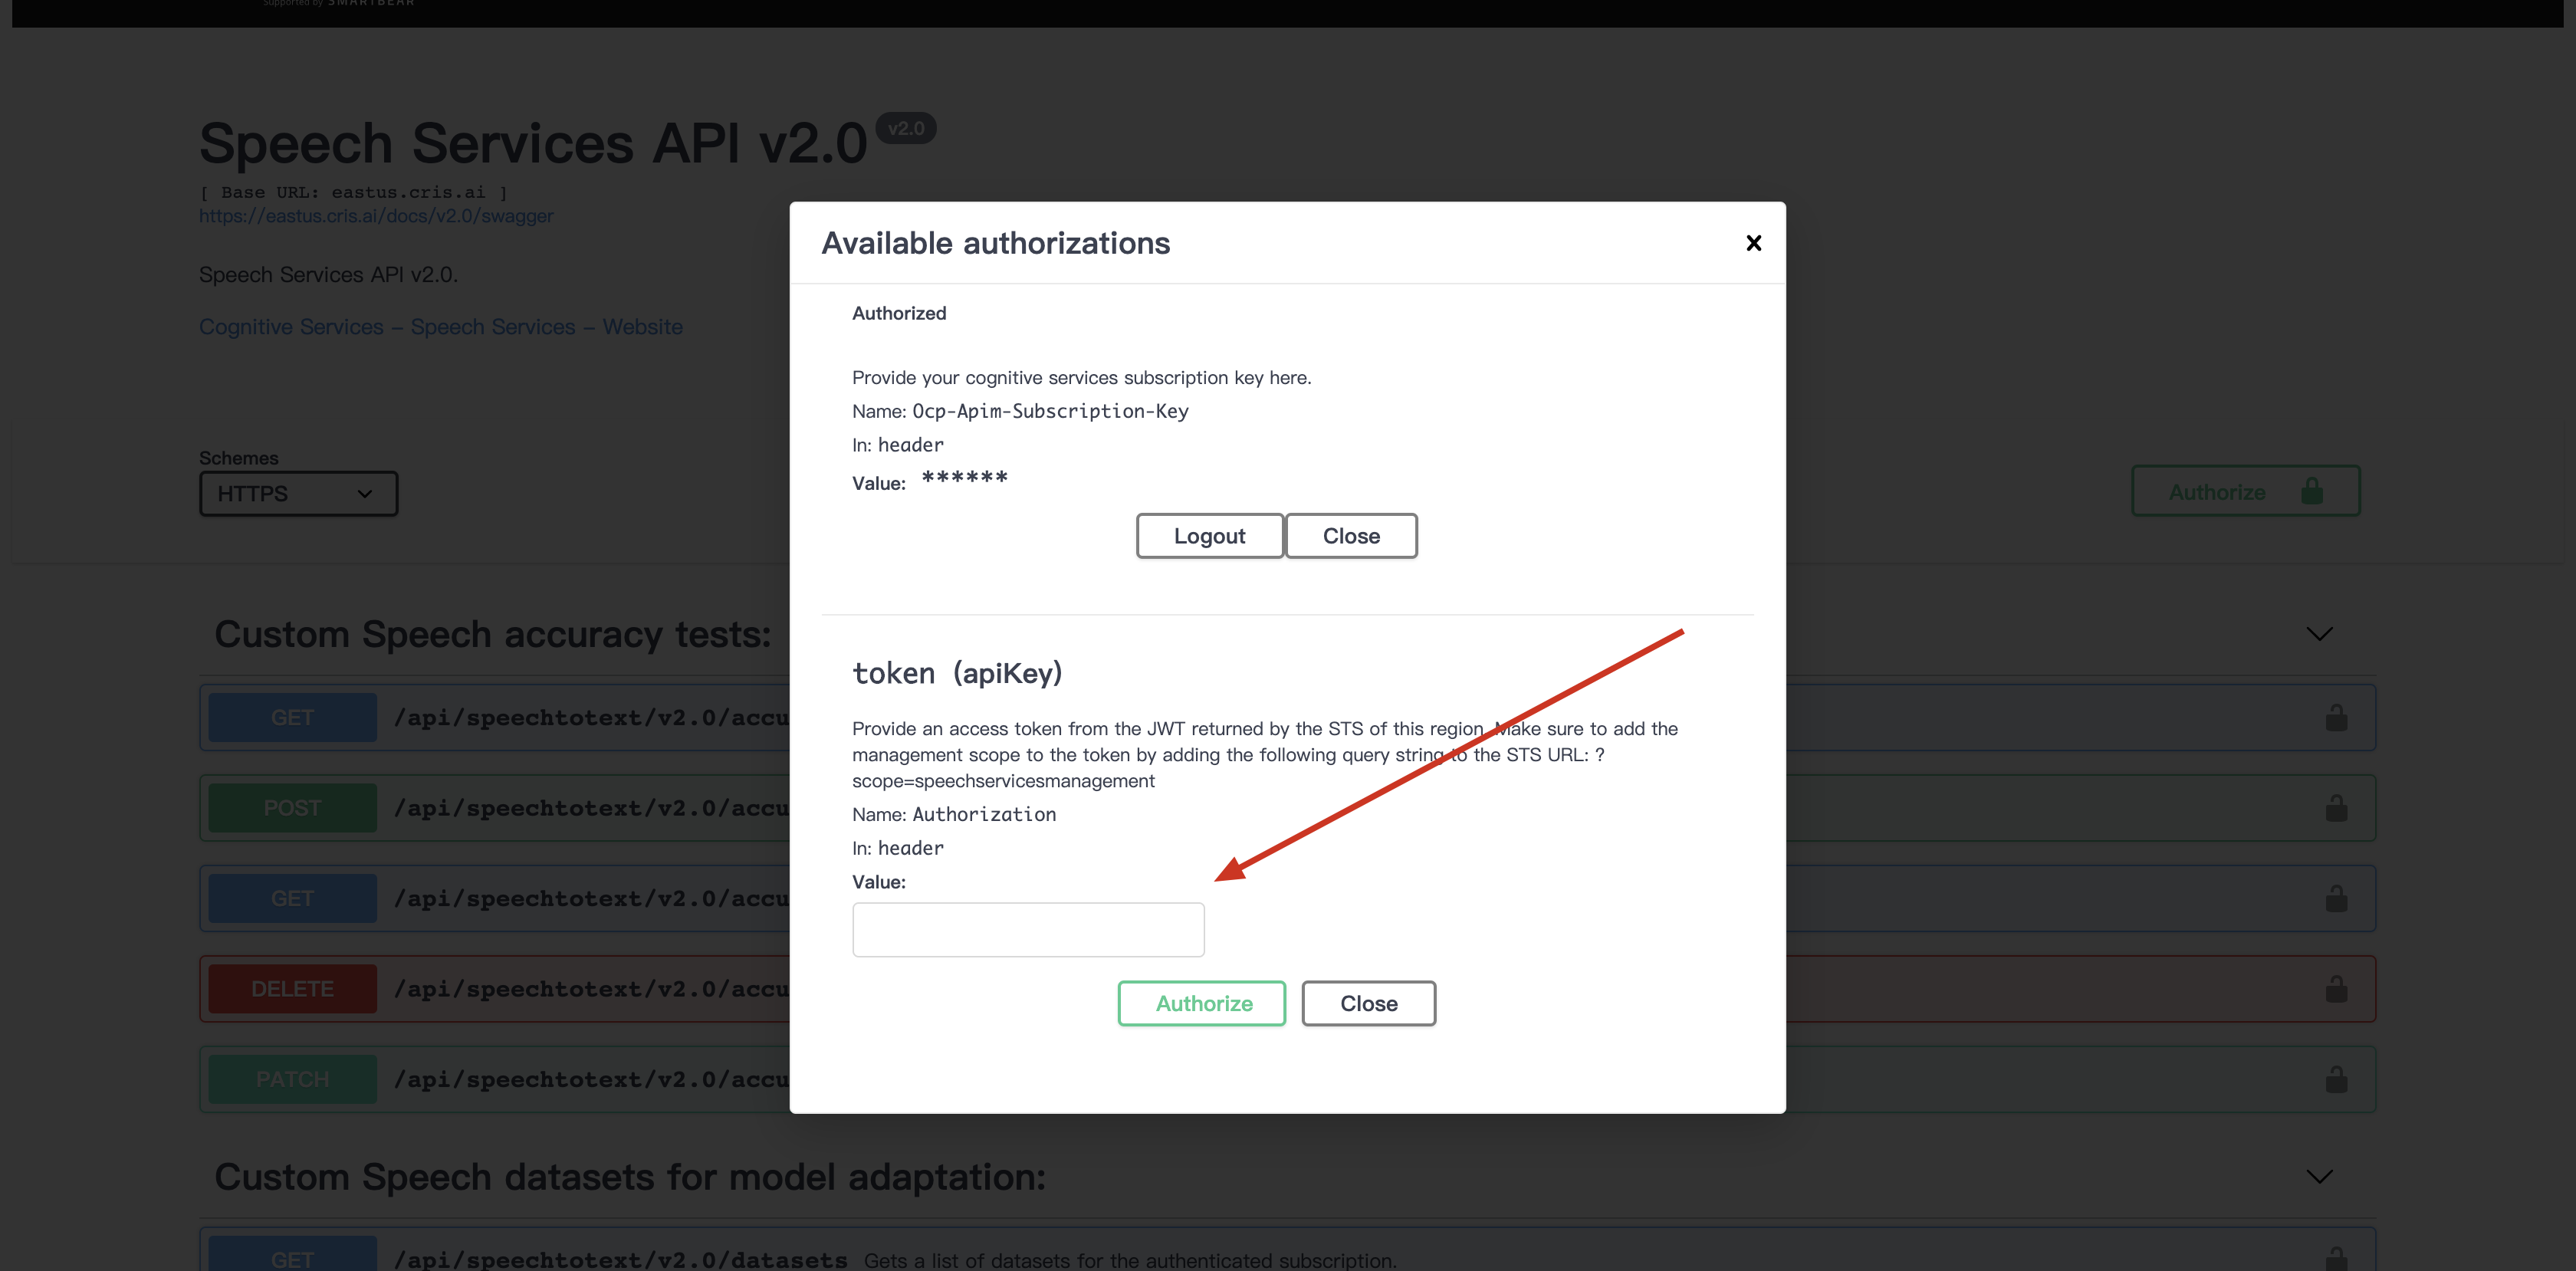
token (apiKey) 这里填入之前命令行返回的那一大串内容
第三步:身份认证的东西都做完了,我们进入正题
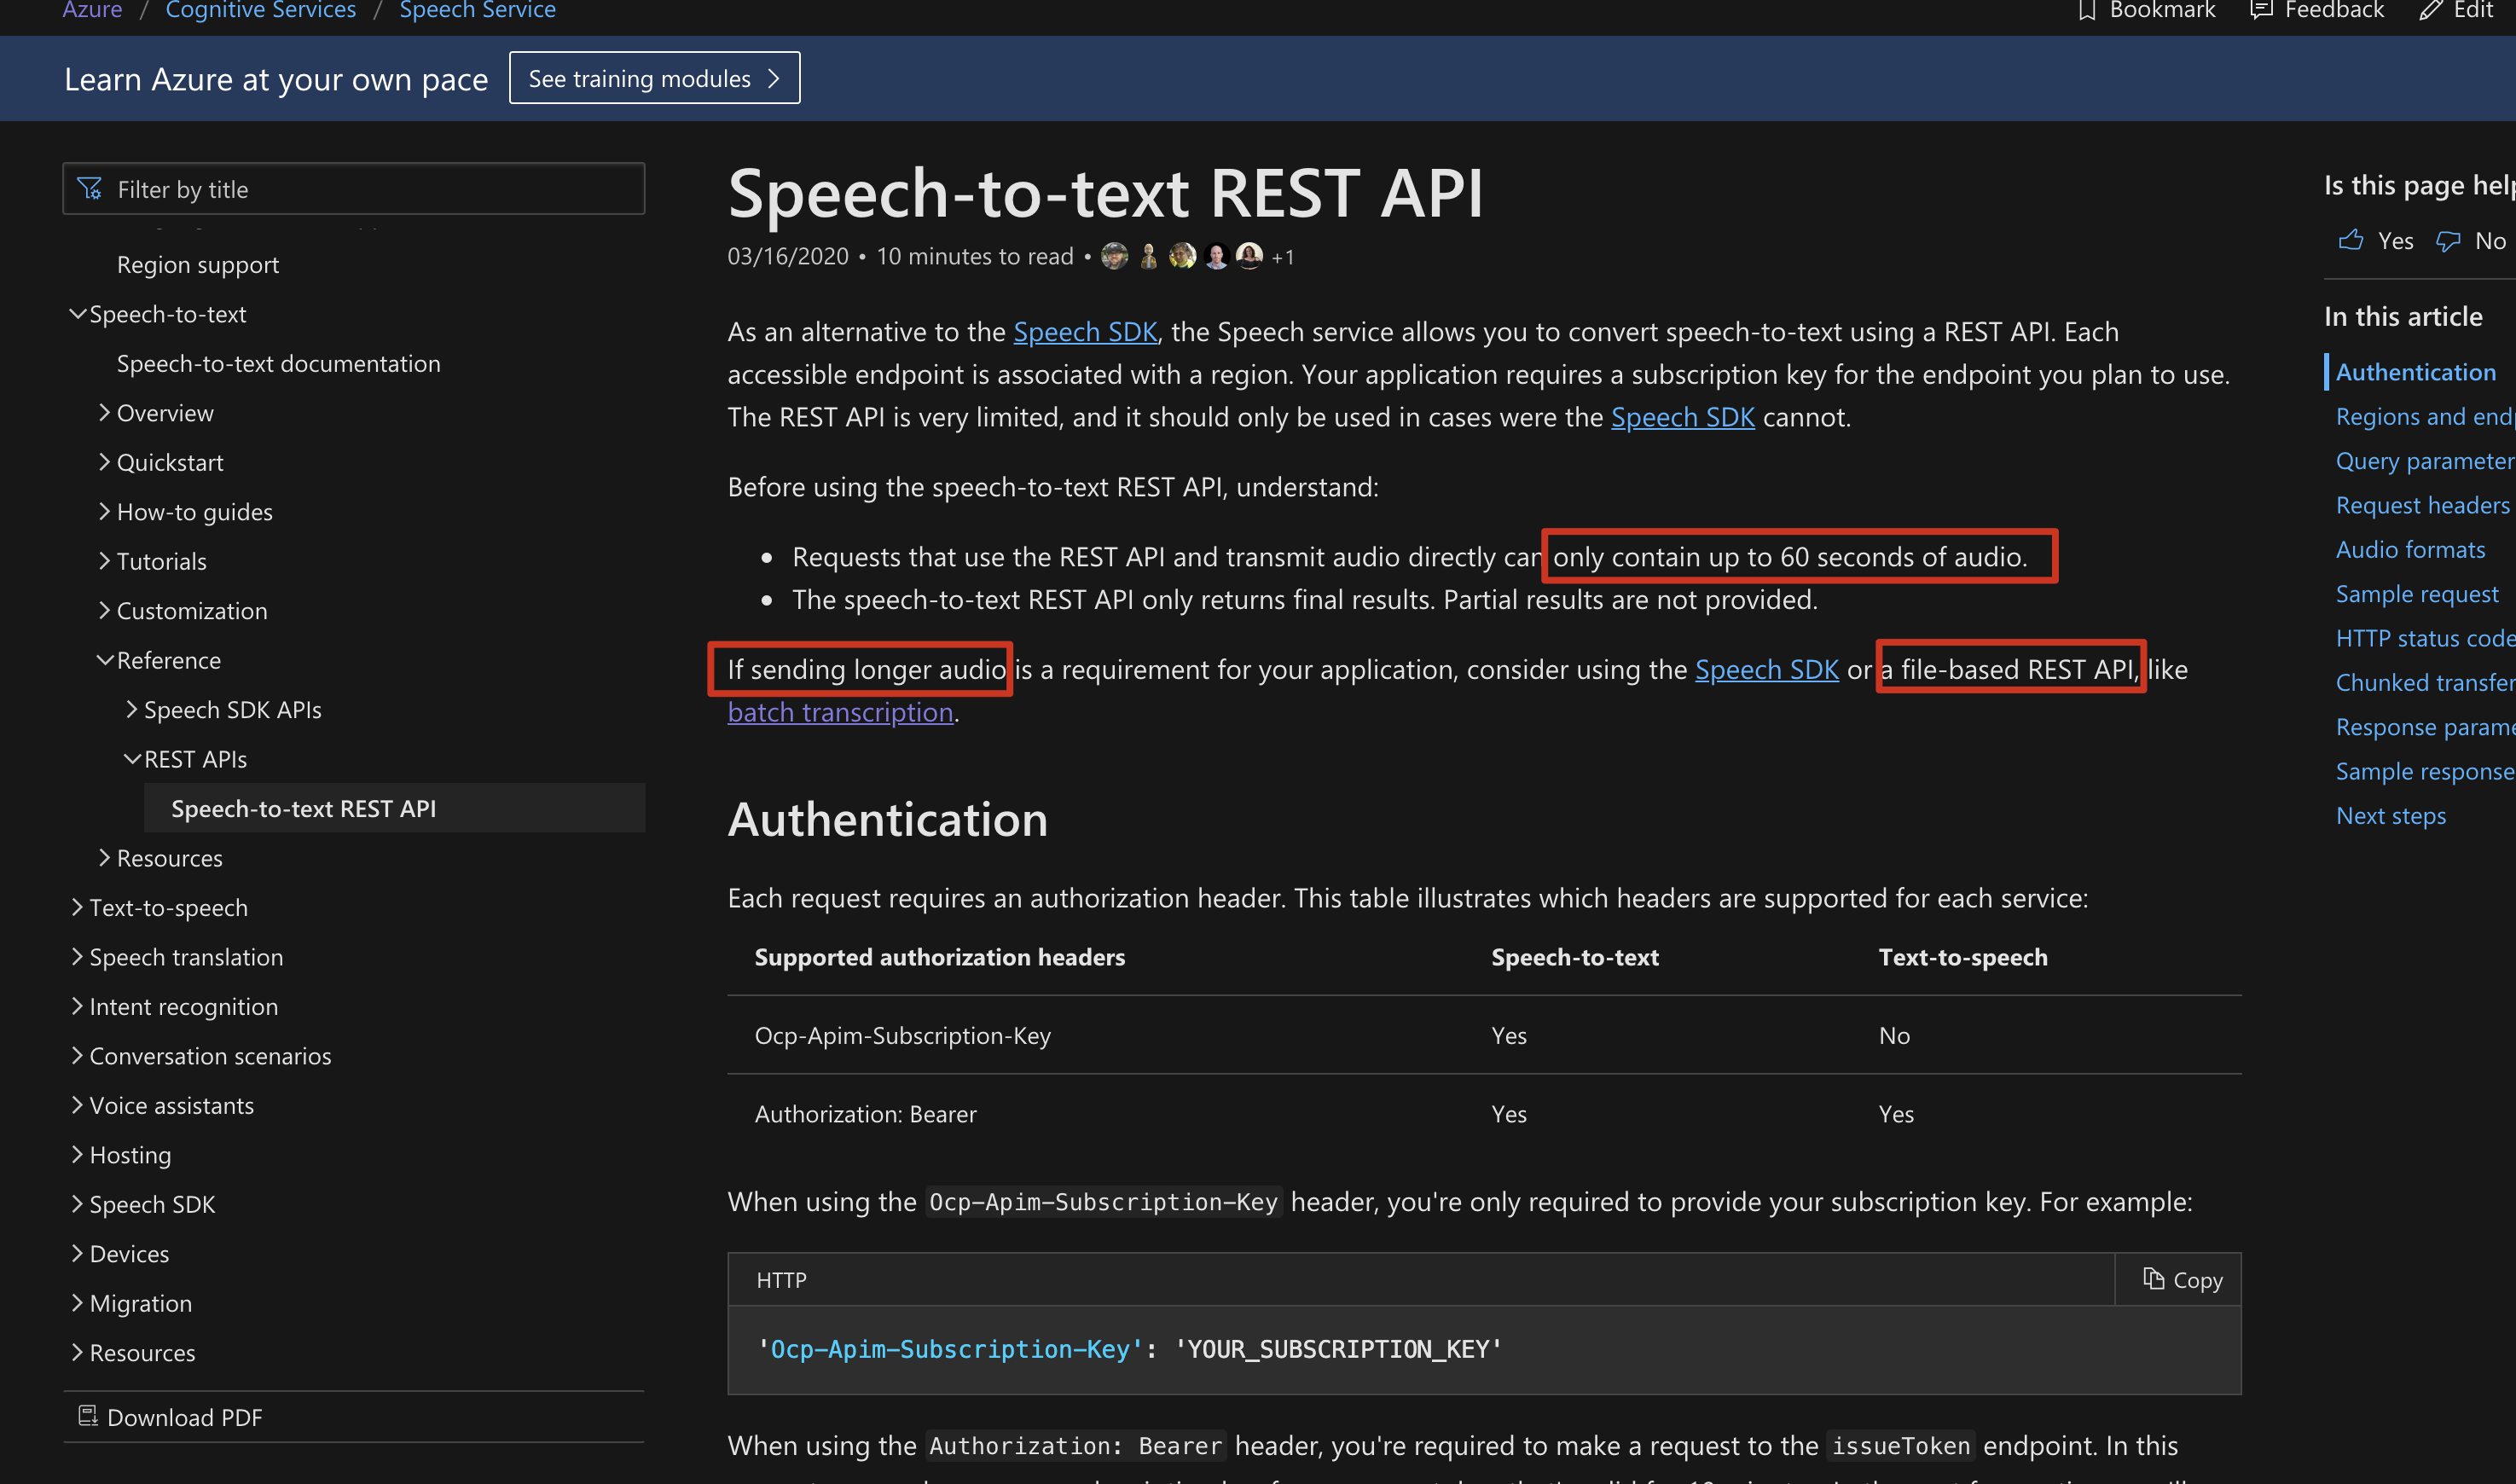
如果要转录60秒以上的音频,要创建识别任务
我们继续用 Swagger
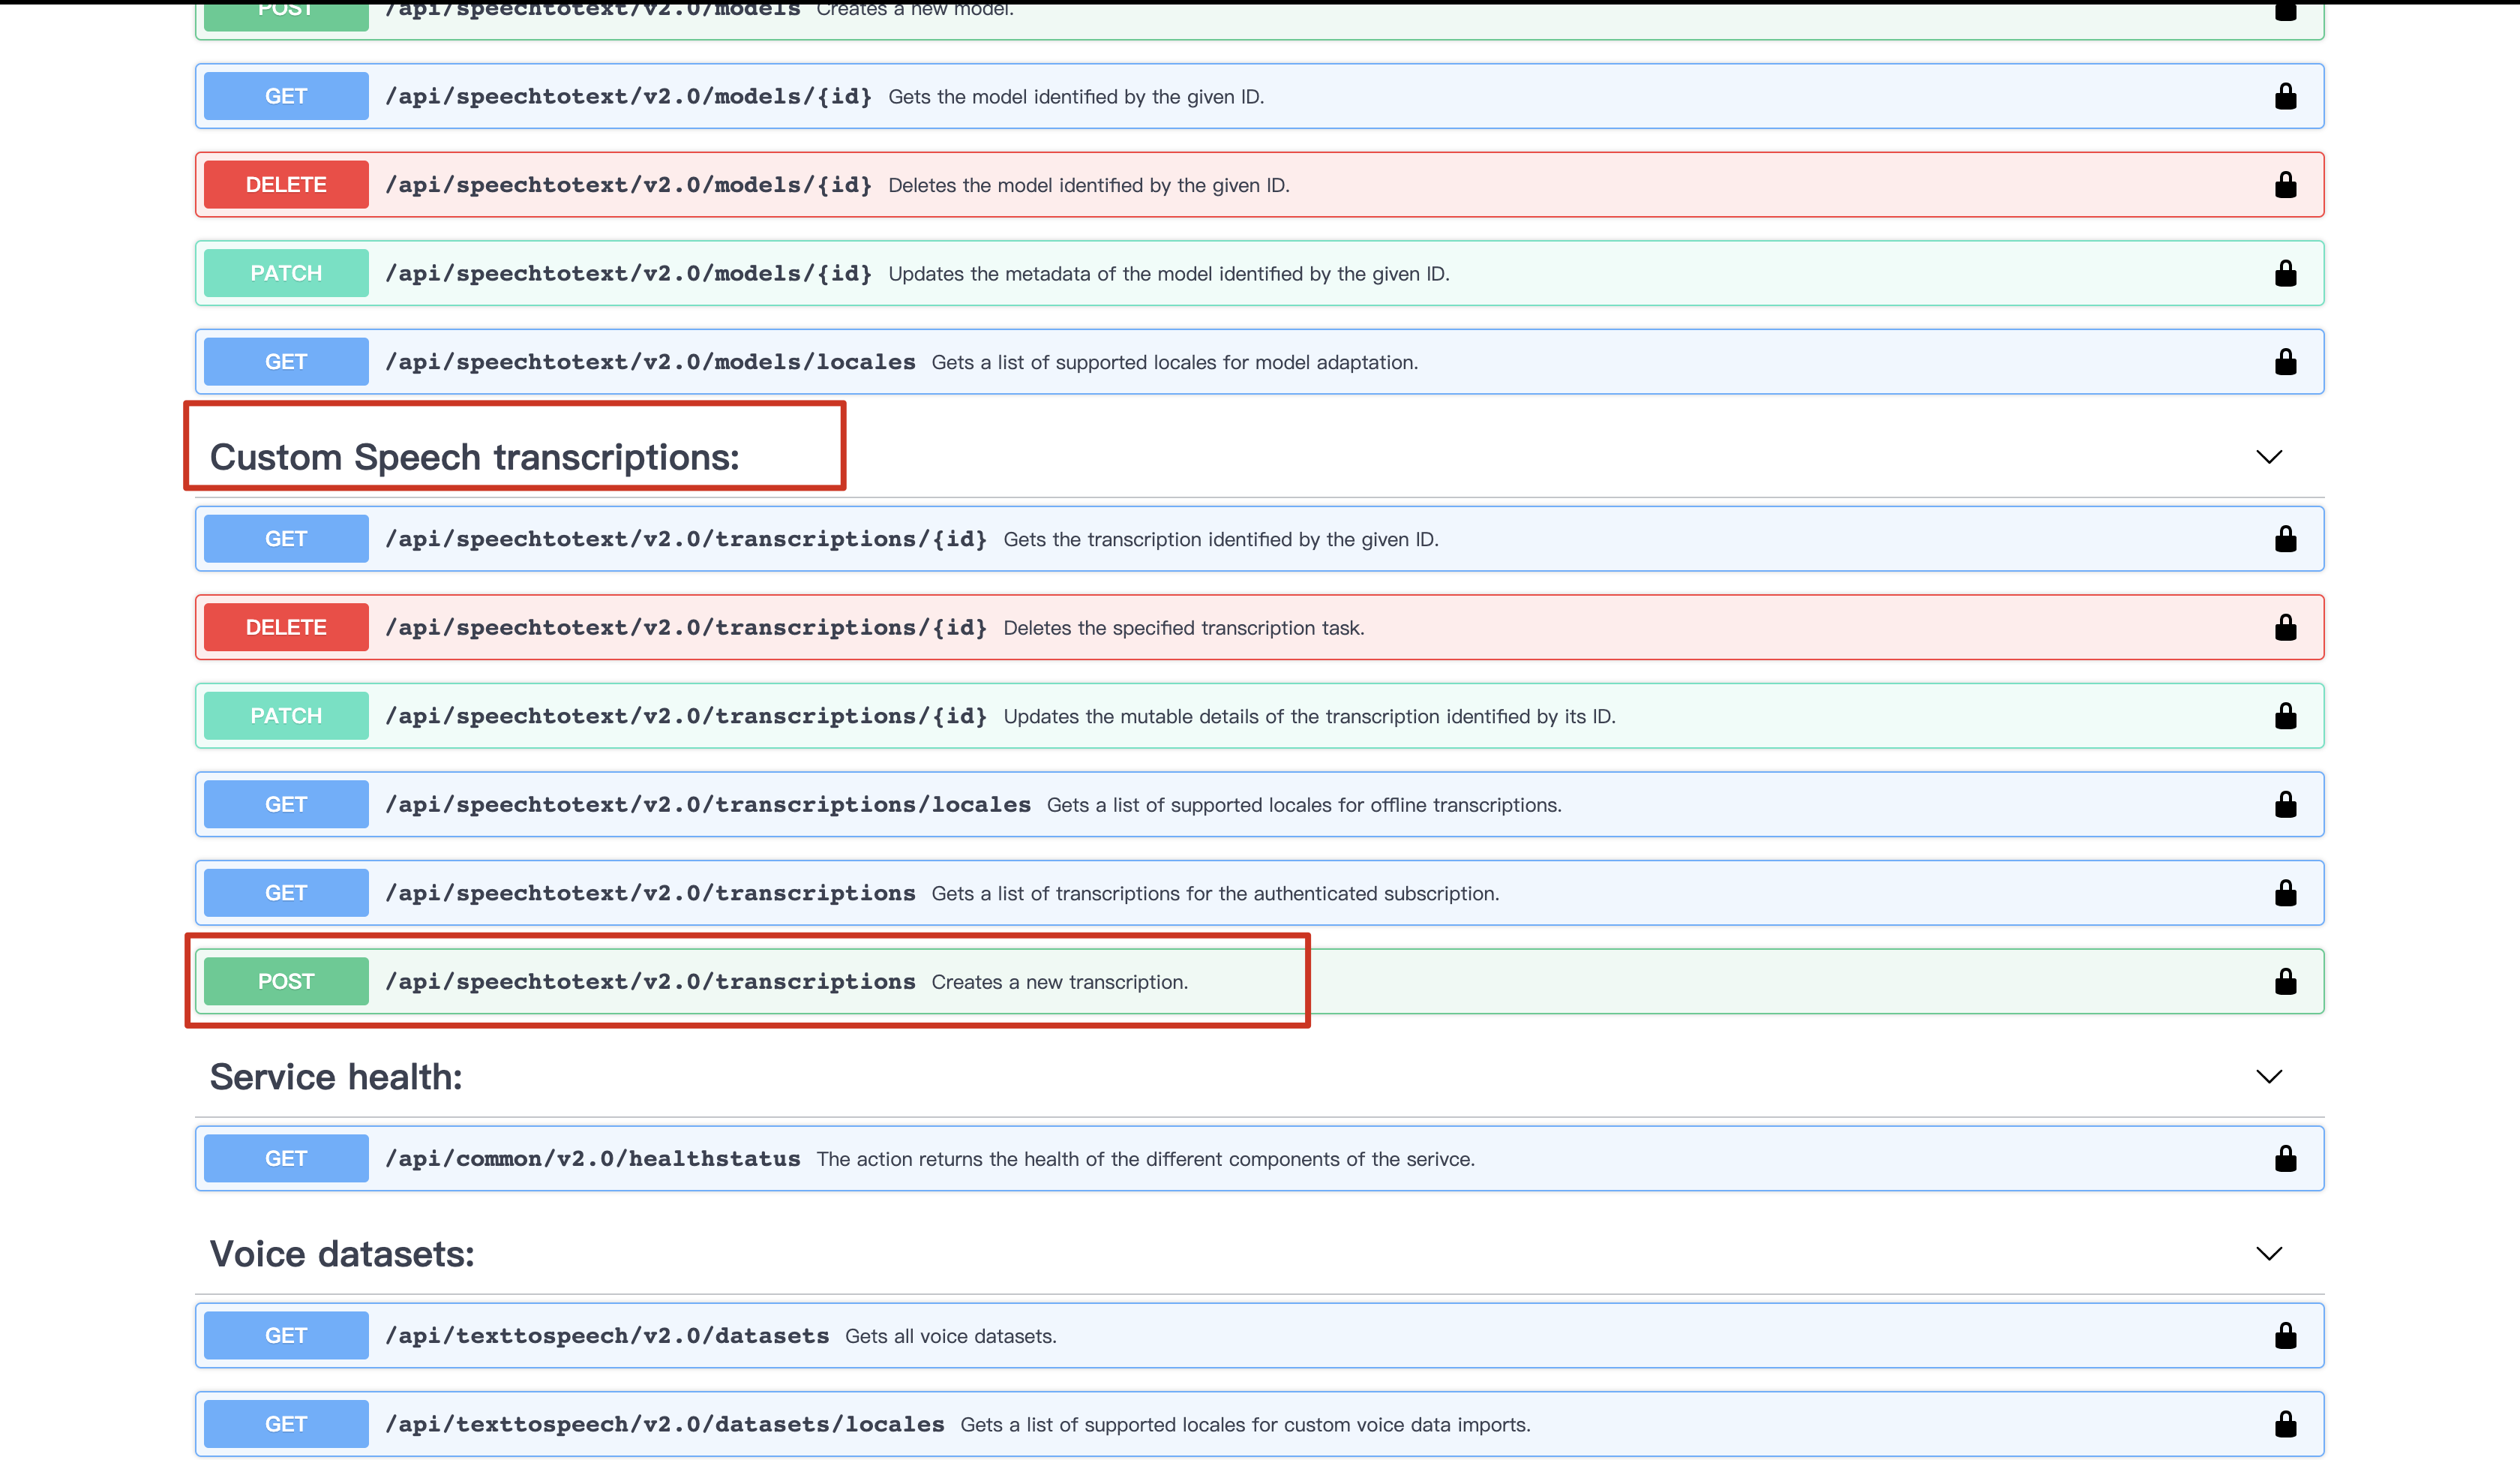
Custom Speech transcriptions: -> POST Create a new transcription
点击右上角 "Try it out"
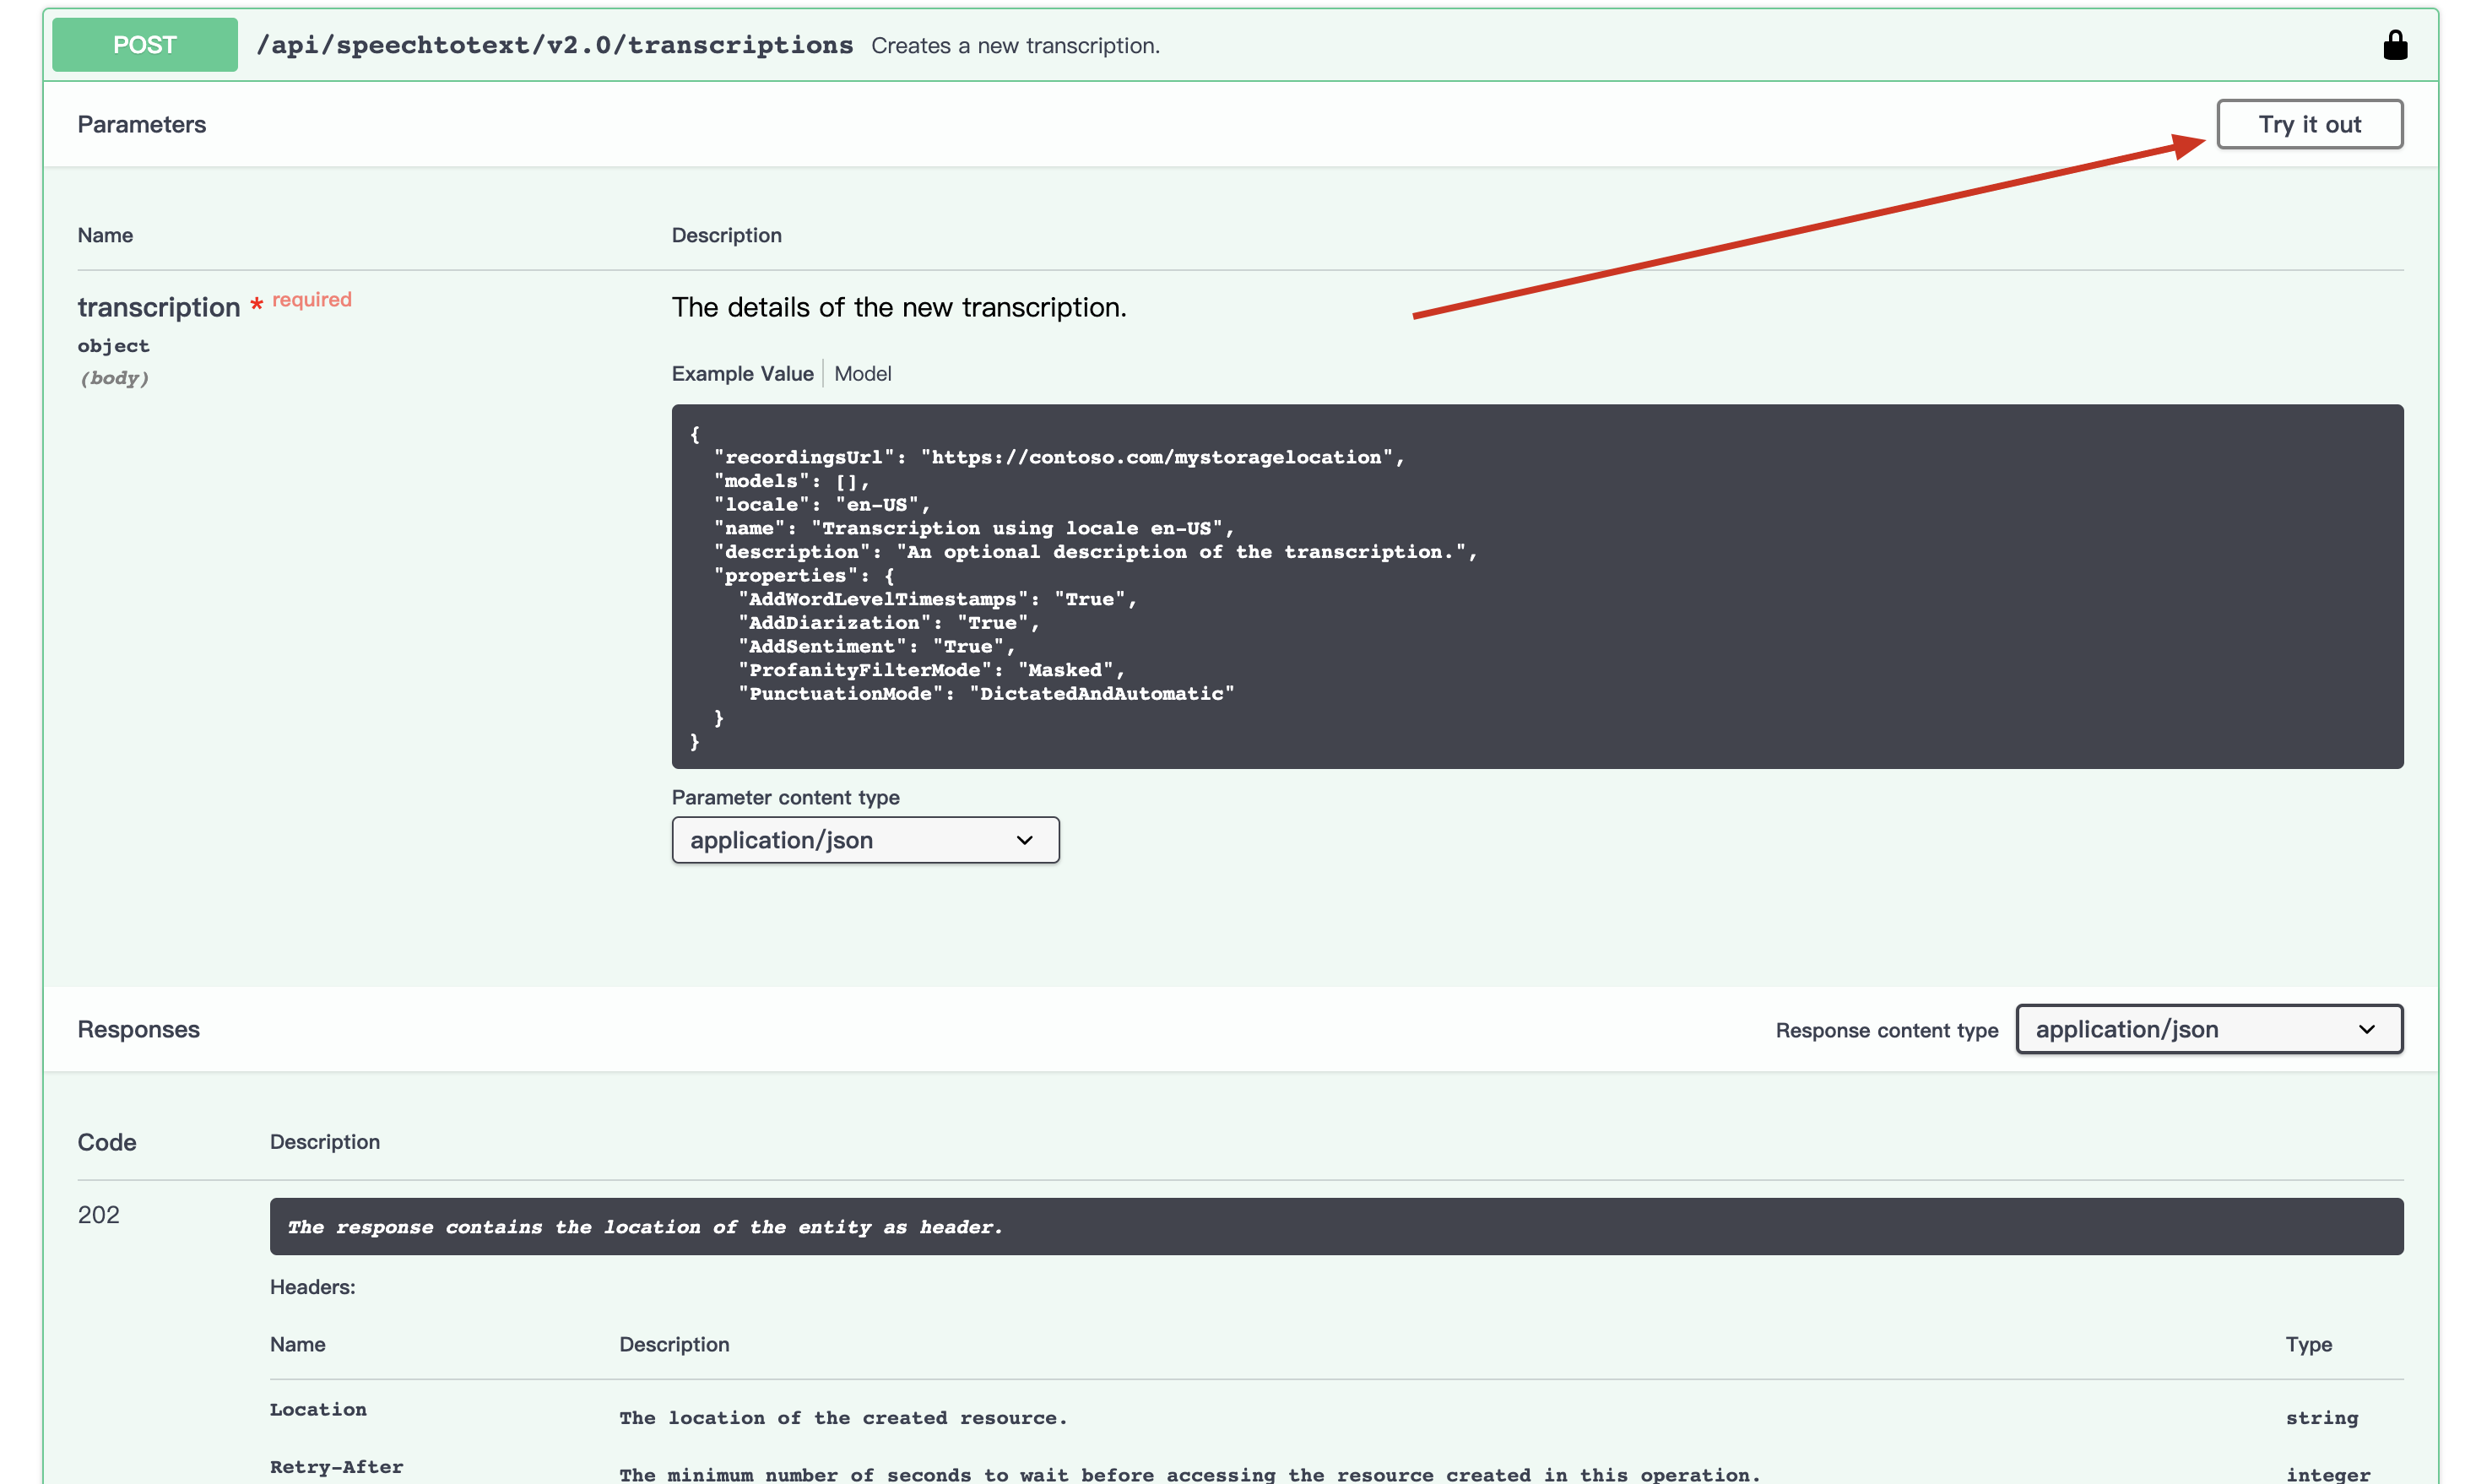
然后:
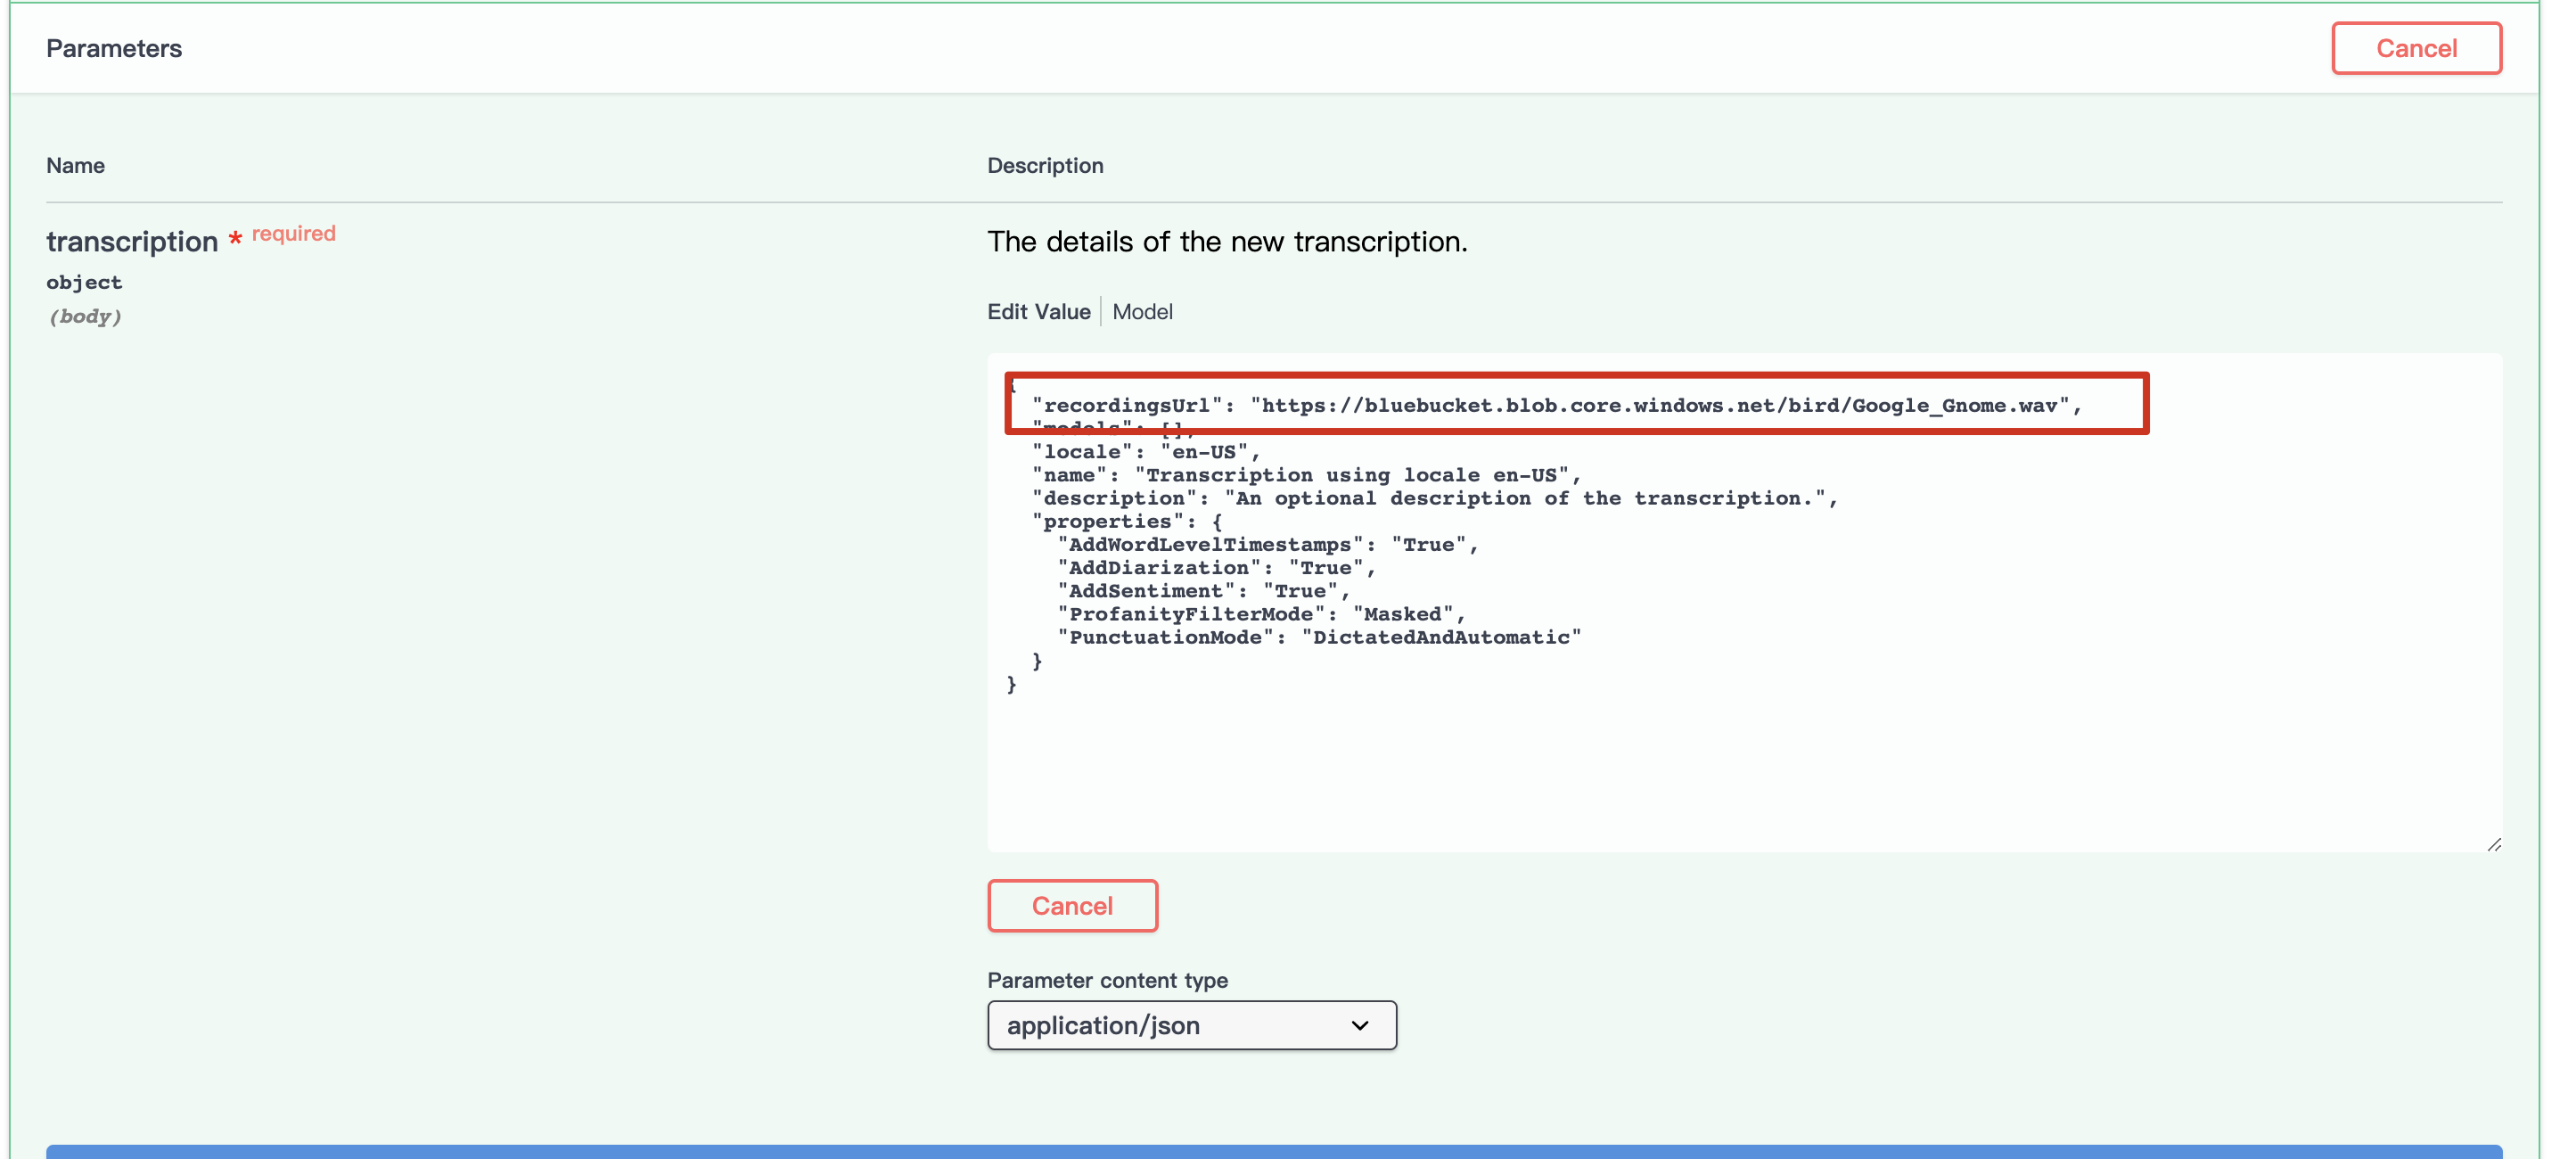
recordingsUrl 是音频文件的地址
我传到了 Azure 的文件存储里,所以有了这个地址:
https://bluebucket.blob.core.windows.net/bird/Google_Gnome.wav
这个地址之后可能过期(我担心扣我钱所以删掉)
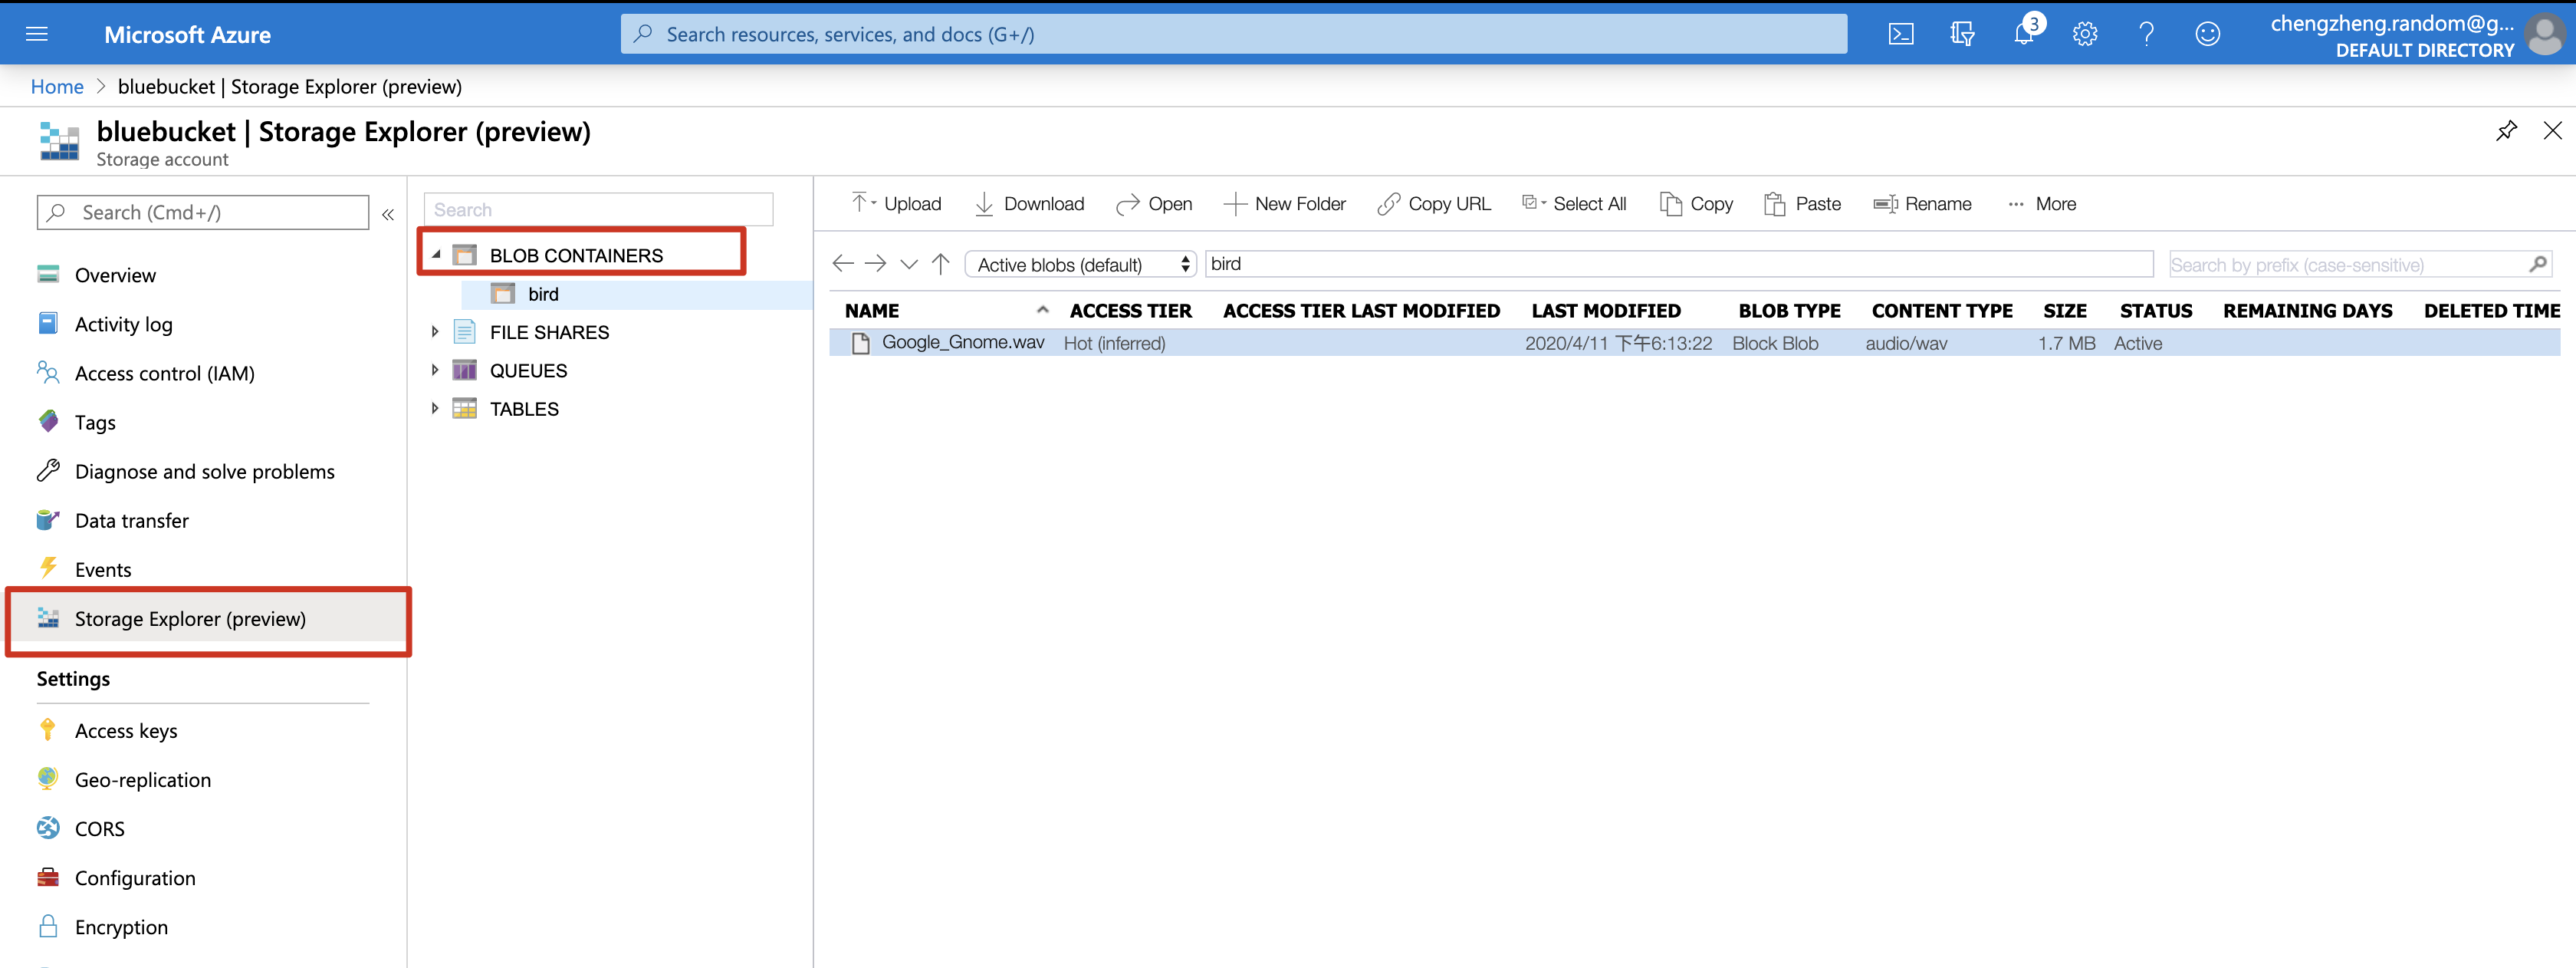
所以读者需要自己把 Google_Gnome.wav 文件传到自己的 Azure 文件存储里,获得一个线上地址(URL)
具体步骤省略,
反正 Azure 这个文件存储就类似 Google 的 Cloud Storage 或者 Amazon 的 S3
读者肯定可以搞清楚怎么上传的,这里就不塞多10来张图片来进行演示了。
点击 Execute 运行
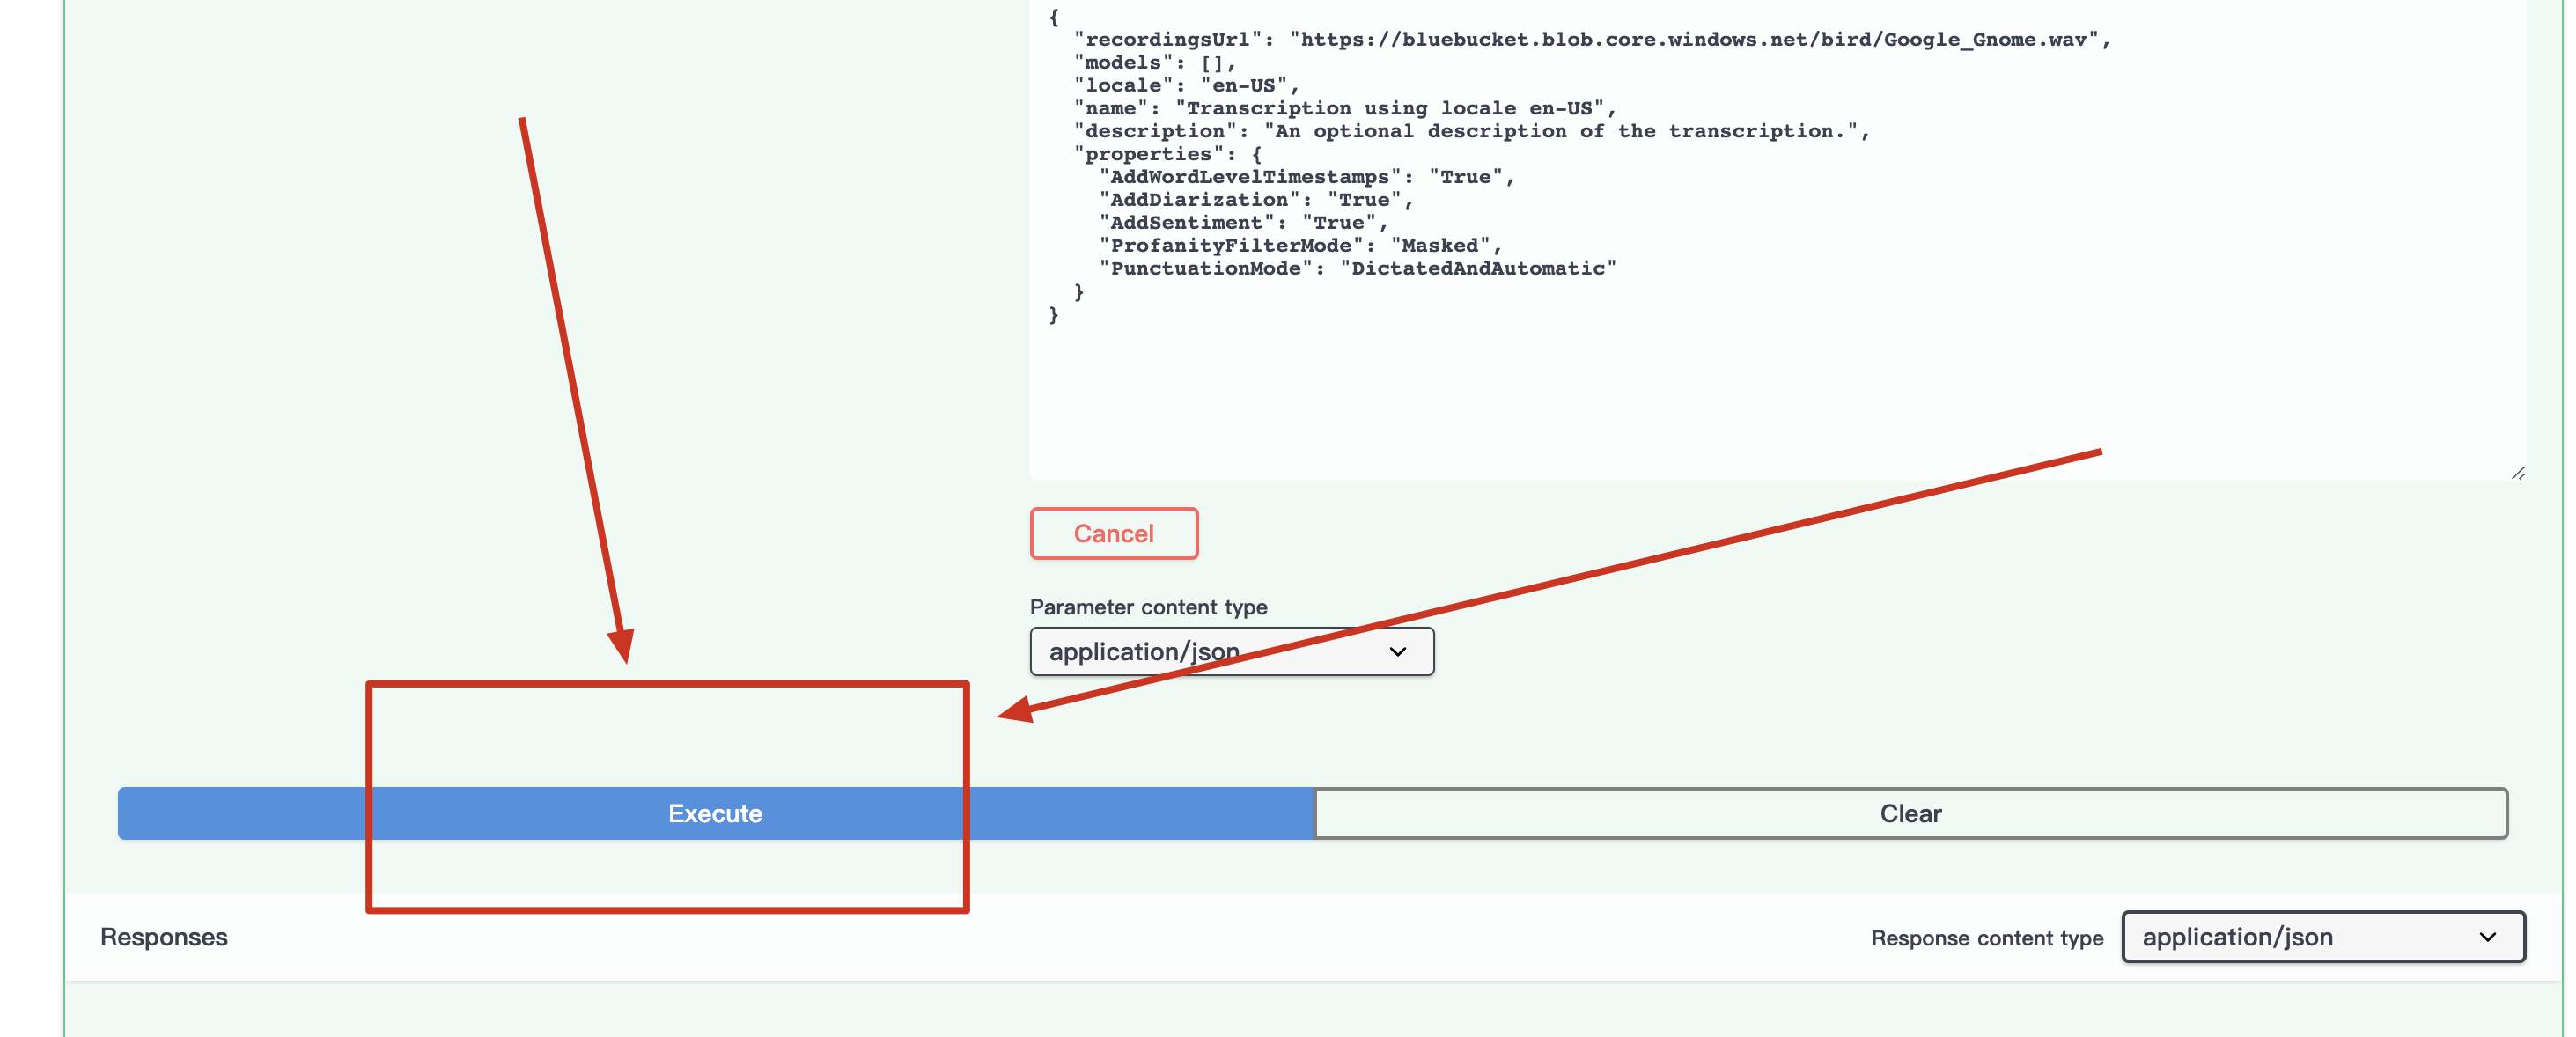
返回结果如下
curl 命令也包含了,需要的话直接复制就行
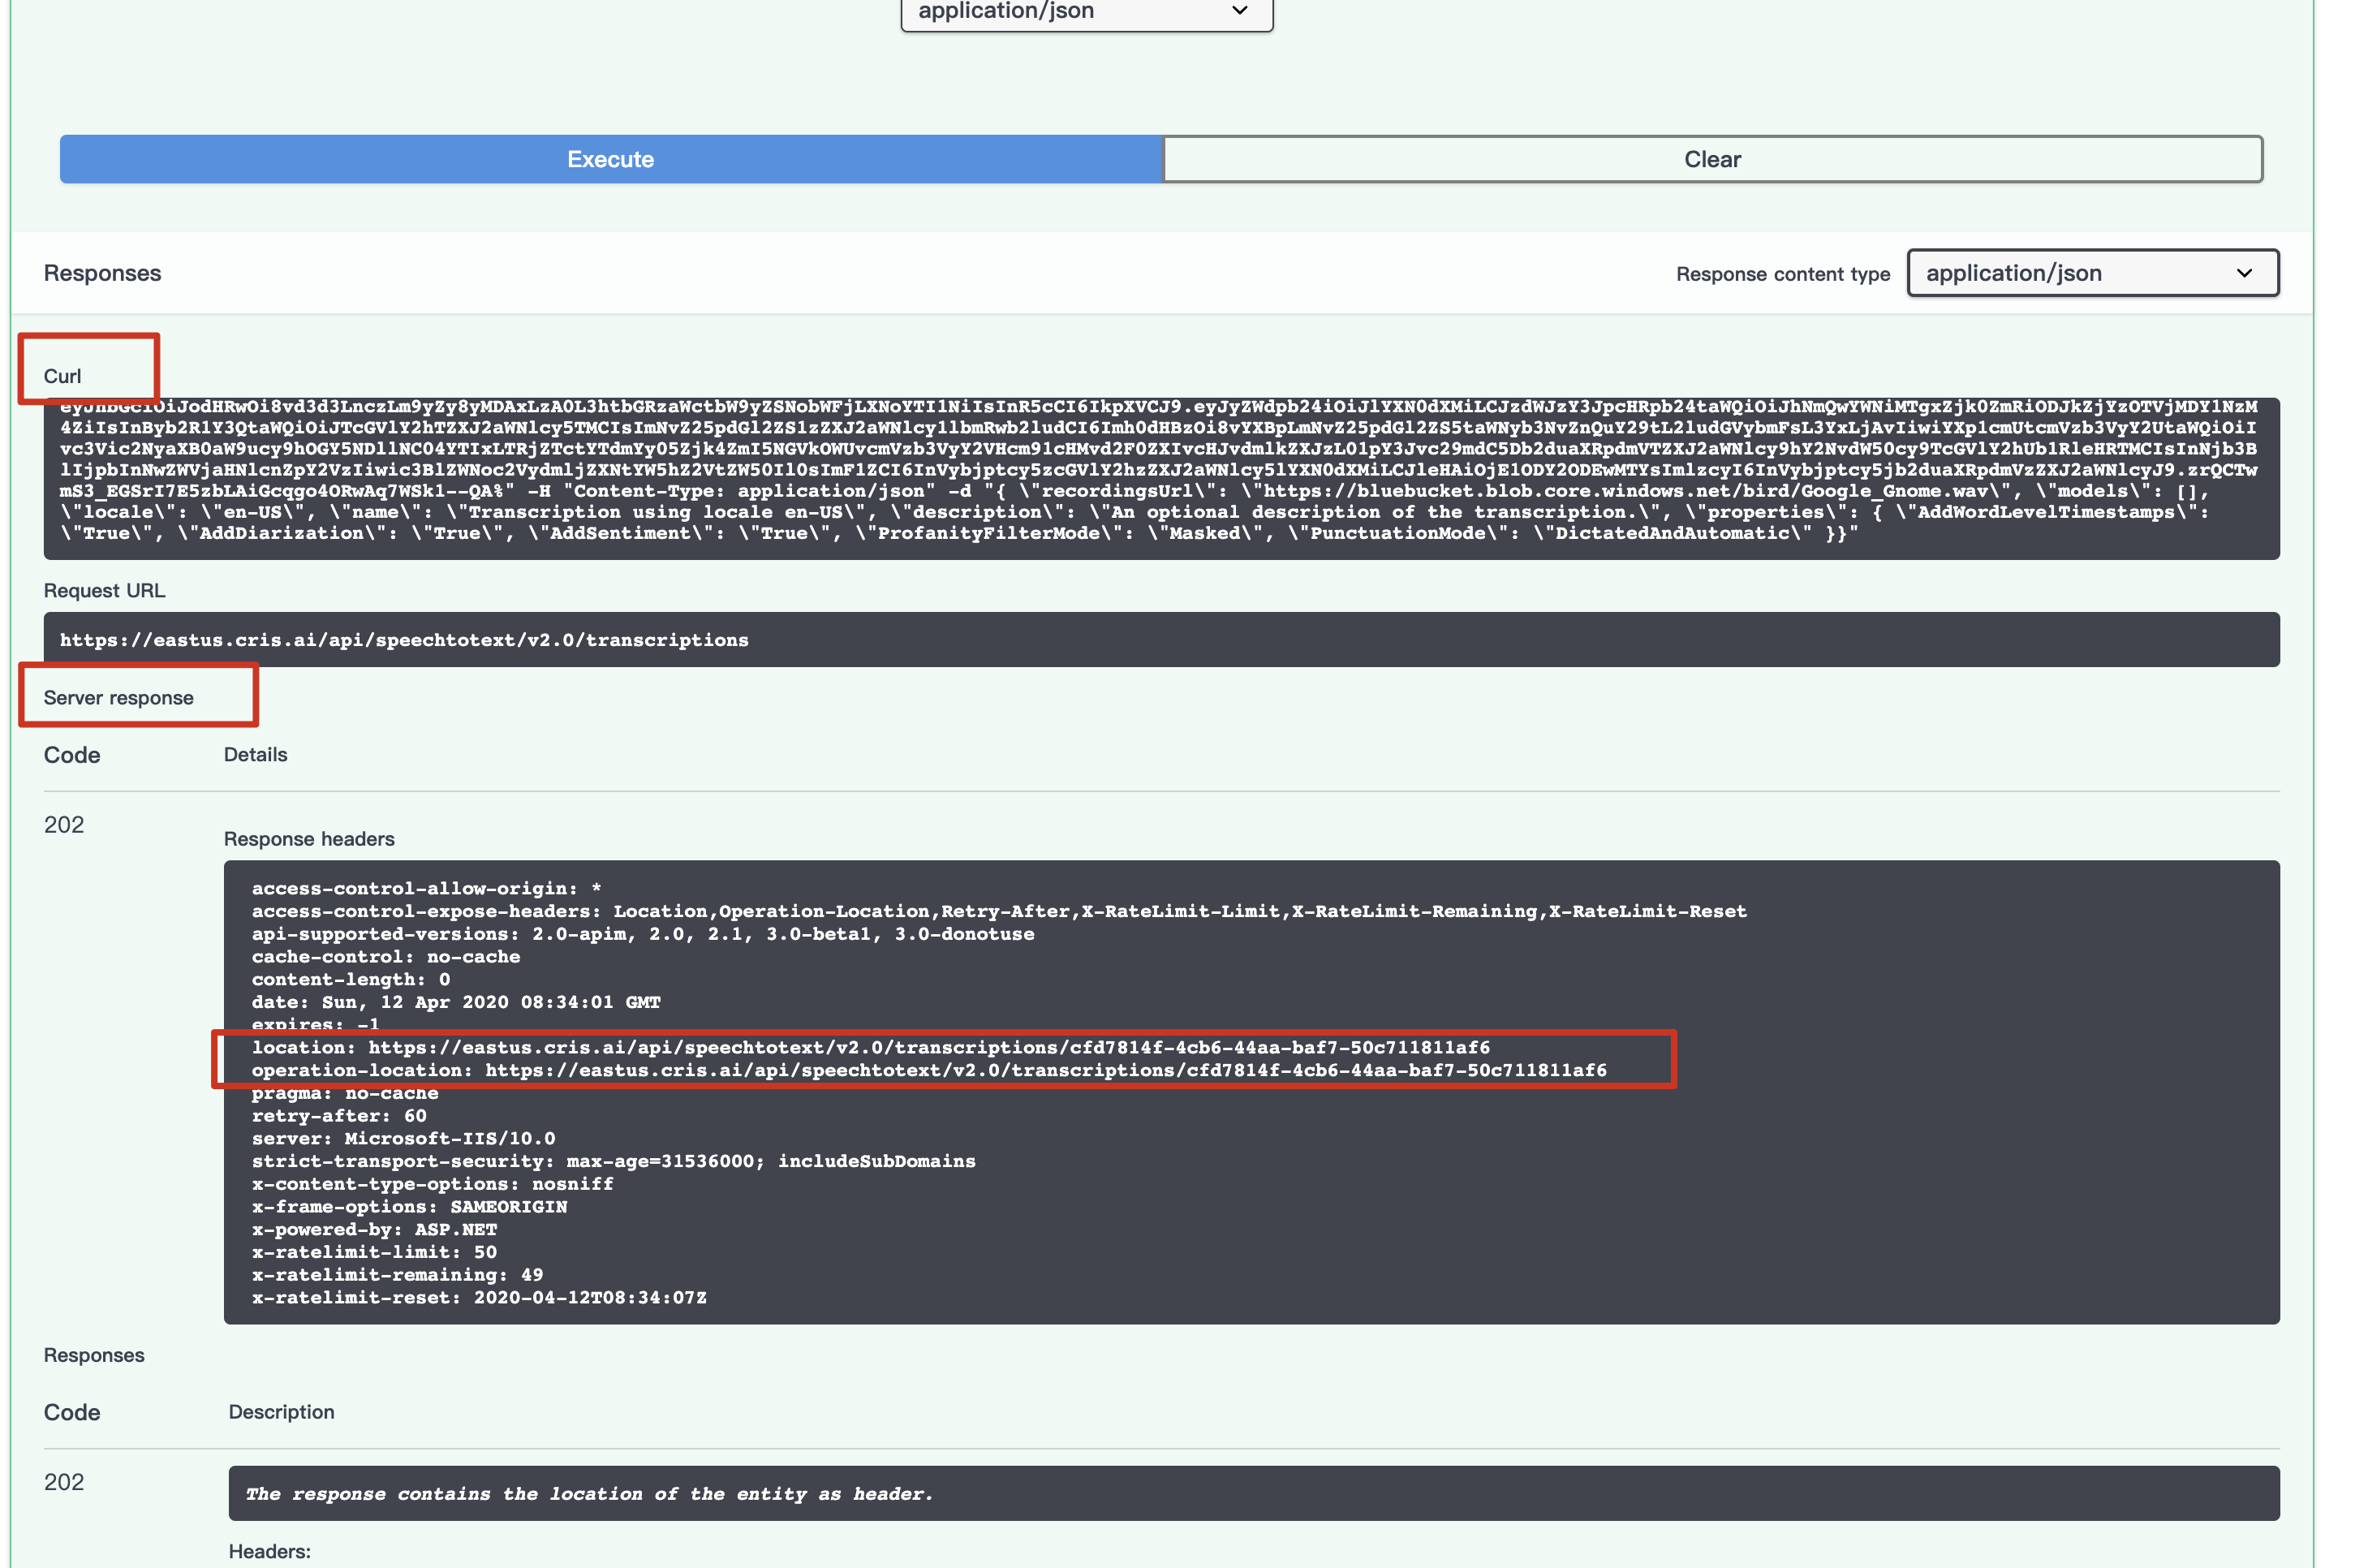
重点是
location: https://eastus.cris.ai/api/speechtotext/v2.0/transcriptions/cfd7814f-4cb6-44aa-baf7-50c711811af6

operation-location: https://eastus.cris.ai/api/speechtotext/v2.0/transcriptions/cfd7814f-4cb6-44aa-baf7-50c711811af6
这里是返回了任务 ID,我们再通过其他接口去查这个任务的具体情况

把 ID 填进去
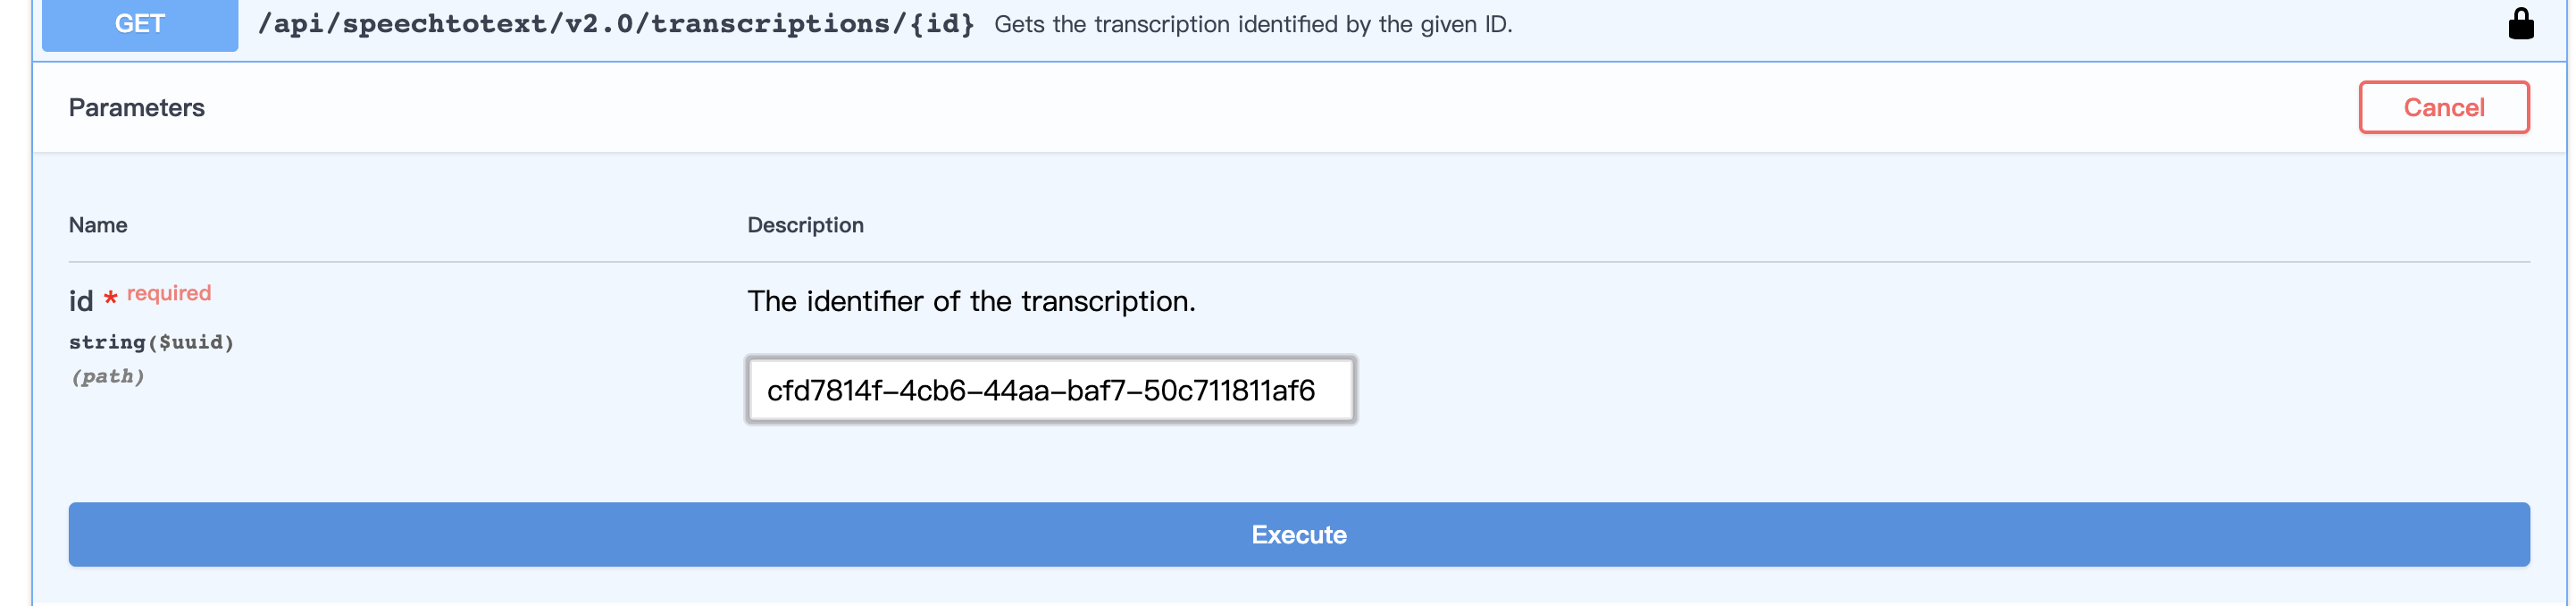
点击蓝色 Execute 按钮
结果如下:
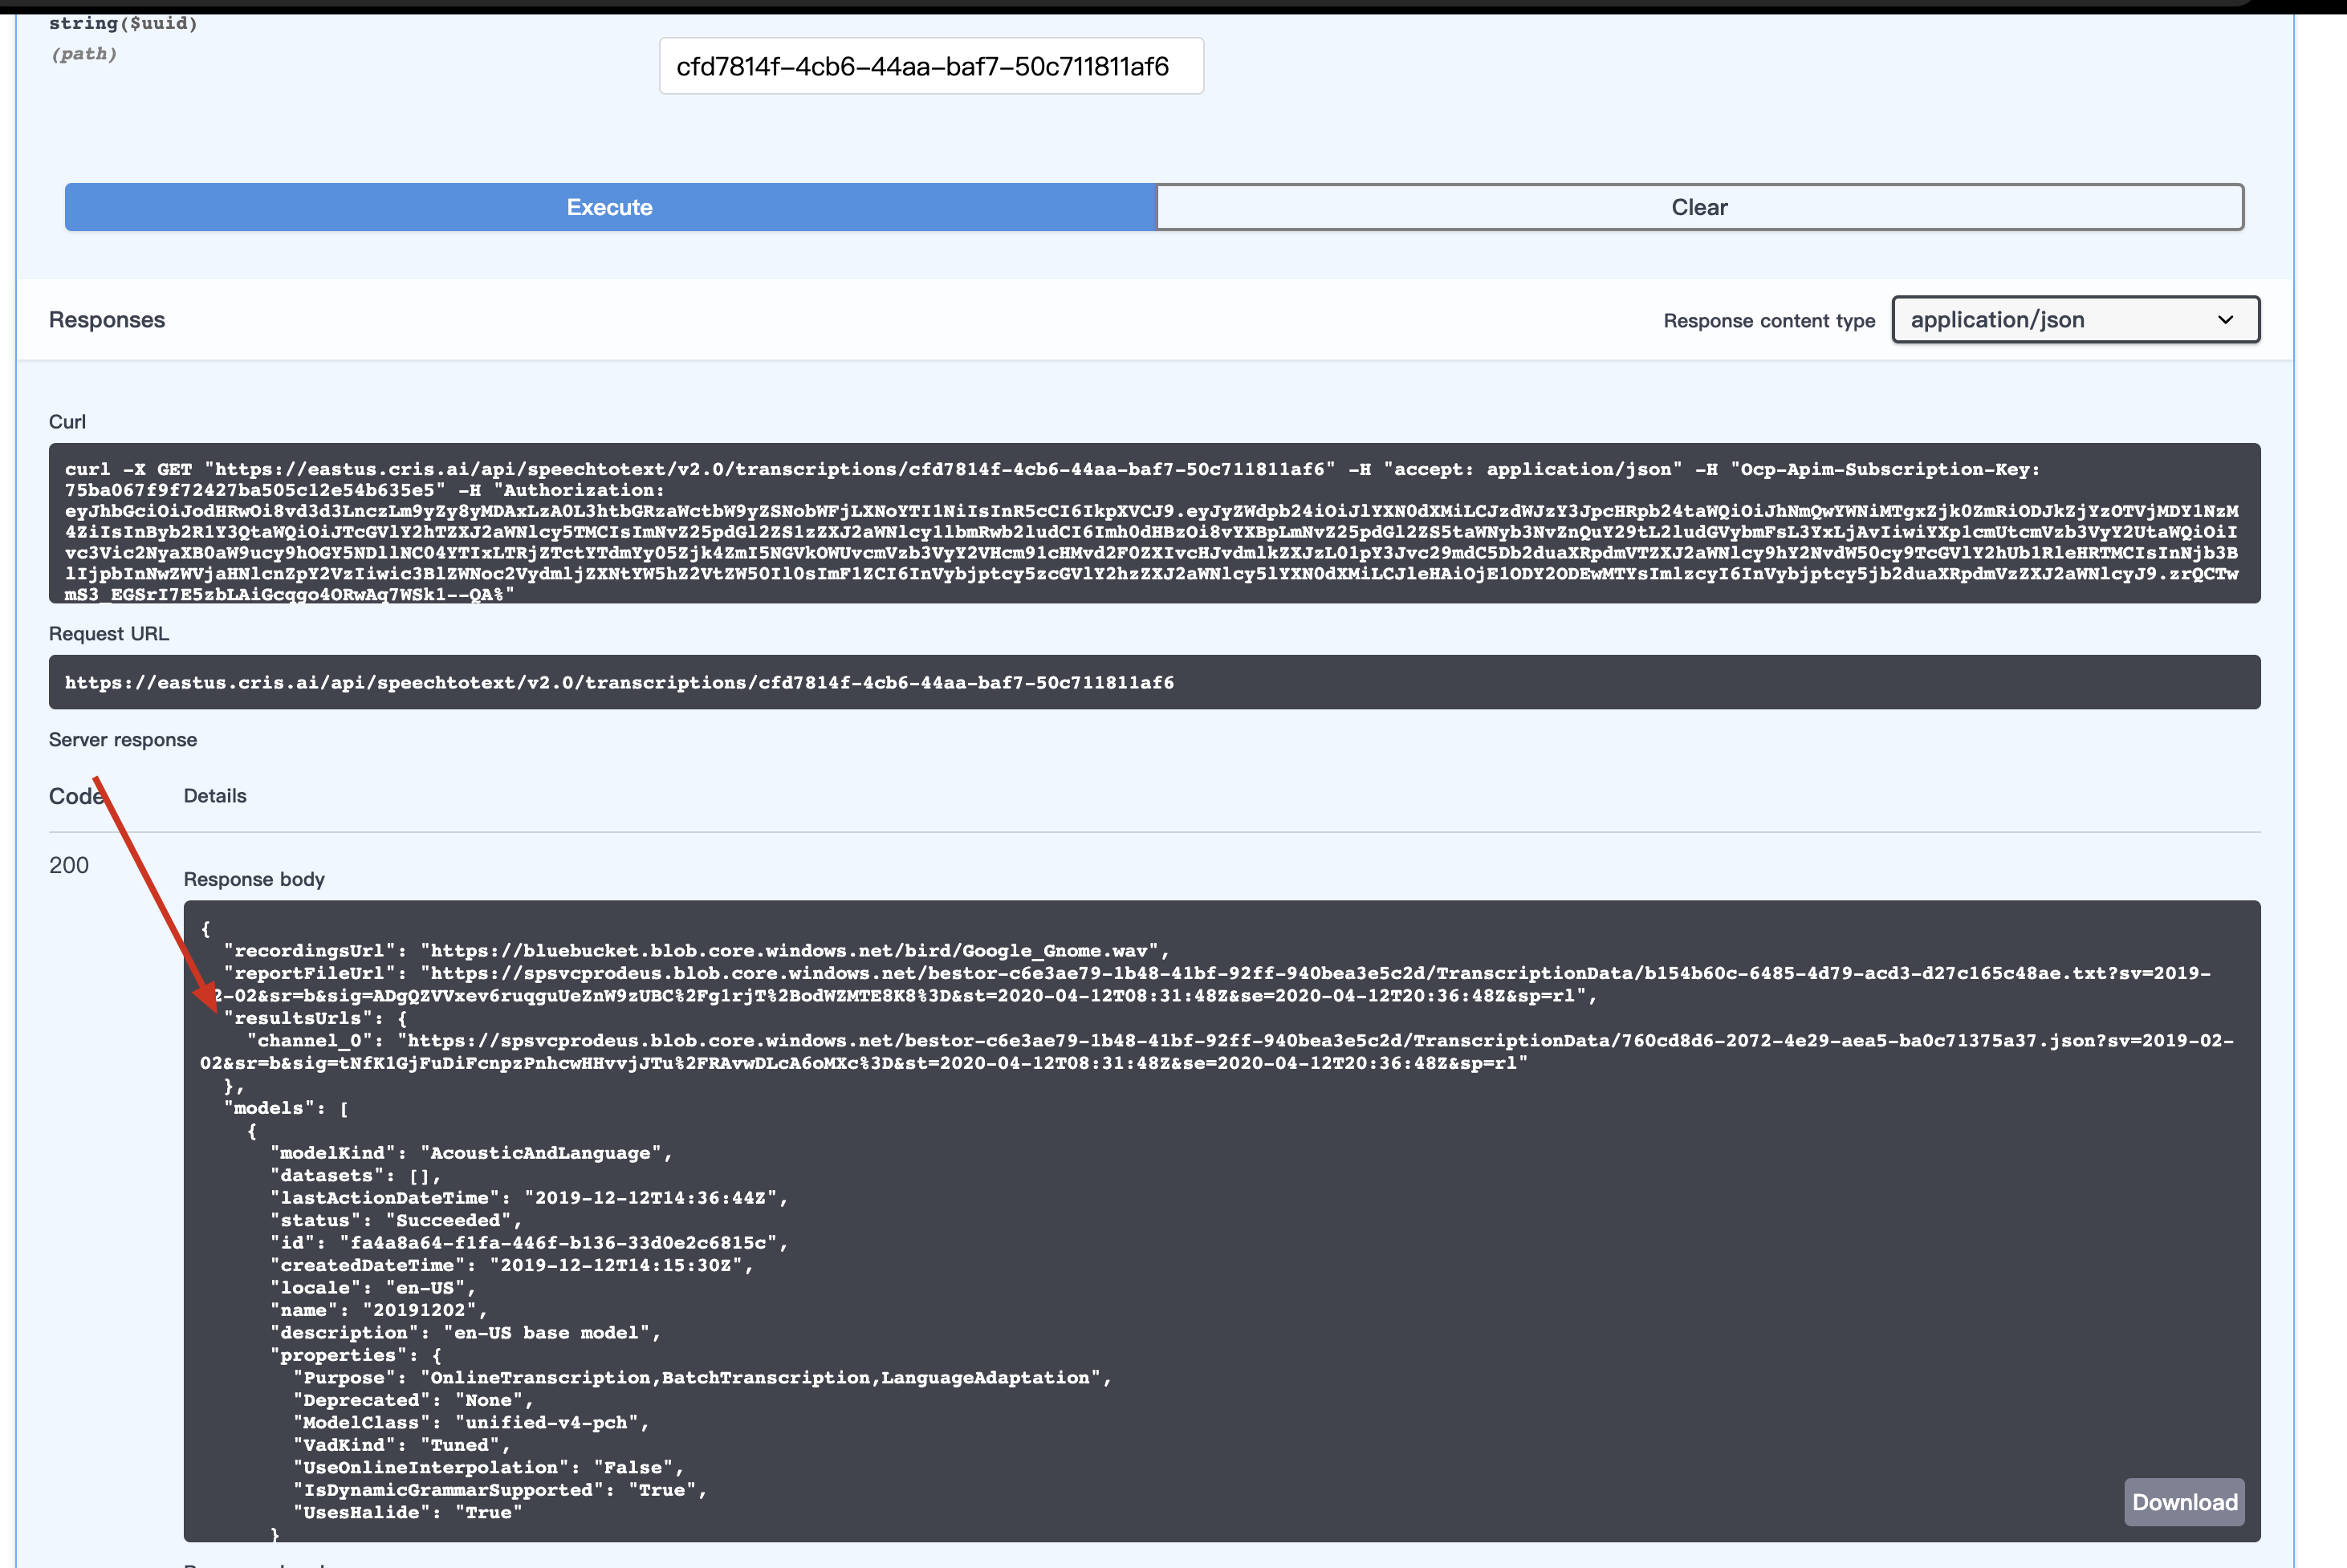
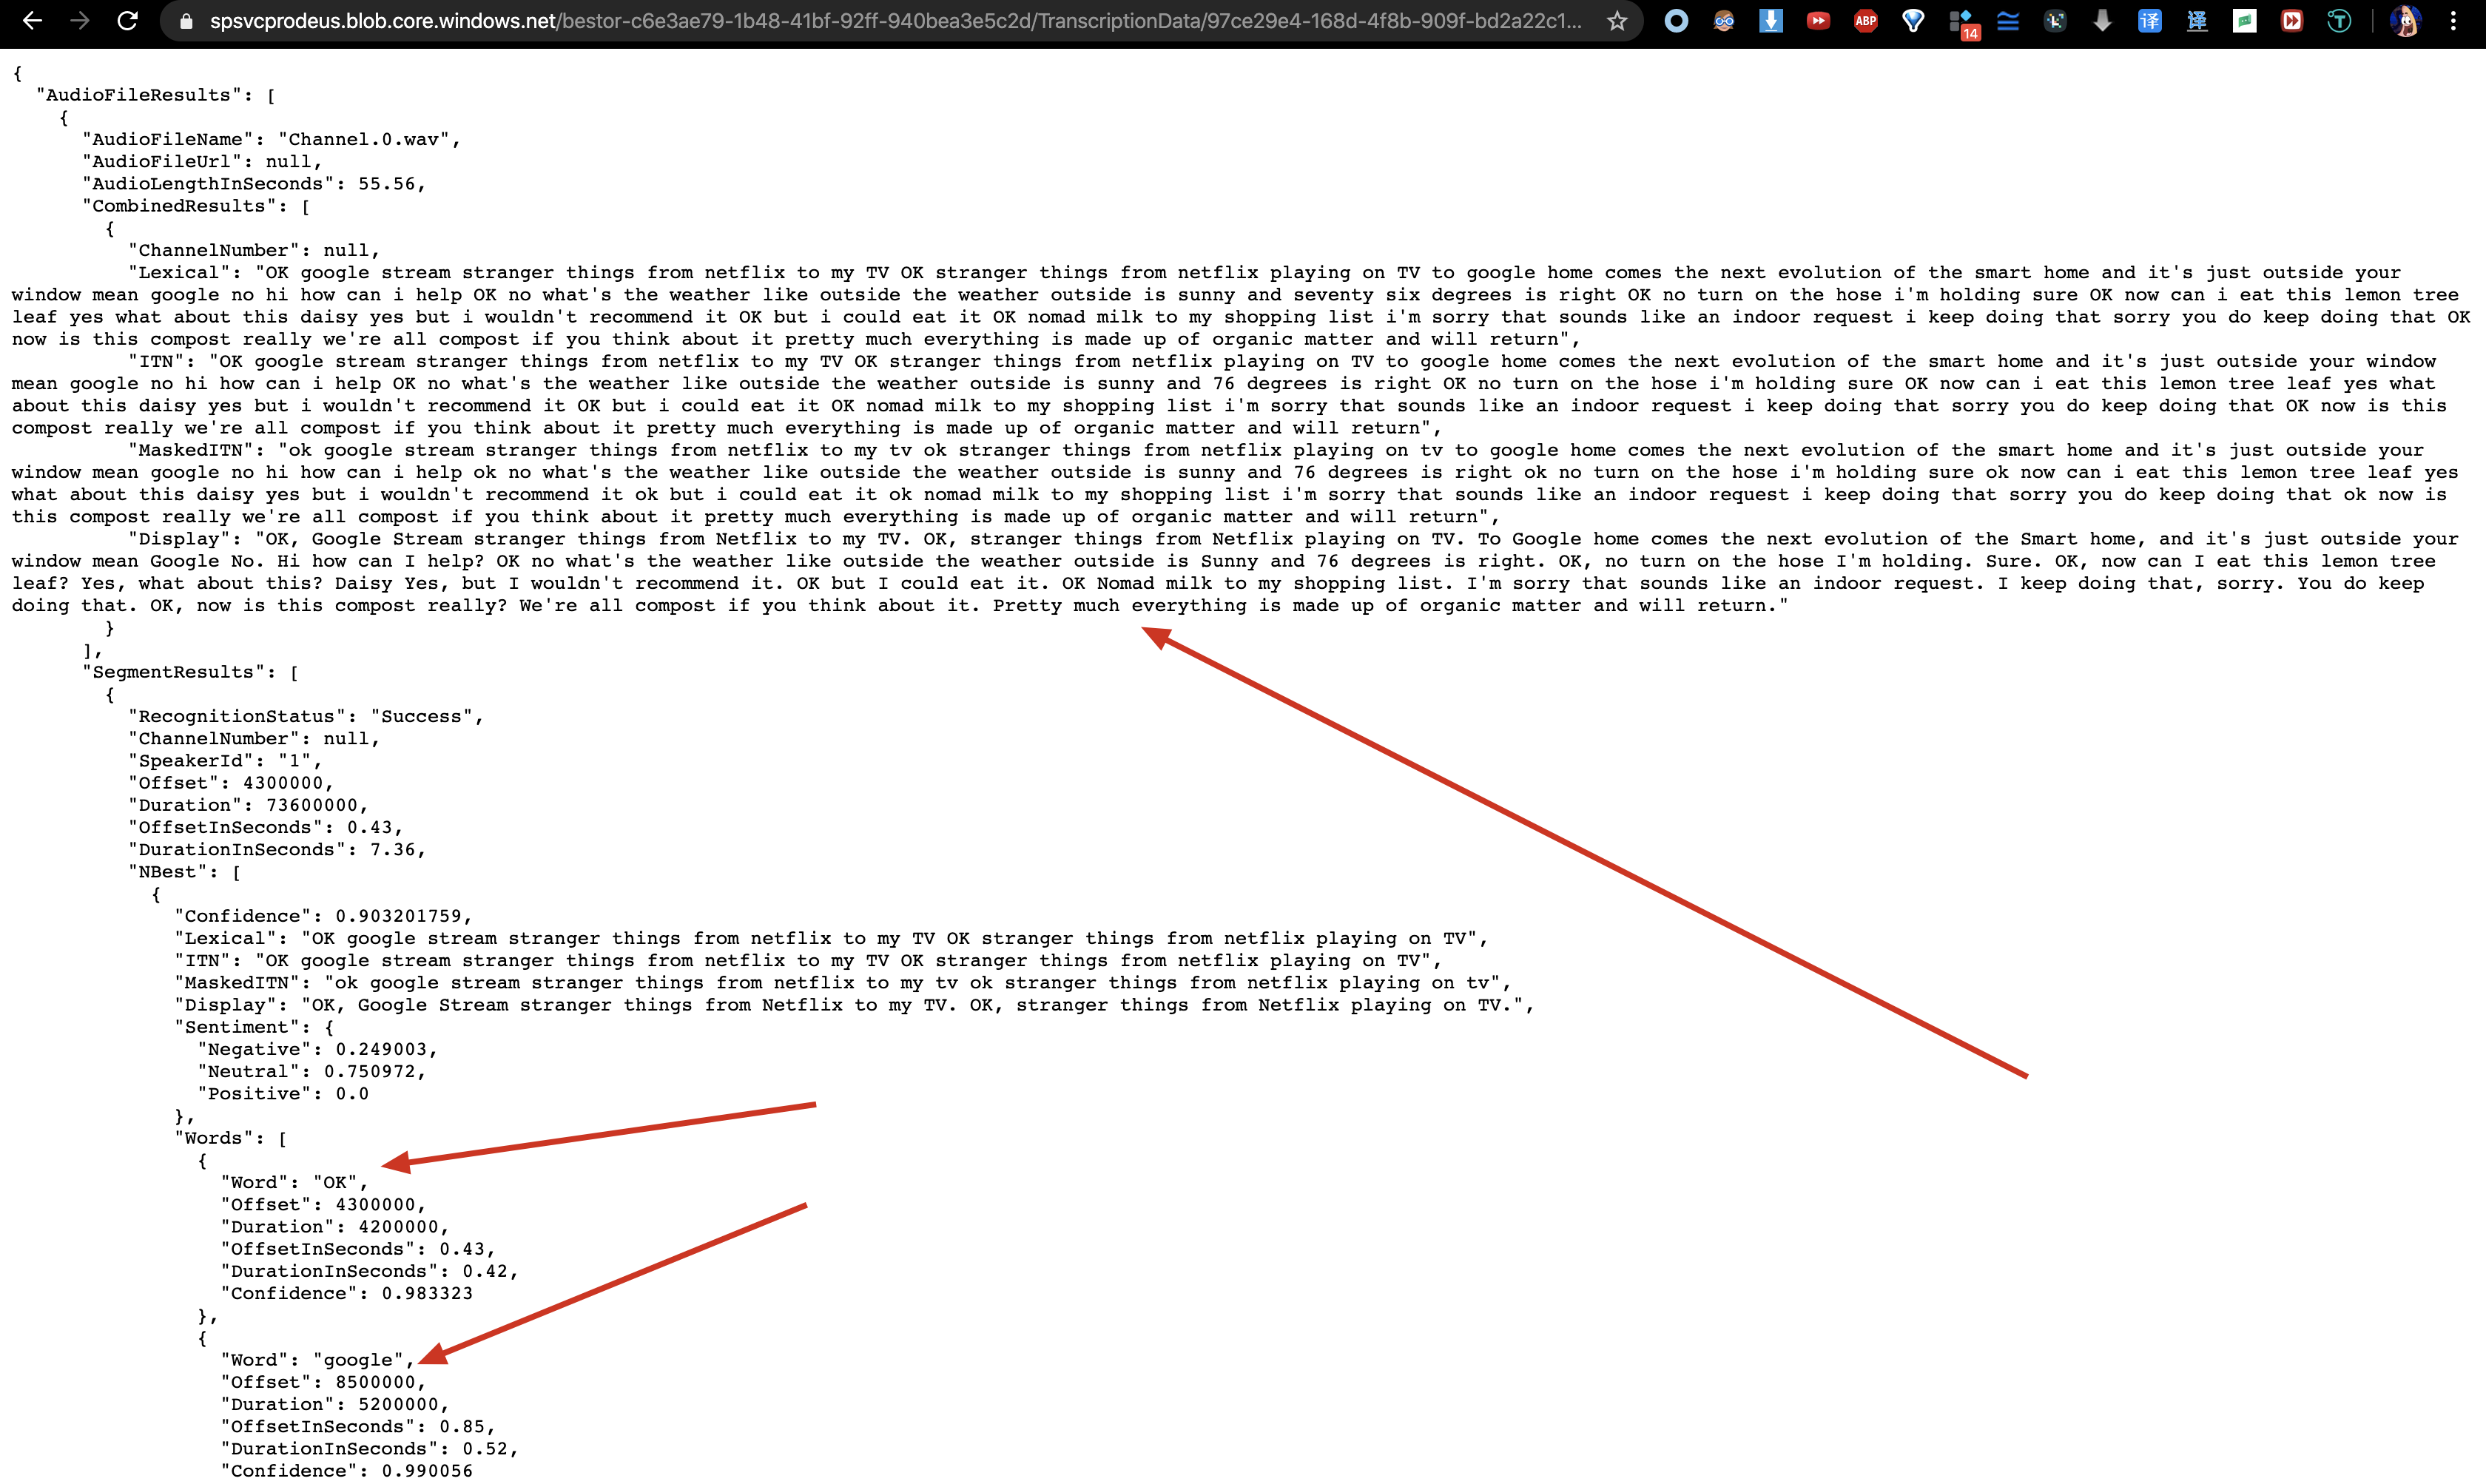
重点是 resultsUrls:
  "resultsUrls": {
    "channel_0": "https://spsvcprodeus.blob.core.windows.net/bestor-c6e3ae79-1b48-41bf-92ff-940bea3e5c2d/TranscriptionData/760cd8d6-2072-4e29-aea5-ba0c71375a37.json?sv=2019-02-02&sr=b&sig=tNfK1GjFuDiFcnpzPnhcwHHvvjJTu%2FRAvwDLcA6oMXc%3D&st=2020-04-12T08:31:48Z&se=2020-04-12T20:36:48Z&sp=rl"
  },
直接访问就可以看到结果了
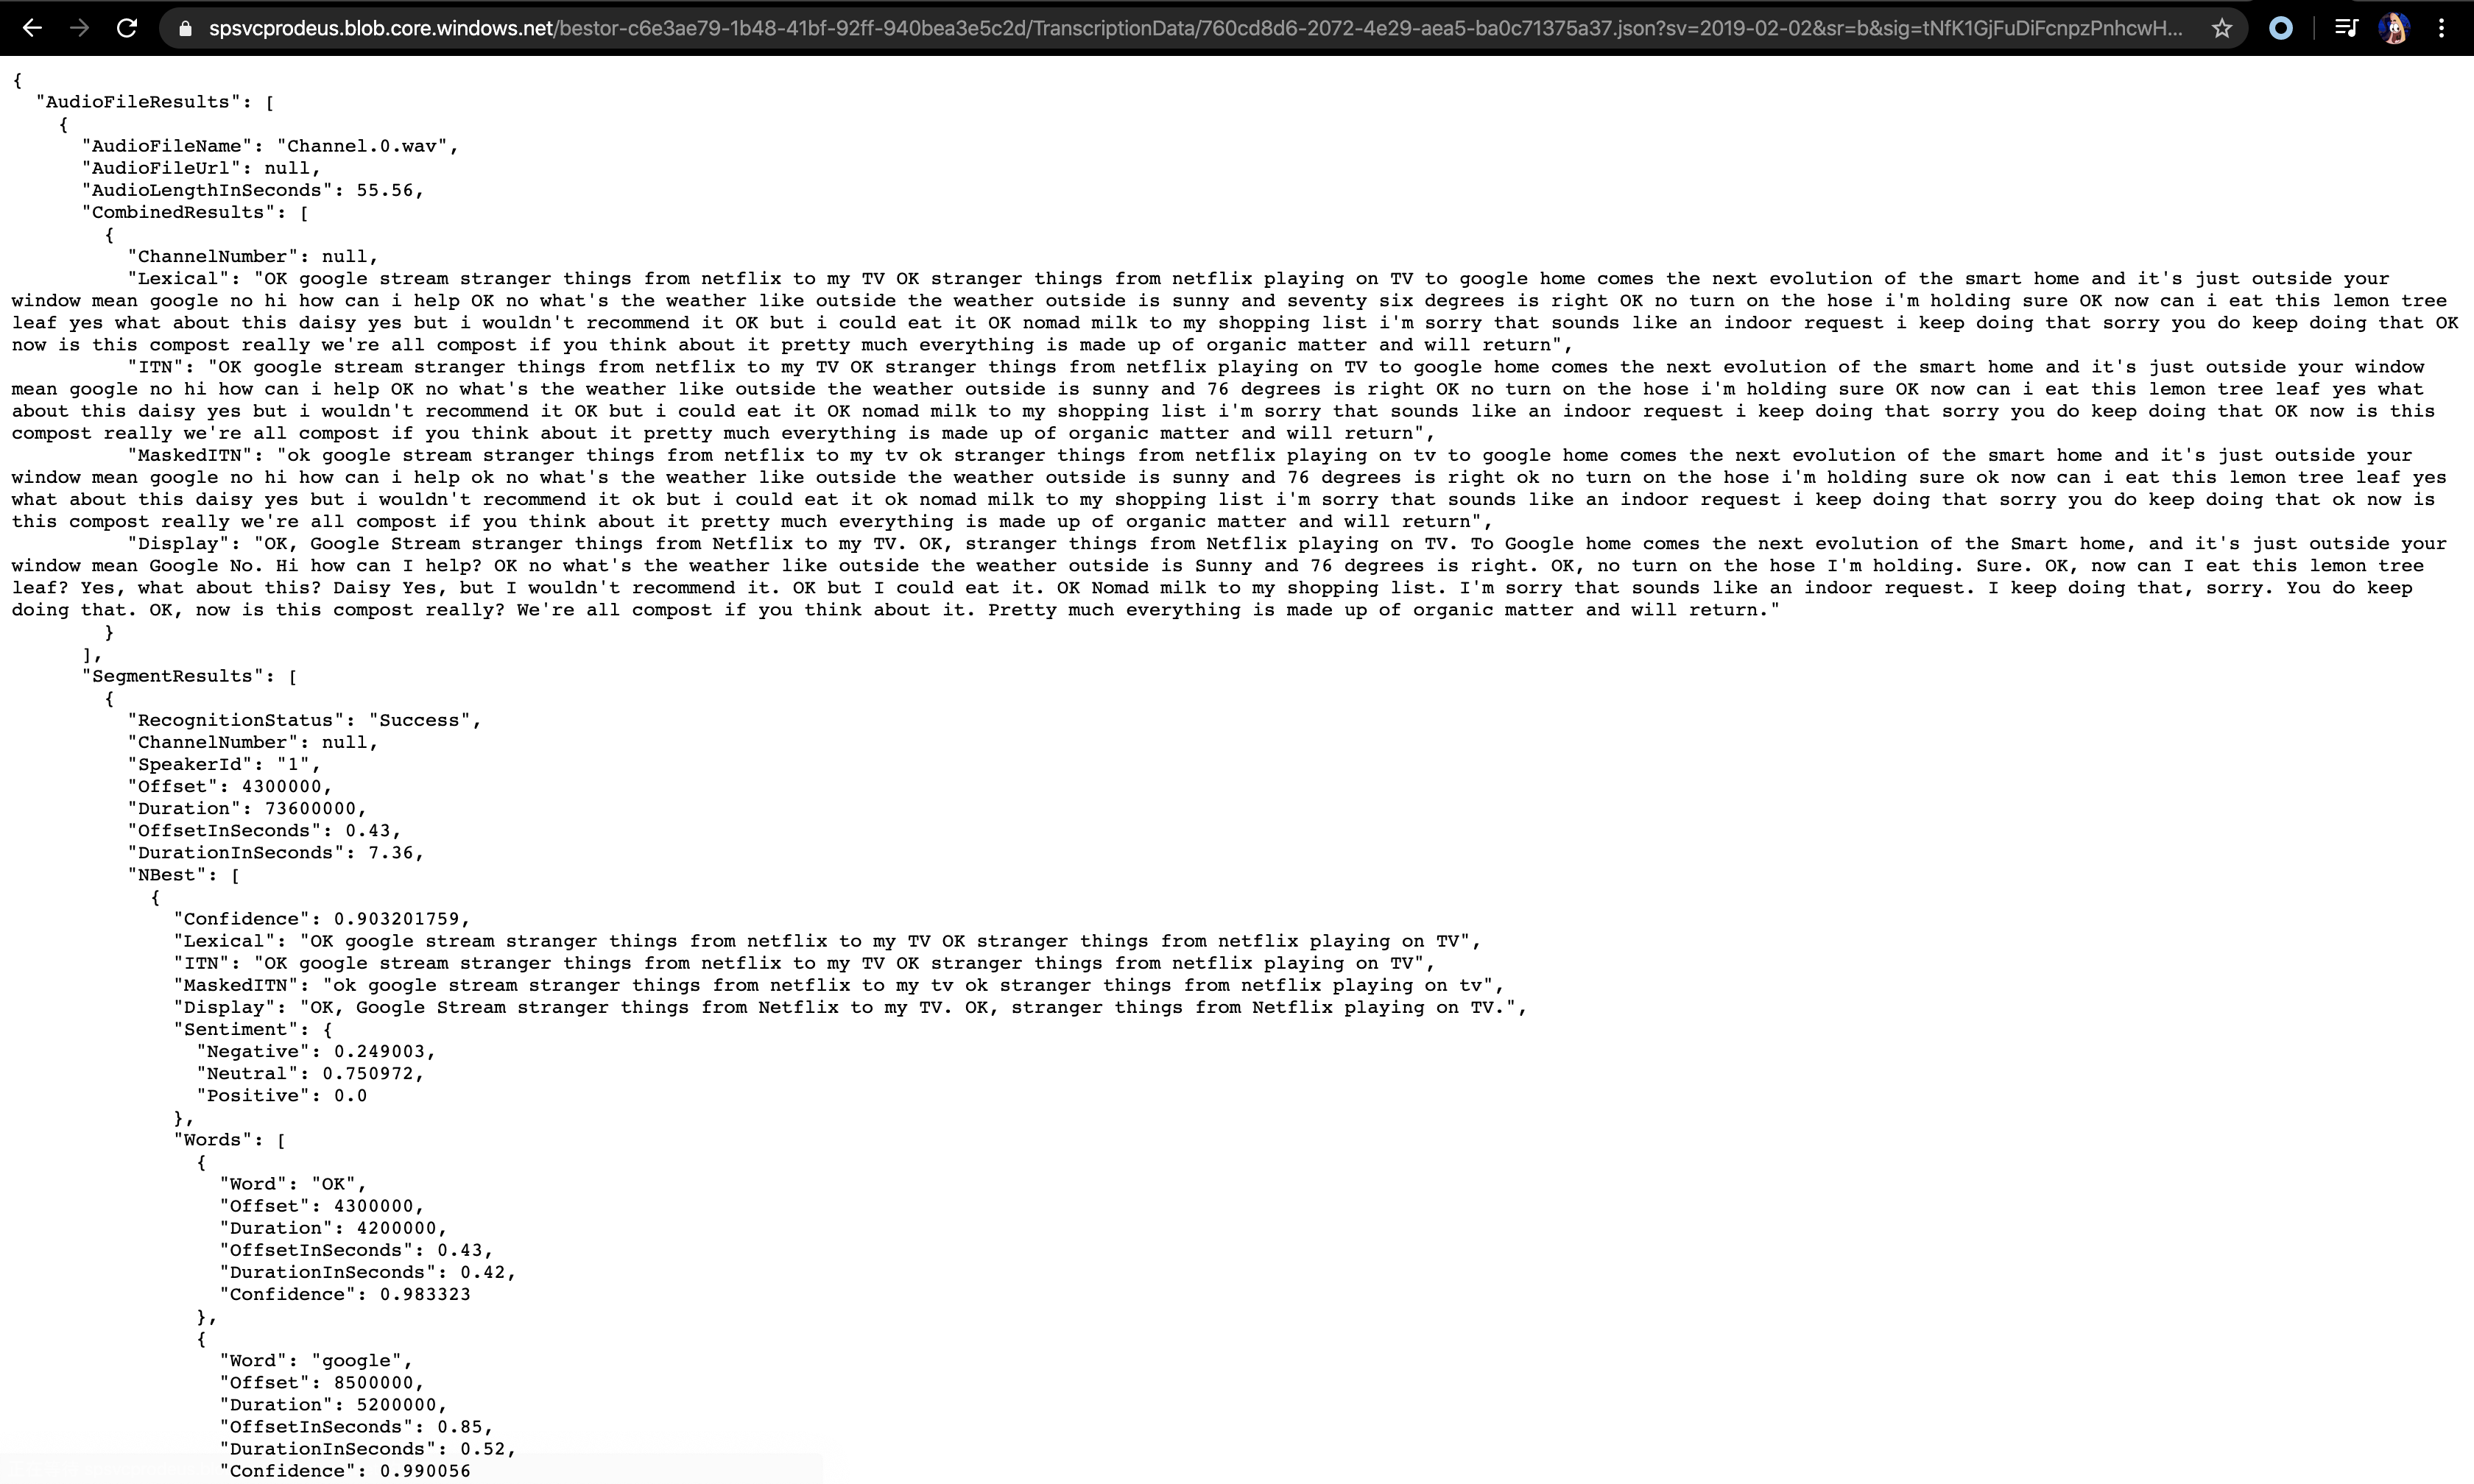
全文完,语音转文字成功了
总结
- 第一步:我们在 Azure 后台里创建 Speech 这个资源
- 第二步:得到 Key1 和 Endpoint
- 第三步:通过 Key1 和 Endpoint 获得 Authtication Token
- 第四步:访问 Swagger,提供 Key1 和 Authtication Token
- 第五步:调用创建任务接口,得到任务 ID
- 第六步:查询任务 ID,得到任务结果(文字)
感谢阅读